
Installation guide


11
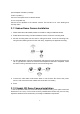
This LED will be flashing while camera is accessed by remote client.
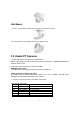
DI/DO Connector
The Camera provides a terminal block with 6 pins of connectors for DI, DO, and RS485.
Audio Output Jack
Audio-out Jack allows this device to output audio for two-way communication or alerting
sound.
DC Power Jack
The input power is 12VDC. Note that supply the power to the Camera with the power
adapter included in package.
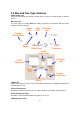
2.4.1 Box and Gun Type Camera Installation
1. Attach the Camera with the included stand
2. Fix camera to desired location with stand
3. Plug an Ethernet cable into the Camera
Connect an Ethernet cable to the LAN socket located on the camera’s rear and attach it to
the network.
4. Connect the external power supply to Camera
Connect the attached power adapter to the DC power jack of the camera. Note: Use the
power adapter, 12VDC, included in the package and connect it to wall outlet for AC power.
5. Done
2.5 Outdoor IR Cameras
The definition of cable/connector is the same as Dome type cameras. Please refer
to section 2.1.
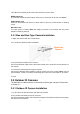
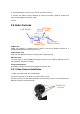
2.5.1 Outdoor IR Camera Installation
1. Fix IR camera to desired location with wall mount fixture
2. Plug-in Ethernet Cable into RJ-45 connector
Connect an Ethernet cable to the LAN socket located on the Network Camera’s back panel
and attach it to the network.
Fixed it by
S
crews