
User Manual


OPERATION
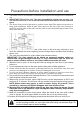
Before using for the first time
1. Remove all packaging and accessories, clean and dry all accessories, including integrated
water tank.
2. Fully fill the water tank with water at room temperature, then close the lid.
3. Install the water tank by pushing it firmly towards the oven.
4. Select Self-cleaning function.
5. After cleaning, wait until the oven is cooled. Remove the water tank and empty the drip tray.
Wipe dry the oven cavity.
Getting Started
1. Connect the plug of the appliance into an earthed power outlet socket. The power ON
button will light up. The oven is in standby mode now.
2. Press the hold Power ON button to turn on the oven. Function icons illuminate and the
display shows .
3.
Select the desired function. The display will show the default time and temperature for
the selected setting. Adjust temperature and cooking time if needed, using
button.
4. Insert the wire rack or food tray into the desired position. Ensure the food is centered
in the oven for the most even cooking.
5. Close the door.
6.
Press button to start cooking.
7.
The cooking time will be displayed and begin to count down. The cooking
temperature and time can be adjusted during the cooking cycle.
8.
At the end of the cooking cycle, the oven alert will sound, and the timer duration
will be shown as zero on the display.
NOTE:
1.
When selected “Steam cook” or “Steam+Convection” function, make sure you have
filled the water tank before operation.
2. The cooking cycle can be stopped at any time by pressing the button. This will bring
the oven back to Standby mode.