
Technical information


OM93_Rev H Page 19 of 28
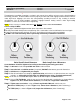
IF APPLICABLE, check that drain holes in bottom of the enclosure and pedestal are not obstructed, and
there is no evidence of water accumulation. Check enclosure doors for proper closure. Verify door seals
are intact and free of tears, abrasions, and/or other damage. Check that all other seals are intact, and
repair with coating of RTV-108 silicone rubber sealant as needed to seal exposed electrical fittings, bolt
holes, and/or any other points of possible water entry to electrical components to maintain a waterproof
condition. If enclosure has a vent fan, inspect fan blade for freedom of operation. Fan bearings are
permanently lubricated. However, any binding, abnormal noises, and/or vibration means replacement of
the fan assembly is needed. Check fan filter element and, dirty or obstructed with dust, replace it.
Visually inspect all mechanical parts for freedom of operation with no misalignment, binding, or
interference. Check all cabling for sufficient slack in order to prevent cable strain while still providing
enough restraint to adequately prevent abrasions and/or chaffing during antenna and feed movement
Check antenna mounting and interconnecting assembly hardware for security. Verify that all electrical
grounding connections (including cross-axis grounding straps) are intact and secure, free of corrosion or
breaks. Use a wire brush to thoroughly clean any noticeably corroded portions of grounding cables, the
un-plated portion of universal terminals, and corresponding mounting surfaces. Any loose A-325
Hardware MUST BE REPLACED rather than tightened. A-325 hardware distorts at initial installation and,
once loosened, will not maintain the required high strength friction connection. All other (not A-325)
assembly and installation hardware should be tightened to its original torqued condition. When installing
new structural hardware, do not use a wrench with a lever arm longer than two (2) feet.
Examine all painted aluminum or galvanized surfaces for chips, cracks, or deep gouges, and touch-up
spots as needed
- - - - - - - - - - - - - -
4.2.3 Drive System Voltage & Current Checks
For details on Drive System Voltage and Current Checks, refer to the appropriate antenna control
documentation.
4.3 Preservation & Lubrication of Component Parts
- - - - - - - - - - - - - -
4.3.1 Preservation of Aluminum Parts
Remove all loose paint and corrosion by scraping, wire brushing, or using steel wool. If using steel wool
near the feed window, make sure that none remains on the feed horn window. Edges of existing paint can
be blended with the metal surface using fine grit sandpaper. Wipe the surface to be painted with a soft rag
dampened in trichloroethylene, lacquer thinner or equal. Be certain to remove all loose paint, corrosion,
imbedded dirt, grease, and oil deposits or the paint will not adhere to the surface. Lacquer thinner will
dissolve paint if applied heavily and rubbed vigorously. The reflector may be washed with plain water if
necessary. Do not use bleach, soap solutions, or kerosene as it is difficult to remove the residue. Allow the
cleaned surface to dry thoroughly before priming.
Prime the cleaned surface by applying zinc chromate primer. The primer can be applied with a brush,
roller, or pressurized spray. If necessary, thin the primer with lacquer thinner to the proper consistency.
Feather the primer onto the adjacent painted surfaces. Allow primer to thoroughly dry before applying the
finish paint coat.
Paint all RF surfaces, such as the inside of the main reflector and subreflector with highly-reflective white
paint. This type of paint disperses light rays, reducing the focusing effect of the sun’s radiation, thereby
reducing heat build-up caused by the focused sunrays on the feed system. Rear surfaces of the reflector
and subreflector may be painted with flat-white enamel paint. The paint can be applied with a brush, roller,
or pressurized spray. If necessary, thin the paint with the appropriate thinner to the proper consistency.
Thoroughly paint over the primed surfaces and blend with the existing painted surface.
- - - - - - - - - - - - - -
4.3.2 Preservation of Galvanized Surfaces
Remove all loose paint and corrosion by scraping, wire brushing, or using steel wool. Edges of existing
paint can be blended with the metal surface using fine grit sandpaper. Wipe the surface to be painted with
a soft rag dampened in trichloroethylene, lacquer thinner, or equal. Be certain to remove all loose paint,