
User guide


59
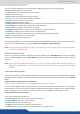
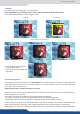
8.2.15 Layer transions & eects
2. In the Layer Selecon secon, press the Layer A buon. The buon will start blinking. The parameters of
the layer will automacally appear on your SmartMatriX² VFD menu screen.
3. In the Layer Menu, make the posion, size, border and transparency sengs you like, then select Opening
Eect in the layer opons, press the ENTER buon and select Type. Select Slide Le - Right for example,
and press the ENTER buon to conrm. Navigate to Duraon in the Opening Eect sub-menu, and set the
duraon of your eect by rotang the SCROLL knob and pressing ENTER.
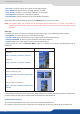
Repeat the procedure in the Closing Eect sub-menu to determine the way your layer will close. Try Slide
From Le - Right for the closing type with a duraon of 1.5 seconds for example.
To capture a logo, display the exact content you want to save on the Program, you can use the freeze buon
if you want. Then follow these steps:
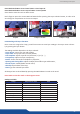
To set up your logo you have several features available:
- Posion / Size Adjustment
- Keying type
- Luma / Chroma key
- Cut out color.
Select the logo number you want to save and wait unl the unit nishes saving. Your logo is now saved and
you can use it through the logo buon.
You can save up to 8 logos with the SmartMatriX².
The capture of logos can be done only with the following condions:
- The capture can be done on the Program output #1 or the Program output #2
- The disappearance of logos on the Preview and Program output is normal during saving.
The logos are captured with the same size as is visible on the Program output without any form of adjust-
ments. If zooming is required, resize the layer or use the layer zoom or input zoom.
A logo captures the state of the dened area on the specied output at the Program output resoluon, and
must be recalled using the same output resoluon. Resizing or other image manipulaon of the captured
logo is not possible.
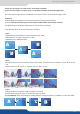
The capture zone is outlined by a white rectangle and includes the pixels beneath the white border. The non-
captured area has a reduced brightness.
Logo capture is limited in the number of pixels being captured. When the logo capture area is resized, exten-
ding the horizontal size may reduce the vercal size to compensate.
Logos can also be captured and displayed with transparent areas. By adjusng the keyer in the logo capture
menu, the porons of the captured area can be keyed away and captured as transparent.
The logo “Cut out color” can help display which porons of the image will be captured as tranparent.
NOTES:
• The cut out color is only a visual tool to help idenfy the transparent areas of the logo. These colored re-
gions will not be captured but later displayed as transparent area.