
User guide


35
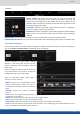
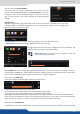
The next tab is the USER FORMAT:
In this tab, you can explicitly dene the input format. The input
format is automacally detected by the SmartMatriX² but you can
change it or force it. The available formats are close to the current
one, in terms of lines. This is only available for analog computer
formats.
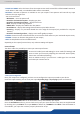
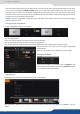
Keying Feature
With the keying feature, you will be able to key easily a color space or a specic luma on an input.
The device oers an individual keying for each input. Into the input sengs, nd the keying menu:
You have 2 ways of using the keying:
- COLORKILLER: classic color keyer removing a specic color space dened by user,
- LUMAKILLER: luma keyer removing a specic lumanance level range.
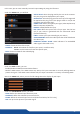
Keying setup can be done either by seng directly color references and
tolerances or by using the color grab assistant.
- INVERT BUTTON: at any me you can choose to invert the
actual keying using this buon.
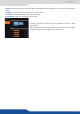
DSK TITLING: aer your keying, the DSK tling feature allows you to play with the transparency of your
deleted pixels. Enabling this, simply adjust the opacity sengs to make your keyed pixels less or more dark.
This is useful when keying white or light colored text over a bright background.
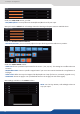
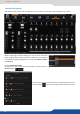
How to use the LUMA KEY:
Select the lumakiller and then adjust manually, the luma level:
- Manually: set the minimum luminance value.
Luma Low Level: Everything darker than this value will be keyed away.
Luma High Level: Everything brighter than this value will be keyed away.
Then adjust the maximum luminance value to dene the range of luminance levels which will be deleted.
Once you have completed the setup of your keyed input, place the it in layer B on top of your background
(such as a camera in layer A) in order to complete the keyed tle or lower third eect.
How to use the CHROMA KEY:
- Manually: set the Hue and luminance to choose the color space you want to delete into your image.
7.2.6 Intput management