
User guide


33
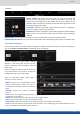
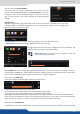
In this case, you can enter manually into each input sengs by using the le menu:
Under the SIGNAL tab, you will nd:
- ACTIVE PLUG: select the plug used by the unit at the moment.
Only this plug can be displayed on your output,
- SETUP PLUG: select the plug you want to set up, all changes will
be applied to this plug, even if this plug is acve or not (do not
mismatch with the acve plug),
- SIGNAL TYPE: dene the type of your signal, video SD/HD YUV/
RGB or Computer HV/SOG etc.,
- ENABLE: enable/disable the input,
aect the input to the ref sync input. Use this box
only if your source is genlocked with the referenced source
(framelock feature),
- LABEL: rename your input according to your source,
- AUDIO MAPPING: select the audio input that will be linked with
the video input,
- EMBEDDED SIGNAL AUDIO: status indicates if an embedded
audio signal is detected or not,
- STATUS: format and size of the input,
- CONTROL: Black: select Black to transform your input in a uniform color,
use this buon to freeze the specic input,
- EDID: choose the EDID for the selected plug.
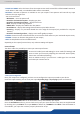
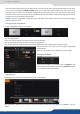
Under the HDCP secon, you can:
- Enable/disable the HDCP communicaon feature
- Read the HDCP status, If the HDCP status says Acve, this input connecon is currently ulizing HDCP to
protect the signal. if the HDCP status indicates Idle, this input connecon is currrently not ulizing HDCP.
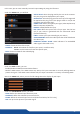
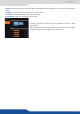
Next is the IMAGE tab, where you can nd all sengs about the display of your input:
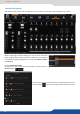
Under the COLORIMETRY secon, you have:
- LEVEL: dene the selected input luminosity level,
- CONTRAST: dene the selected input contrast level,
- COLOR: dene the selected input color level (0:black and white, full: full color),
- HUE: set up the hue phase of your NTSC signal.
7.2.6 Input management