
User guide


31
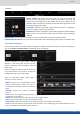
7.2.4 Misc
7.2.4 Misc
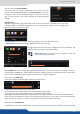
PRESET TOGGLE: by default, the device will not swap the Program and
Preview busses during each TAKE. Disabling this opon will leave the
Preview bus unchanged during each TAKE, and only the Program will be
updated. When this opon is enabled, the Preview and Program busses will
be swapped during each TAKE.
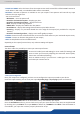
AUTOTAKE: enable the automac TAKE. Each me a source is changed on
preview, it triggers a TAKE to be launched.
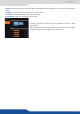
DYNAMIC FIT: enable or disable the automac recognion of black band for
digital content. The size and the aspect rao of the layer are automacally
adapted.
FREEZE MODE: choose to freeze all inputs or only one input when you use the freeze funcon.
PIP BACKGROUND COLOR: here you chose the automac color of PIP background, black is the default color.
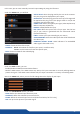
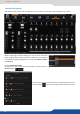
A short summary of each output sengs
appears on the main page. You can see the
number of outputs, their resoluon, rate and
HDCP status.
Select an output to adjust by either clicking on
it from the column on the le, or clicking the
conguraon cog icon for that output.
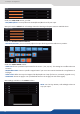
Once the individual output setup page is
opened, you have access to:
choose your rate generaon mode,
internal (free-running within the unit) or
Framelock by choosing an input as a reference
input,
- FORMAT: choose the output resoluon
format,
- RATE: choose the signal ming standards, if
the mode is set to internal
- STATUS: the status menu will show you the current output status,
- APPLY: click on this buon to apply the new format/rate,
- PLUG STATUS: indicates the status of the aached monitor and conrms connecvity,
- TYPE: you can choose the type of output synchronizaon on the analog plug, for example RGsB for sync on
green, or RGBHV for separate H and V sync wires,
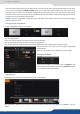
Into the output secon, you will be able to manage your output resoluons, formats, sync types, test paerns,
etc. On the SETUP > OUTPUT TAB, the following screen will appear:
7.2.5 Output management