
Manual
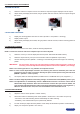

3► [OUTPUT] + ENTER.
3-1 [Output status] + ENTER.
Indicates the status of the output.
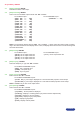
3-2 [Output format] + ENTER.
Selectoneoftheavailableoutputformatswith◄►+ENTER.
For the MAIN output : For the PREVIEW output :
• [852x 480 ----- 16/9] • [1024x768 --- - 4/3]
• [800x 600 ----- 4/3]
• [1280x 720 ----- 16/9]
• [1024x 768 ----- 4/3]
• [1280x 768 ----- 16/9]
• [1280x 800 ----- 16/9]
• [1280x1024 ----- 4/3]
• [1366x 768 ----- 16/9]
• [1400x1050 ----- 4/3]
• [1440x 900 ----- 16/9]
• [1600x1200 ----- 4/3]
• [1920x1080 ----- 16/9]
• [1920x1080B ----- 16/9]
• [1920x1080HD ----- 16/9]
• [1920x1200 ----- 16/9]
NOTE : Forxedpixelsdisplaydevices(DMD,LCD,PLASMA…),alwaysselecttheoutputformatcorrespon-
ding to the native resolution of the display device. Thus, the display device will not have to scale the image and
the result will be better.
3-3 [Output rate] + ENTER.
For the MAIN output : For the PREVIEW output :
• [50 Hz]:50Hzoutputframerate •[60Hz]:60Hzoutputframerate
• [60 Hz]:60Hzoutputframerate
• [72 Hz] : 72 Hz output frame rate
• [75 Hz] : 75 Hz output frame rate
3-4 [Output sync] + ENTER.
SelecttheOutputSync.typewith◄►+ENTER.
For the MAIN & PREVIEW outputs :
• [H&V] : H & V Separate Sync.
• [COMP] : Composite Sync.
• [SOG] : Sync On green.
3-5 [Type of screen] + ENTER.
Selectanitemwith◄►+ENTER.
For the MAIN & PREVIEW outputs :
• [screen 4/3] : If your image is displayed on a 4/3 wall mounted projection screen shape.
• [screen 16/9]:Ifyourimageisdisplayedona16/9wallmountedprojectionscreenshape.
NOTE : Available only in case of 4/3 output format.
3-6 [Test pattern] + ENTER.
Selectanitemwith◄►+ENTER.
For the MAIN & PREVIEW outputs :
• [no pattern] : No test pattern is displayed.
• [centering] : Displays a centering pattern (for position and size adjustments).
• [color bar] : Displays a color bar pattern.
• [grey scale] : Displays a grey scale pattern.
• [grid] : Displays a grid pattern.
• [burst] : Displays a burst pattern.
PAGE 28