
User Manual
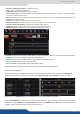

7.3.9 Input management
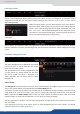
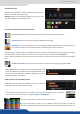
You now have access to a lot of input sengs
Select the plug used by the unit at the moment. Only this plug can be displayed on your
output.
Select the plug you want to set up, all changes will be applied to this plug, even if this plug is
acve or not.
Dene the type of your signal, video SD/HD YUV/RGB or Computer HV/SOG etc…
Only available for SD signal, set up to auto or manual recognion of SD signal type.
Enable or not the auto stability for SD signal (use stable by default)
Enable or not the comb lter for SD signal. It avoids the interlaced lines problem
Enable/disable the input.
Status of the input
Rename your input according to your source.
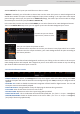
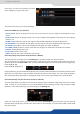
In this case, you can enter manually into each
input sengs by using the le menu:
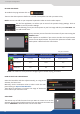
The Dual-Link can be supported on the . It provides 2 Dual-Link inputs over DVI.
You can choose to use the Dual-Link input into the input secon under the Setup mode. Select the input #2,
#4, #6 or #8 and select mode. To make this buon appear, you rst need to select the right plug.
Inputs #2 & #6: DVI
Inputs #4 & #8: DisplayPort
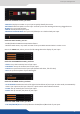
The Dual-Head feature is useful when you want to support a high resoluon image using more than one DVI
cable. In order to use this feature, run your Dual-Head PC board providing you your high resoluon image
splied in 2 DVI cables and plug it into 2 DVI plugs of the .
Using the feature, you will automacally disable the input #1 (linked to input #2) and input #5 (linked to input
#6) as the unit needs those input to handle the dual link input (in case of DVI). The same thing will happen
with inputs #4 & #8 on DisplayPorts. Enabling the Dual-Link on these inputs disables the inputs #3 & #7.
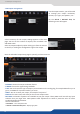
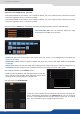
Under the input Setup menu, you can check the feature of your DVI inputs. You just need to
indicate which second plug is linked to the actual input. In this example, the input #3 is linked in Dual-Head
with the input #1 .