
Technical information


Management Page
76
RMS - Administrator’s Guide
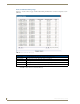
Example Group structures:
City
Building
Floor
Campus
Building
Floor
Country
City
Department
Creating a New Group
1.
From the Management - Rooms page, select Create New Group.
2. In the Create New Group Page (FIG. 73 on page 75), type the name of the group in the field Group
Name.
3. If it is a group of groups, select the Parent Group in the drop down list.
4. If it is a group of rooms, select the rooms in the window Available Rooms and click the << button to move
the rooms to the Rooms window.
5. Click Save to save, Cancel to cancel.
To reassign a room to another group, delete it from the group to which it currently belongs, then add the room
to the desired group.
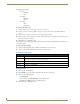
Viewing Group Settings
1.
Groups are displayed in the Groups window of the Management - Rooms page.
2. Select a group, and click View. The View Group Setting page opens.
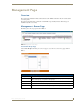
View Group Setting Page
Editing a Group
1.
Select a group, and click View.
2. Click Modify to access the modify options in the Modify Group Setting page.
3. Edit any of the following fields:
Group Name
Set or remove the Parent Group from the drop down list
Add (<<) or Remove (>>) rooms within the group
4. Click Save to save, Cancel to cancel.
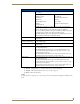
View Group Setting Page Options
• Group Name Text field for friendly name of the group.
• Parent Group Drop down list establishes the groups relation to other groups. A group can be separate, a
child of another group, or the parent of other groups.
• Room Rooms included in the group.
• Modify Launches the Modify Group Setting Page section on page 77.
• Delete Deletes the selected group.