
Technical information

RMS Configuration Wizard
39
RMS - Administrator’s Guide
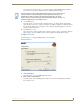
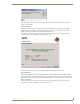
When selecting this option you can select a NIST time server from the NIST Time Server drop-
down list or type in your own NIST time server address.
You can click the Synchronization button to test the time synchronization process.
Click Next to continue.
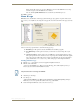
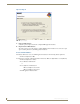
Name & Logo
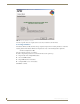
RMS allows user customization of the web page title and web page logo graphic, via options in the System
Name and Logo screen (FIG. 39). To change the web page title, enter the desired name in the Application Title
field.
Select one of the logo options below to customize the web page logo:
Default Logo - If this option is selected, the RMS uses the default logo graphic.
User Defined Logo - If this option is selected, you can browse to select an image file of your
choice.
Custom Created Logo - If this option is selected, RMS uses a custom implemented logo image.
This option provides the user a method to create a logo image that seamlessly matches the graphic
style of the web pages without the need for a border or background color. For more information,
please click the How to Create Custom Logo? link on this page of the Configuration Wizard.
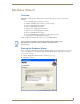
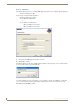
Creating A Custom Logo
1.
Open the "logo_custom.GIF" in your favorite graphics manipulation software.
2. This file can be found in the
"C:\Program Files\AMX Resource Management Suite\Web\App_Themes\MeetingManager\images"
directory (if you used the default installation location).
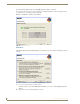
3. Add the logo to the image.
4. Save the logo to:
"C:\Program Files\AMX Resource Management Suite\Web\App_Themes\MeetingManager\images"
Make sure you save it as a.gif file and retain the name "logo_custom.GIF".
5. Use the Configuration Wizard to select "Custom Created Logo".
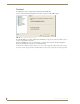
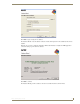
FIG. 39 RMS Configuration Wizard - Name & Logo
The pixel dimensions for the logo are 147x101.