
Technical information


RMS Configuration Wizard
31
RMS - Administrator’s Guide
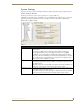
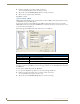
Once the default administrator account has been established, you cannot return to this step to alter it.
If the default administrator account has already been configured and you return to this step, the Configuration
Wizard indicates The Administrator account has already been configured and does not allow you to alter the
account.
Click Next to continue.
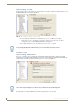
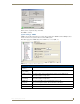
System Settings - Scheduling
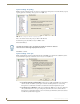
If the Internal Appointment Management/Scheduling System option was selected on the Appointment
Management/Scheduling System step, then you will only need to enter a default Master Appointment Password
in the Internal Scheduling System Options screen (FIG. 26).
Click Next to continue.
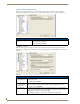
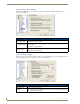
If the External Appointment Management/Scheduling System option was selected on the Appointment
Management/Scheduling System step, then you need to configure which Scheduling Plug-in interface you wish
to use with the RMS (FIG. 26).
For specific details on each Scheduling Plug-in, see the documentation that is associated with that plug-in.
After you have selected and registered the desired Scheduling Plug-in, click Next to continue.
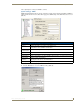
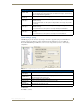
Appointment Modification Master Password
Master Appointment
Password
This password is used to gain access to any user created appointment record in the
system.
Type a password in the field provided.
• If this password is blank, there is no master password for modifying appointments.
• The default password is 1988.
FIG. 26
RMS Configuration Wizard - Master Appointment Password Modification