
Technical information
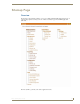


RMS Scheduling Page
177
RMS - Administrator’s Guide
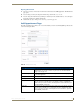
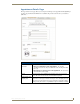
3. Set the Automation Control, if applicable, to set the preset to execute manually or automatically. Select
the Control Event from the drop-down menu (FIG. 163).
4. Click the RMS Appointment Details tab to access the Appointment Details page.
5. Enter display text in the lines provided. These lines of text appear on the panels in the room at the time of
the appointment. This step is optional.
6. Select a panel display image from the drop-down menu, or click Upload Image. If you selected Upload
Image, either type the path or browse to the file you wish to use. Click Upload to load the file. This step
is optional.
7. Click Save to save, or Cancel to cancel.
Included in the RMS SDK are touch panel files that allow the user to execute manual presets, send help and
maintenance requests, extend the appointment, and view schedules.
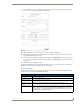
Room Search Page
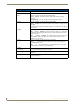
The Room Search page allows you to search for a specific room or find one based on your appointment needs.
Room searching is a feature of internal RMS scheduling.
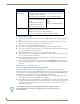
FIG. 163 Configure External Scheduler Appointments Page
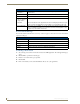
Room Search
• Room Name The name of the room.
• Location The location of the room
• Number of Seats
Needed
This is the number of seats for the room.
• Minimum Prestige
Level
Select the level from the drop down list. This is the prestige level for the room.
• Equipment Needed This is the equipment listed for any room. All equipment items should be separated by a
comma. You can also select devices that appears in the available list. You can select
more than one piece of equipment from this list by pressing the CTRL key on your key-
board and clicking the appropriate devices.