
Technical information


RMS Scheduling Page
173
RMS - Administrator’s Guide
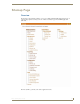
Opening Month View
1.
Select View Schedule > Month View in the menu on the left side of the RMS application. The Month View
page opens.
2. You can change rooms by selecting them from the drop down menu, Select a room.
3. You can change the month in view by clicking on another day in the calendar under Select Date. Navigate
back to the current day by clicking This Month.
4. Double click any day to change to Day View Page section on page 171.
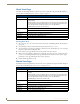
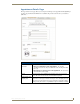
Add Appointment Page
The Add Appointment page allows you to create and schedule your own event. MeetingManager allocates the
room for the designated time.
FIG. 161 Add Appointment Page
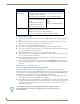
Add Appointment
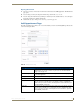
• Room A drop down list of rooms available for scheduling within the RMS application.
Search allows you to find a room base on your needs. See the Room Search
Page section on page 177.
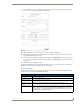
• Scheduled By: A text field to provide the name of the meeting scheduler. This field is populated
by the RMS application.
• Subject The subject line for the meeting purpose.
• Message A larger text field for any additional information pertaining to the meeting.
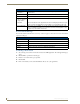
• Start Time: A text field for the date (mm/dd/yyyy) the meeting has been scheduled to start.
You can click on the calendar icon to select the date. The three following drop
down menus represent hour, minute, and designation for ante-meridiem vs. post-
meridiem (AM/PM), in that order.
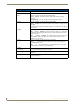
• End Time: A text field for the date (mm/dd/yyyy) the meeting has been scheduled to end. You
can click on the calendar icon to select the date. The three following drop down
menus represent hour, minute, and designation for ante-meridiem vs. post-meri-
diem (AM/PM), in that order.