
Technical information


RMS Resource Management Suite
6
RMS - Administrator’s Guide
The RMS application can provide Notification through SMTP e-mail and Simple Network Pager Protocol
(SNPP). Configuring for SMTP is always recommended if it is available. Configuring for SNPP should be
based on whether your users have pagers that support SNPP.
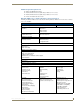
Logging Configuration
The RMS application logs systems problems for long-term storage and historical reporting. The RMS
application has a built-in log, but it also supports Windows Event logging and Syslog logging. All logging
options can be configured in the Configuration Wizard.
Security
The RMS application can be configured to not require secure logins, require secure logins but allow for
anonymous access, or require secure login with no anonymous access allowed. The RMS application users are
configured with a username, password, and role that determines their access to the system.
The account management is configured through the Configuration Wizard. Two options, Use Account
Management and Allow Anonymous Access are configured by the Configuration Wizard.
Windows Authentication
The RMS web application supports the use of Integrated Windows Authentication. In order to use this feature
you must enable Windows Authentication for the RMS Virtual Web Directory and ensure that RMS is enabled
for user authentication.
If using Integrated Windows Authentication, you can not enable anonymous access.
If you are using the scheduling features of RMS, you will need to configure the
"dynamicResources" folder in the RMS Virtual directory to allow anonymous access.
The RMS services will automatically detect if the RMS web application is configured for Integrated Windows
Authentication and apply the following behavior:
Administrative Web Pages:
In the RMS administrative web pages, the web application will auto detect the integrated windows
username and attempt to authenticate this user account to a user account in the RMS database. If
the username is defined in the RMS database, the user is automatically logged on and the user's
security permissions are applied to the user's session. If the integrated windows username is not
found in the RMS database, a login prompt will be provided to manually log on to the RMS
administrative pages.
If using Integrated Windows Authentication, the user's password in the RMS database need not be
synchronized with the actual domain account, this password will not be used in the authentication
process.
User Scheduling Web Pages:
In the RMS user scheduling web pages, the web application will auto detect the integrated windows
username and only allow appointment record modification to appointment records that the user
created. Attempting to access or modify an appointment created by another user is restricted.
The integrated Windows usernames need not be defined in the RMS database. The web application
will simply restrict access to appointments based on the appointment's organizer username.
For details on configuring RMS for use with Windows Authentication, please refer to the RMS IT
Administrator's Guide (available to view/download from www.amx.com).
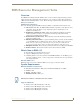
Enabling Integrated Windows Authentication
1.
To enable Integrated Windows Authentication, after the RMS product installation and completion of the
RMS Configuration Wizard, open the IIS manager from Control Panel > Administrative Tools >
Internet Information Services. Expand the Web Sites and navigate to the RMS web application.
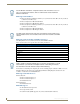
2. Next, right-click on the RMS web application and select Properties.
3. Select the Directory Security tab and click the Edit button under Anonymous access and authentication
control.
If using Integrated Windows Authentication, you can not enable anonymous access.