
User's Manual

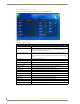
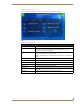
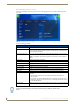


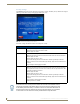
Table Of Contents
- MVP-9000i 9" Modero® ViewPoint® Touch Panel with Intercom
- Introduction
- Accessories
- Configuring Communication
- Overview
- IR Communication
- Modero Setup and System Settings
- Wireless Settings - Wireless Access Overview
- Configuring Wireless Network Access
- Step 1: Configure the Device’s WiFi Settings
- Step 2: Configure the Card’s Wireless Security Settings
- Step 3: Choose a Master Connection Mode
- Ethernet Over USB
- Using G4 Web Control to Interact with a G4 Panel
- Using the NetLinx Master To Control the G4 Panel
- Setup Pages
- Protected Setup Pages
- Upgrading Firmware
- Programming
- Overview
- Animated Transitions
- Touch Gesture Recognition
- Page Commands
- Programming Numbers
- "^" Button Commands
- Text Effects Names
- Button Query Commands
- Panel Runtime Operations
- Input Commands
- Embedded codes
- Panel Setup Commands
- Dynamic Image Commands
- Intercom Commands
- SIP Commands
- ^PHN- AUTOANSWER
- ^PHN-CALL
- ^PHN-DECLINE
- ^PHN-INCOMING
- ^PHN- LINESTATE
- ^PHN- MSGWAITING
- ^PHN-PRIVACY
- ^PHN-REDIAL
- ^PHN- TRANSFERRED
- ^PHN-ANSWER
- ^PHN- AUTOANSWER
- ?PHN- AUTOANSWER
- ^PHN-CALL
- ^PHN-DTMF
- ^PHN-HANGUP
- ^PHN-HOLD
- ?PHN- LINESTATE
- ^PHN-PRIVACY
- ?PHN-PRIVACY
- ^PHN-REDIAL
- ^PHN- TRANSFER
- ^PHN-SETUP- DOMAIN
- ^PHN-SETUP- ENABLE
- ^PHN-SETUP- PASSWORD
- ^PHN-SETUP- PORT
- ^PHN-SETUP- PROXYADDR
- ^PHN-SETUP- STUNADDR
- ^PHN-SETUP- USERNAME
- Battery Life and Replacement
- Appendix A: Text Formatting
- Appendix B: Wireless Technology
- Appendix C: Troubleshooting
- Overview
- Panel Doesn’t Respond To Touches
- Battery Will Not Hold Or Take A Charge
- MVP-9000i Isn’t Appearing In The Online Tree Tab
- MVP Can’t Obtain a DHCP Address
- My AP Doesn’t Seem To Be Working
- NetLinx Studio Only Detects One Of My Connected Masters
- Can’t Connect To a NetLinx Master
- Only One Modero Panel In My System Shows Up
- Panel Behaves Strangely After Downloading A Panel File Or Firmware
- Overview

Protected Setup Pages
68
MVP-9000i Modero® Wireless Touch Panel with Intercom
Security Settings
The Security button on the System & Options page has three settings: Standard, Secure, and DoD. Pressing the
button opens the Panel Security Setting popup window (FIG. 63):
Each of the settings has different features for touch panel security:
FIG. 63 Panel Security Setting popup window
Security Profile Features
Standard: • Factory default, shipped in this configuration.
• Default Protected Setup Password is “1988”.
• Remote login uses Telnet.
Secure: • Default Protected Setup Password is “Amx1234!”.
• Minimum password requirement is 8 characters with at least one numeric character.
• Remote login uses SSH.
• Remote login user name is “amx”.
• Login failure attempt pauses 4 seconds before another login attempt is allowed.
• After 3 consecutive unsuccessful SSH login attempts, login lockout is enabled for 15
minutes.
• Login and logout audit logging is enabled.
DoD: • Default Protected Setup Password is “Amx1234!”.
• Minimum password requirement is 8 characters with at least one numeric character,
one uppercase character, one lower case character, and one special character, with
no duplicate adjacent characters.
• Remote login uses SSH.
• Remote login user name is “amx”.
• Login failure attempt pauses 4 seconds before another login attempt is allowed.
• After 3 consecutive unsuccessful SSH login attempts, login lockout is enabled for 15
minutes.
• Login and logout audit logging is enabled.
• DoD login banner is enabled.
A transition from one security mode to another will reset the Protected/Web Control/
remote login password to the default value for the current security mode (please refer
to the default passwords above). A transition to Secure or DoD mode will disable G4
Web Control and ZeroConf. Although the security password features are immediate,
a reboot must occur for all the new security mode features to fully take effect.