Operation/Reference Guide Metreau Keypads ™ MET-6N 6-Button Keypad with Navigation MET-7 7-Button Keypad MET-13 13-Button Keypad DAS-MET6SRC 6-Source Audio Keypad DAS-MET-NUM Numeric Audio Keypad K e ypa ds Last Revised: 12/31/2012
AMX Limited Warranty and Disclaimer This Limited Warranty and Disclaimer extends only to products purchased directly from AMX or an AMX Authorized Partner which include AMX Dealers, Distributors, VIP’s or other AMX authorized entity.
Table of Contents Table of Contents Metreau™ Keypads ............................................................................................1 Overview .................................................................................................................. 1 Metreau Keypads (AxLink Compatible) ........................................................................... 1 Metreau Audio Keypads (SWT Compatible) ....................................................................
Table of Contents MET-13, DAS-MET-NUM ............................................................................................... 17 Mounting Procedures ............................................................................................. 17 Wallbox Mounting ......................................................................................................... 17 Podium Mounting..........................................................................................................
Table of Contents BMODE .....................................................................................................................................31 LED Feedback for 2-Position Pushbuttons .................................................................... 32 Sending Firmware to Metreau Keypads (AxLink).................................................... 32 Device Addressing on MET-6N Keypads .......................................................................
Table of Contents Working With Presets ............................................................................................. 49 Creating A Preset ......................................................................................................... 49 Recalling A Preset ........................................................................................................ 50 Clearing All Presets ....................................................................................................
Table of Contents Adding an Alarm ........................................................................................................... 71 Removing an Alarm ....................................................................................................... 73 SWT Troubleshooting .......................................................................................75 Overview ................................................................................................................
Table of Contents vi Metreau Keypads
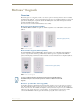
Metreau™ Keypads Metreau™ Keypads Overview Metreau keypads are a convenient, versatile, cost-effective option for achieving effortless control of virtually anything through a NetLinx® control system. Metreau keypads offer easy installation within decora-style wall plates and sleek styling that complements the NI-3101-SIG Signature Series NetLinx Integrated Controller and Tango Distributed Audio System.
Metreau™ Keypads Additionally, the versatility of SWT also allows AMX Matrix Audio products to be connected where the control wire has been run separately from the speaker cable. All Metreau keypads are available in three popular colors: White, Black and Light Almond. The following table lists the keypads in the Metreau family, with descriptions and FG#s for each color.
Metreau™ Keypads MET-6N Specifications MET-6N Specifications Power: 12 VDC, 75 mA Front Panel Components: • Pushbuttons - 6 tactile pushbuttons with blue LED indicators that illuminate when pressed to confirm the source/function was selected and that it is currently being used. These pre-printed buttons are field-replaceable. • IR Sensor - Supports standard AMX IR (38 kHz only). • LED Levels Indicator - set of 7 blue LEDs provide level feedback.
Metreau™ Keypads Navigation Wheel The Navigation Wheel itself can be rotated clockwise and counterclockwise, and is intended to provide level control (for example volume or lighting levels). When rotated clockwise, the Navigation Wheel provides a channel event on button #12. When rotated counter-clockwise, the Navigation Wheel provides a channel event on button #13. The light on the Navigation Wheel can be illuminated by activating channel #11.
Metreau™ Keypads MET-7 Specifications (Cont.
Metreau™ Keypads MET-13 Specifications (Cont.) Operating Environment: • Operating Temperature: 32° - 104° F (0°- 40° C). • Relative Humidity: 5% - 85%, non-condensing. • Intended for indoor use only.
Metreau™ Keypads DAS-MET-6SRC Specifications (Cont.) Rear Panel Components: Wiring connection - Two 4-pin SWT connectors that provide connection from the Matrix Audio Controller, and to the speakers. Dimensions (HWD): • Keypad and Mounting Plate: 4.055" x 1.772" x 0.997" (103mm x 45mm x 25.32mm) • Mounts into standard decora-style wall plates. Weight: 2.4 oz. (68.04 g) Operating Environment: • Operating Temperature: 32° - 104° F (0°- 40° C). • Relative Humidity: 5% - 85%, non-condensing.
Metreau™ Keypads DAS-MET-NUM Metreau Numeric Audio Keypad The DAS-MET-NUM Metreau numeric keypad (FIG. 9) connects to the Main DAS-MET-6SRC keypad via a 14-pin connector. Used in conjunction with the DAS-MET-6SRC Metreau keypad, it provides direct numeric access, setting & recalling presets, and access to advanced functionality such as grouping, Setting Favorites, Alarm, and Keypad lockout functionality (see the Advanced Functions - DAS-MET-6SRC section on page 47 for information).
Custom Button Installation Custom Button Installation Overview With the exception of the DAS-MET-NUM, all Metreau keypads feature field-replaceable pre-printed buttons. This section describes removing the original set of buttons and replacing them with custom buttons. FIG. 10 provides an exploded view of the keypad assembly. remove screw remove screw Circuit board remove screw tabs (2 on each side) remove screw Buttons Metal Mounting Plate Plastic Faceplate FIG.
Custom Button Installation 1. On the back of the keypad assembly, remove the four screws that secure the Mounting Plate (with Faceplate attached) to the Circuit Board. 2. Carefully remove the Circuit Board from the Mounting Plate. Once the Circuit Board is removed from the Mounting Plate, the buttons are prone to fall out of position. In most cases, there is sufficient friction within the button mounts to hold them in place on the Circuit Board.
Custom Button Installation Custom Keypads and Buttons If a requested keypad needs functions not offered in the standard Button Kits, a custom keypad may be built with the AMX Metreau Keypad Preview (FIG. 12), available at www.amx.com. This tool allows custom arrangement of default or custom button arrangements, creation of custom button text, previews of keypad type and color, and printouts of final keypad layouts and parts lists. FIG.
Custom Button Installation 12 Metreau Keypads
AxLink Device Addressing AxLink Device Addressing Overview Metreau Keypads used in NetLinx applications require a unique numeric AxLink device address of 1-255. Consider specifying the device address for each keypad before final installation. AxLink device addressing applies only to the MET-6SRC, MET-7 and MET-13 keypads. Metreau Audio Keypads (DAS-MET-6SRC and DAS-MET-13) do not require device addressing.
AxLink Device Addressing 1. If connected, disconnect the power supply. 2. Locate the 8-position mini-DIP switch on the rear panel. 3. Set the DIP switch according to the values shown below. Switch 1 2 3 4 5 6 7 8 Value 1 2 4 8 16 32 64 128 The device number is set by the total value of DIP switch positions that are in the ON position. Note that the ON position is indicated on the DIP Switch. As an example, the DIP switch in FIG. 14 defines AXlink device number 129 (1+128=129). FIG.
Mounting and Installation Mounting and Installation Overview Metreau keypads are designed to install into standard U.S. decora-style wall plates and boxes (wallboxes not included). Before touching the device, discharge the static electricity from your body by touching a grounded metal object. Mounting Dimensions MET-6N, DAS-MET-6SRC FIG. 15 provides detailed dimensions for the MET-6N and DAS-MET-6SRC keypads. FIG.
Mounting and Installation MET-7 FIG. 16 provides detailed dimensions for the MET-7 keypads. FIG.
Mounting and Installation MET-13, DAS-MET-NUM FIG. 17 provides detailed dimensions for the MET-13 and DAS-MET-NUM keypads. FIG. 17 MET-13 and DAS-MET-NUM Mounting Dimensions Mounting Procedures AMX recommends mounting Metreau keypads in standard U.S.-style decora wallboxes: Conduit box should meet NEC specs (section 370) Minimum internal clearance of (HWD) 2-5/8" x 1-3/4" x 1-5/8". Wallbox Mounting 1. Use the cutout dimension for the wallbox to cutout the install surface. 2.
Mounting and Installation Podium Mounting 1. Use the cutout dimension for the wallbox to cutout the Mounting Frame install surface for the keypad 2. Confirm that the terminal end of the AxLink cable is disconnected, and not receiving power. 3. Connect the AxLink power supply. The connector passes through the center of the Mounting Frame and connects to the board. 4. With the Mounting Frame resting in the cutout area, drill the mounting holes into the flat surface.
Wiring and Connections Wiring and Connections Overview Metreau keypads support both AxLink and SWT wiring configurations. Each is described in the following sub-sections. For information on AxLink vs. SWT device addressing, refer to the AxLink Device Addressing section on page 13. Before touching the device, discharge the static electricity from your body by touching a grounded metal object.
Wiring and Connections AxLink Wiring Guidelines Metreau keypads require 12 VDC power to operate properly. The necessary power is supplied via the AxLink cable. The maximum AxLink wiring distance is determined by power consumption, supplied voltage, and the wire gauge used for the cable. The following table lists wire sizes and the maximum lengths allowable based on the maximum power consumption rating of 170 mA. Wiring Guidelines at 170 mA Wire Size Maximum Wiring Length 18 AWG 690.42 feet (210.
Wiring and Connections Using AxLink for Data with an Auxiliary Power Supply Use an auxiliary 12 VDC power supply when the distance between the controller and server exceeds the limits described in the AxLink Wiring Guidelines. Connect only the GND (-) wire on the AxLink connector when using an auxiliary 12 VDC power supply. Connect the NetLinx Controller’s AxLink connector to the AxLink connector on the rear panel of the Metreau keypad, as shown in FIG. 20.
Wiring and Connections SWT Wiring DAS-MET-6SRC and DAS-MET-7 Rear Panel Components Before touching the device, discharge the static electricity from your body by touching a grounded metal object. FIG. 22 shows the basic rear components of the SWT (DAS-MET-6SRC and DAS-MET-NUM) keypads: not used 14-pin connector (To DAS-MET-NUM) 14-pin connector (From DAS-MET-NUM) SWT connector (To speakers) SWT connector (from Matrix Controller) DAS-MET-6SRC DAS-MET-NUM FIG.
Wiring and Connections Speakers LL+ TO CONTROLLER R- TO SPEAKERS R+ R R G G D D L L Mi-Series Controller Delta Series Controller Carbon XA Series Amplifier SWT connectors on Metreau keypad FIG. 23 SWT wiring DAS-MET-NUM - Connecting to the Main DAS-MET-6SRC Keypad The DAS-MET-NUM Metreau numeric keypad connects to the main DAS-MET-6SRC keypad via a 14-pin connector, as indicated in FIG. 24: Pin #1 14-pin connector Pin #1 14-pin connector DAS-MET-6SRC DAS-MET-NUM FIG.
Wiring and Connections Tango System Integration Drawings Tango System Integration Drawing - Using Four-Conductor Speaker Wire IR OUT LINE IN Tango Controller Shared 4-conductor speaker wire FIG. 25 System Integration Drawing Using Four-Conductor Speaker Wire Tango System Integration Drawing - Using the Audio Zone Expander IR OUT LINE IN Zones 1-8 Tango Controller LINE IN RJ11 Tango Audio Zone Expander Shared 4-conductor speaker wire FIG.
Wiring and Connections SWT Special Wiring Configurations Auxiliary Amplifier Configuration In some cases you may require more power for a given zone than the Matrix Controller can provide. You may purchase a DAS-LLC to provide a line level output to incorporate a larger external amplifier, or you can make your own line level converter. FIG.
Wiring and Connections Two-Wire Configurations – Keypad for Control Only In some retrofit configurations it is not feasible or possible to re-route the speaker cable through the keypad. In cases such as this, it is possible to run a separate cable pair (CAT-3 / CAT-5 / Twisted Pair) cable from the Matrix Controller to the keypad for control purposes. When using CAT3/CAT5 over long runs, it is recommended to "double-up" the control wires (only 2 conductors are required, and there are 4-8 wires available).
Wiring and Connections Split Zone / Analog Volume Control In cases of split zones where more than one set of speakers are driven from the same keypad, it is sometimes desirable to place a volume control in the split zone. FIG. 30 shows the connections to a remote zone, and “Autoformer” volume control device. Zone Output Connector (on Matrix Controller) L D G R Volume Control Metreau keypad Right Right Left Left FIG.
Wiring and Connections 28 Metreau Keypads
Programming The Metreau Keypads Programming The Metreau Keypads Programming the AxLink Metreau Keypads Button Layouts The following illustrations indicate the button numbers for each of the AxLink Metreau Keypads (MET-6N, MET-7 and MET-13): 1 3 5 1 1 2 4 2 3 4 6 3 5 6 4 7 8 5 9 10 2 13 7 9 11 12 6 10 8 7 MET-6N Center pushbutton = button #11 dual function: (push/release, press/hold) rotate Navigation Wheel clockwise = button #12 8 MET-7 Bottom pushbutton is a two-position Pus
Programming The Metreau Keypads Rotate the Navigation Wheel counter-clockwise for button event #13 Rotate the Navigation Wheel clockwise for button event #12 7 9 11 10 8 Center = button #11 dual function: push/release, and press and hold Rotate bi-directionally for level events on Level #2 FIG.
Programming The Metreau Keypads Supported SEND_COMMANDs The AxLink-enabled Metreau keypads (MET-6N, MET-7 and MET-13) support a number of NetLinx SEND_COMMANDs, described in the following section. To use these commands, establish a Telnet session from the PC to the NetLinx master. All text is based on a Unicode index. SEND_COMMANDs @BRT Set Brightness level for all LEDs (pushbuttons and levels indicator bar), for both On and Off states.
Programming The Metreau Keypads LED Feedback for 2-Position Pushbuttons The MET-7 and MET-13 Keypads feature a 2-Position pushbutton at the bottom of the button layout (FIG. 33). It can be used either as a single button (in which case it functions just like the other buttons), or it can be used as a 2-position button. In many cases, this button is used as a 2-Position button to provide ramp up/down control, for volume, light levels, etc.
Programming The Metreau Keypads FIG. 34 Send to Axcess Dialog Window 3. Browse to the location of the firmware file. 4. Select the file within the Files frame. 5. Click Query for Devices. 6. Select the Metreau keypad within the Devices frame. The MET-6N will appear as two devices in the Devices frame, because it’s built-in IR Receiver, is recognized as a separate online device.
Programming The Metreau Keypads 34 Metreau Keypads
Basic Keypad Functions - DAS-MET-6SRC Basic Keypad Functions - DAS-MET-6SRC Overview Metreau Keypads are pre-configured to provide many common functions. The DAS-MET-6SRC provides basic keypad functionality, including Source Control (selecting source, initiating and pausing playback), Volume control (Up/Down), Zone control (On/Off), and audio (Bass/Treble/Balance/SRS Mode) adjustment. The SWT Metreau Keypads function essentially the same as previous versions SWT keypads.
Basic Keypad Functions - DAS-MET-6SRC Listening To an iPod Dock the iPod in the docking station connected to the Tango Audio Controller, and press the iPod button on the room/zone keypad to listen to the most recent selection. The UP, DOWN, LEFT, RIGHT, Centre PRESS and Centre HOLD buttons are programmed by the installer, based on what the individual dock with remote can do.
Basic Keypad Functions - DAS-MET-6SRC DAS-MET-6SRC - Audio Adjustment Mode 1 - Bass Level adjust 2 - Treble Level adjust 3 - Balance adjust 4 - SRS Settings Press bottom two buttons simultaneously for 4 seconds to enter Audio Adjustment Mode Current level setting indicated by LEDs Press center (Select) button to accept changes Rotate wheel to adjust the currently selected audio mode FIG.
Basic Keypad Functions - DAS-MET-6SRC Top-right LED blinks to indicate Treble Level Adjust mode Center LED (LED #4) indicates FLAT FIG. 38 Treble Level Adjust Mode Treble adjustments are provided in +/- 1dB steps, from -10dB (min) to +10dB (max). The treble level is indicated in the LED display: Flat = center LED (#4) lit. Press and hold the center (Select) pushbutton on the Navigation Wheel for 3 seconds to return to the default Treble Level setting.
Basic Keypad Functions - DAS-MET-6SRC Middle-right LED blinks to indicate SRS Adjust mode FIG. 40 SRS Adjust Mode Press the center (Select) pushbutton on the Navigation Wheel to set the current SRS settings, and proceed to LED "ON" Brightness Adjust mode. Turning SRS Off Press and hold the Center Navigation button while in SRS mode. DAS-MET-6SRC - Privacy Mode Off/On When Privacy Mode is engaged, the room/zone cannot be paged, apart from this, the room/zone will function normally.
Basic Keypad Functions - DAS-MET-6SRC Working With Sources When a Source button is selected, the following occurs: The Source is turned ON, and if there is a Favorite assigned for the Source, then the favorite begins playing. If no Favorite has been set for the Source, the following occurs: If the Source is the on-board Tuner, the first Preset will begin playing. If there are no Presets, then the last station listened to will begin playing.
Basic Keypad Functions - DAS-MET-6SRC Turning Off/On a Source In All Zones Press and hold a Source button for 4 seconds to turn it off in ALL zones. FIG. 43 Turning Off a Specific Source in All Zones Press and hold the active Source button for 4 seconds to turn it off in all zones. To turn the source back on in all zones, press and hold the same Source button for 4 seconds. Turning Off All Zones (System OFF) Press and hold the top two Source buttons to turn ALL sources off in ALL zones. FIG.
Basic Keypad Functions - DAS-MET-6SRC DAS-MET-6SRC - Zone Control (Dynamic Pause) Switching sources within a single zone, turning off an active source within a single zone, and switching sources for all (grouped) dynamically pauses the source device that is no longer being used. Press any Source button to turn a single Zone On Press the active Source button to turn the Zone OFF Press and hold a Source button for 4 seconds to turn it OFF in ALL zones. FIG.
Basic Keypad Functions - DAS-MET-6SRC DAS-MET-6SRC - Using the Navigation Wheel The Navigation Wheel on the DAS-MET-6SRC provides multiple functions, based on the source type selected, as described in the following sections: Using the Navigation Wheel With the Internal AM/FM Tuner FIG.
Basic Keypad Functions - DAS-MET-6SRC FIG. 49 describes functions available at the Navigation Wheel, when used with a DVD Player/Changer: Up Rotate the wheel counter-clockwise to adjust the Zone volume DOWN Rotate the wheel clockwise to adjust the Zone volume UP Left Right Push and Release - Select Press and Hold - Menu Down FIG. 49 Using the Navigation Wheel With DVD Player/Changer These are suggested settings. All buttons are user-definable.
Basic Keypad Functions - DAS-MET-6SRC These are suggested settings. All buttons are user-definable. Using the Navigation Wheel With an External Tuner FIG. 52 describes functions available at the Navigation Wheel, when used with an External Tuner: Seek Up Rotate the wheel counter-clockwise to adjust the Zone volume DOWN Rotate the wheel clockwise to adjust the Zone volume UP Push and Release to toggle AM/FM Press and Hold to toggle Stereo/Mono Seek Down FIG.
Basic Keypad Functions - DAS-MET-6SRC 46 Metreau Keypads
Advanced Functions - DAS-MET-6SRC Advanced Functions - DAS-MET-6SRC Overview The DAS-MET-NUM Numeric keypad is used in conjunction with the DAS-MET-6SRC keypad to provide enhanced functionality, including Direct Numeric Access, Zone Grouping, Favorites, Alarm (setting), Keypad Lockout and setting and recalling Presets. The SWT Metreau Keypads function essentially the same as previous versions SWT keypads.
Advanced Functions - DAS-MET-6SRC CD Player - Direct Selection of a Disk and Track To select a specific disk and track, the format is DDD•TTT + ENTER (DDD = Disk & TTT = Track). Enter the desired Disk/Track number Press ENTER to save Use the "Preset •" button to enter a "point" to specify the disk and track numbers ("25.4" indicates disk # 25, and track # 4) FIG. 55 Direct Selection of a Disk and Track 1. Enter the Disk number. 2. Press the "PRESET •" button. 3.
Advanced Functions - DAS-MET-6SRC Cable and Satellite - Direct Selection of a Channel To select a channel on a Cable or Satellite receiver, the format is CCC + ENTER (CCC=Channel #). Enter the desired channel number Press ENTER to save FIG. 57 Direct Selection of a Cable or Satellite Channel This information also applies to selecting a Digital Cable Music (DCM) Channel. To change the Cable or Satellite (or Digital Cable Music) channel: 1. Key in the Channel number. 2. Press ENTER to complete.
Advanced Functions - DAS-MET-6SRC Each Source can have up to ten Presets assigned to it. 1. Select a Source (CD or Tuner). 2. Select the desired entry (Station or Track number). 3. Press ENTER 4. Press the PRESET • button. 5. Enter a number for this Preset (1-10). 6. Press and hold ENTER for four seconds to complete. Example: To set station "104.5" as "Preset 3": a. Select a Tuner as the Source. b. Key in "104.5" (to tune to the desired station). c. Press ENTER. d. Press PRESET •. e. Press 3. f.
Advanced Functions - DAS-MET-6SRC Clearing All Presets Enter "00" Press PRESET • Press and hold ENTER for 4 seconds to clear all Presets FIG. 60 Clearing All Presets 1. Select a Source. 2. Press PRESET •. 3. Enter "00". 4. Press and hold ENTER for four seconds. Example: Press PRESET • + 00 + press & hold ENTER = All presets will be cleared. Working With Favorites One Favorite can be programmed via the numeric keypad for each source in each zone.
Advanced Functions - DAS-MET-6SRC Clearing Favorites For All Sources In a Specific Zone Press and hold buttons 3 & 4 simultaneously for 4 seconds Press and hold ENTER for 4 seconds to save FIG. 62 Clearing Favorites For All Sources in a Specific Zone 1. Select a Source (CD or Tuner). 2. Simultaneously press and hold buttons 3 and 4 to enter Favorites mode for this Source (LED’s will turn On). 3. Key in "00". 4. Press and hold ENTER to complete.
Advanced Functions - DAS-MET-6SRC The Zone from which zone grouping is being administered, is assumed to be the first Zone in the Group. It should, therefore, not be added to the Zone Grouping. Grouping All Zones Enter "99" Press ENTER to save Press the Group button to enter Zone Grouping mode (all Source LEDs light) FIG. 64 Adding A Zone To Group 1. Press the Group button to enter Group Mode (all Source LED’s turn On). 2. Enter "99". 3. Press ENTER to complete.
Advanced Functions - DAS-MET-6SRC Grouping Volume Control When initially creating a zone grouping, all members of the group will have the volume set to the same level. The volume can then be adjusted on an individual zone basis, by using the Navigation Wheel (on the DASMET-6SRC keypad) in each zone.
Advanced Functions - DAS-MET-6SRC 3. Press Hour to increment the HH (hours) from 1 through 24. 4. Press Minute to increment the MM (minutes) from 01 through 60. 5. Press Second to increment the SS (seconds) from 01 through 60. 6. Press Set to set the clock to the time displayed. Refer to the Tango Audio Controller Operation/Reference Guide for details. Setting an Alarm In a Zone Press and hold buttons 5 & 6 simultaneously for 4 seconds to enter Alarm mode Enter alarm time (24HR) Press ENTER to save FIG.
Advanced Functions - DAS-MET-6SRC Clearing All Alarms For All Zones Press and hold buttons 5 & 6 simultaneously for 4 seconds to enter Alarm mode Enter "00" Press and hold ENTER for 4 seconds to clear all alarms for ALL zones FIG. 70 Clearing All Alarms For All Zones 1. Press and hold buttons 5 and 6 simultaneously for four seconds. 2. Key in "00". 3. Press and hold ENTER for four seconds to complete.
Advanced Functions - DAS-MET-6SRC Unlocking a Keypad Press and hold buttons 7 & 8 simultaneously for 4 seconds to access Lockout mode Enter the Zone number that you want to unlock Press ENTER to save FIG. 72 Unlocking A Keypad Unlocking a keypad must be done at the keypad that originally locked the keypad. 1. Press and hold buttons 7 and 8 simultaneously for four seconds (Source LED’s turn On). 2. Enter the Zone number to unlock. 3.
Advanced Functions - DAS-MET-6SRC 58 Metreau Keypads
Using the NetLinx Module Using the NetLinx Module Overview The Tango system can be controlled via the Touch Pages provided with the NetLinx Module, as described in this section. Refer to the NetLinx module documentation for details on incorporating the module into your source code and loading it onto the NetLinx Master. Main Page (Initial View) The initial view of the touch panel pages is the Main Page, featuring the Menu Bar along the left edge, as shown in FIG.
Using the NetLinx Module Main Pages Press Main in the Menu Bar to access the Locations page (FIG. 76). The options on this page allow you select Locations (Zones) to specify a Source Device to use with each Location, and configure audio settings for each Location. FIG. 76 Locations Page Location/Device Pages Press one of the Locations buttons to invoke the Location/Device page for the selected Zone.
Using the NetLinx Module The Zone Options and Change Source buttons provide additional options: Press Zone Options to configure audio settings for this Location (Zone). Press Change Source to select a different source Device for this Location. Zone Options From a Location / Device page, press Zone Options to invoke the Zone Options popup shown in FIG. 78: FIG. 78 Zone Options popup Use the Up/Down buttons to adjust Bass and Treble for this Location.
Using the NetLinx Module Device Control Pages There is separate Device Control page for each device type, with options specific to each device type, as described in the following sub-sections. Internal Tuner Touch Internal Tuner to invoke the Device Control page shown in FIG.
Using the NetLinx Module Internal Sirius Touch Internal Sirius to invoke the Device Control page shown in FIG. 81: Category Up/Down Channel Up/Down Display window (current Channel/ Category/Song info) Numeric keypad for direct tuning (press Enter to select specified station) Mute Volume Up Volume Down Source On/Off (this Zone only) Tuner Presets 1-10 FIG.
Using the NetLinx Module DVD Touch DVD to invoke the Device Control page shown in FIG. 82: Access DVD Menu Navigation/Select Mute Volume Up Volume Down Pause Play Source On/Off (this Zone only) FIG. 82 Device Control page - DVD The options on this page include: Device Control Page - DVD Play/Pause: Press to control DVD playback. Menu: Press to access the DVD’s menu screen. Navigation/Select: Use the directional buttons (Up, Down, Left and Right) to navigate DVD menus, and press Enter to select.
Using the NetLinx Module CD Touch CD to invoke the Device Control page shown in FIG. 83: Track Up/Down Disk Up/Down Mute Volume Up Volume Down Source On/Off (this Zone only) Pause Play FIG. 83 Device Control page - CD The options on this page include: Device Control Page - CD Metreau Keypads Play/Pause: Press to control CD playback. Disk: Press the Up button to select the next CD, press the Down button to select the previous CD.
Using the NetLinx Module Audio Server Touch Audio Server to invoke the Device Control page shown in FIG. 84: Navigation/Select Mute Volume Up Volume Down Pause Play Source On/Off (this Zone only) FIG. 84 Device Control page - Audio Server The options on this page include: Device Control Page - Audio Server Play/Pause: Press to control CD playback. Navigation/Select: Use the directional buttons (Up, Down, Left and Right) to navigate DVD menus, and press Enter to select.
Using the NetLinx Module Satellite Touch Satellite to invoke the Device Control page shown in FIG. 81: Display window (current Channel/ Category/Song info) Numeric keypad for direct tuning (press Enter to select specified station) Channel Up/Down Mute Volume Up Volume Down Source On/Off (this Zone only) Tuner Presets 1-10 Guide Up/Down Go to Channel Guide FIG.
Using the NetLinx Module External Tuner Touch External Tuner to invoke the Device Control page shown in FIG. 86: Display window (current Station info) Toggle Stereo/Mono Toggle AM/FM Seek Up/Down Numeric keypad for direct tuning (press Enter to select specified station) Mute Volume Up Volume Down Tuner Presets 1-10 Source On/Off (this Zone only) FIG.
Using the NetLinx Module Other Touch Other to invoke the Device Control page shown in FIG. 86: Display window Navigation/Select Mute Volume Up Volume Down Pause Play Source On/Off (this Zone only) FIG. 87 Device Control page - Other The options on this page include: Device Control Page - Other Metreau Keypads Display Window: Displays information on the current selection (display depends on the device type). Play/Pause: Press to control playback.
Using the NetLinx Module Setup Pages Press Setup in the Menu Bar to access the main Setup page. The options on this page allow you to access Zones and Alarms. The initial view of the Setup pages is the Zones page (FIG. 88) FIG. 88 Setup page (initial view - Zones) Setup - Zones Touch any of the Zones buttons to edit the selected Zone’s label, via the on-screen keyboard shown in FIG. 89: FIG.
Using the NetLinx Module Setup - Alarms Press Alarm on the main Setup page to access the Alarms page (FIG. 90). Use the options in this page to set alarms for one or more selected Zones. An "Alarm" can be programmed to play a specific source in any specified Zone. FIG. 90 Setup - Alarms page Adding an Alarm 1. Touch one of the location (Zone) buttons to select the Zone for which you want to set an alarm. 2. Set the start time for the alarm using the H (hour) and M (minute) up/down arrows.
Using the NetLinx Module FIG. 91 Setup - Alarms page with Zone and Time selected 4. Touch "choose source" to specify the source device to be used as the alarm (FIG. 92): FIG. 92 Alarms page - select a Source The exit button allows you to close the Sources window without selecting an Alarm Source. Once a Source is selected, the Sources windows closes automatically. 5. Touch the Volume Up and Down buttons on the Volume bar to set the alarm volume for the selected Source device. 6.
Using the NetLinx Module Removing an Alarm Once an alarm has been set for this Zone, the "Remove Alarm" option is enabled (FIG. 93). FIG. 93 Alarms page - Remove Alarm Touch Remove Alarm to remove the alarm for the selected Zone.
Using the NetLinx Module 74 Metreau Keypads
SWT Troubleshooting SWT Troubleshooting Overview This section provides troubleshooting for the SWT Metreau keypads (DAS-MET-6SRC and DAS-MET-NUM). Symptom Possible Causes Section Everything is dead Power Power All keypads are dead Power-cabling between MRC and keypad incorrect. Power (No lights) Keypad connections reversed. Keypad cabling Some keypads ok, some dead. Cabling between MRC & keypad shorted. Keypad connections reversed. Keypad Cabling. Restart system. Defective keypad.
SWT Troubleshooting Zone Connection Problems If there is wall power and both the source components and the Controller seem to be powering up OK, but one or more of the zones are not working, there may be a problem at the individual zone or with the cabling connecting to the zone. Begin by checking each zone keypad for functionality by pressing the desired source button. The LED should light red next to the source on the KP-4e keypads or should “wake up” with a screen menu on the touch panel keypad.
SWT Troubleshooting Tip: For Testing, when you are having IR problems, it is helpful to carry a blinking emitter or a test emitter to ensure that the commands are being sent to the source. Techniques you can use to help isolate a sources problem include swapping the source with another on the Tango Controller to see if the problem stays with the Controller or follows the movement of the source. Also try swapping IR emitter leads.
AMX. All rights reserved. AMX and the AMX logo are registered trademarks of AMX. AMX reserves the right to alter specifications without notice at any time. ©2012 12/12 It’s Your World - Take Control™ 3000 RESEARCH DRIVE, RICHARDSON, TX 75082 USA • 800.222.0193 • 469.624.8000 • 469-624-7153 fax • 800.932.6993 technical support • www.amx.