
Specifications


Record Service
94
Vision
2
Operation/Reference Guide
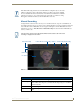
Record a video as follows:
1. Enter a name for the recording in the Name text box
2. Select a category (folder) you want to record to.
3. Click Start. Note that once you start a Manual Record you cannot leave this screen until you stop the
Record. If you want to do more than one Manual Record at a time you will need to login with a separate
Browser tab
4. Click Stop to end the recording and save a copy of the recording to the archive.
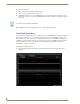
Scheduled Recording
The Scheduled Record feature allows you to schedule when to record a MPEG 2 Live Channel. Configure the
Record Service in the same way as for a Continuous Record, except choose Scheduled Record from the
Recording Type drop down. After you have configured the Record service for scheduled recording and have
enabled the service a Schedule section appears at the bottom of the screen, click Edit to enter the Schedule
Screen. Alternatively you can go to Video Recorders > Scheduled Recording and select and load the
Scheduled Record Service you wish to use.
Edit the Record Schedule as follows:
1. In the Schedule editor click the calendar icon and select the date when the recording should occur.
(FIG. 95).
You cannot record longer than 180 minutes
FIG. 95 Schedule Editor for Record Service