
Installation guide

Kaleidescape Part No. 101-0105-00 Rev 3 Page 16
Kaleidescape Installation Guide
Section 2
Quick Start
This section describes the basic steps required to connect and test
Kaleidescape System components. If problems occur, refer to
Troubleshooting on page 107.
Step 1 – Verify Network Connections
All Kaleidescape components must be connected to the same local network.
Connect the components to a 1000Base-T network switch. These
instructions assume there is a router or DHCP server on the network to
assign DHCP addresses. For more advanced network configuration, see
Appendix C on page 156.
For initial configuration, and to receive software, Movie Guide and Music
Guide updates, the network must be connected to the Internet. Users must
also complete the activation process at www.kaleidescape.com/activate.
Test the network connection for each Kaleidescape component before
installing by connecting the network cable for the component to a laptop,
disconnecting the laptop from any WiFi networks, and opening a new, non-
cached web page. If the page fails to load, troubleshoot the network.
Note: Connecting the server to a 100Base-TX switch port limits the server to
seven simultaneous DVD playback zones or one Blu-ray zone and can slow
down imports.
Step 2 – Set Up the Server
Kaleidescape players require a Kaleidescape server to operate. Always set
up servers first.
Note: If installing the Kaleidescape Mini System, refer to the Quick Install Guide
packaged with the system.
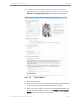
1. Unpack and check against the packing list.
a. 1U Server –
0 Remove front panel and mount server chassis.