instruction manual Axcess Programming Language So ftw are
AMX Limited Warranty and Disclaimer AMX Corporation warrants its products to be free of defects in material and workmanship under normal use for three (3) years from the date of purchase from AMX Corporation, with the following exceptions: • Electroluminescent and LCD Control Panels are warranted for three (3) years, except for the display and touch overlay components that are warranted for a period of one (1) year.
Table of Contents Table of Contents Introduction ...............................................................................................................1 Device Numbers................................................................................................................ 1 Video Monitors .................................................................................................................. 2 Connecting the System ..................................................................
Table of Contents Defining mutually exclusive latching ...................................................................................... 21 Defining mutually exclusive toggling ...................................................................................... 21 Putting it all to work ................................................................................................................ 22 Programming Feedback...............................................................................
Table of Contents Relational Operators ....................................................................................................... 47 True and false ........................................................................................................................ 48 Logical Operators ............................................................................................................ 49 Bitwise Operators .............................................................................
Table of Contents Controlling Time in Axcess.............................................................................................. 79 The Wait List ................................................................................................................... 79 Multiple Waits.................................................................................................................. 81 Naming Waits............................................................................................
Table of Contents Sending Commands...................................................................................................... 113 Responses from Axcess................................................................................................ 114 External_Control .................................................................................................................. 115 Appendix ......................................................................................................
Table of Contents vi Axcess Programming Language
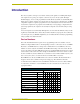
Introduction Introduction The Axcess system is a microprocessor-based control system capable of controlling both simple and complex devices, giving you complete control of every device in any system. Through a flexible language, Axcess can be programmed to handle almost any task. It can automatically dim lights, increase volume controls to preset levels, turn on video projectors, and much more. An IBMcompatible computer is required to program the Axcess Control System, and not much memory is needed.
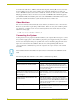
Introduction As shown in the table above, AMX recommends that all panels, infrared (IR) receivers, and radio frequency (RF) receivers start on device number 128, and that the number increase with each device. All AXB-xxx (boxes) start at device number 96, and increase with each device. The AXBFD (floppy disk drive) starts at 127 and decreases with each AXB-FD. When numbering panels, start with RF and IR, then SoftWire panels such as the AXU-MSP8 or AXU-SPL4, and then touch panels.
Introduction Blinking Light Status The green Status LED, on the front of the Central Controller, lights when the Central Controller is plugged in, and power is supplied to the CardFrame. The AXlink LED uses a series of different flash patterns to indicate the status of the control system: • One blink per second: Indicates the system is operating normally. • Two blinks per second: Indicates the devices specified in the program do not match the devices found on AXlink.
Introduction 4 Axcess Programming Language
Axcess Basics Axcess Basics Format of the Programming Language The Axcess programming language is in a free format, meaning that the source code is independent of tabs and carriage returns. Utilize tabs and carriage returns in a consistent method of code placement to make the code readable.
Axcess Basics The number of open and closed braces must be the same in your program. After compiling, Axcess will list an error if the numbers are different. PUSH[DEVICE, CHANNEL] (*Input request*) { ON [DEVICE, CHANNEL] (*Output command*) X = 5 } In this example, when button 1 on PANEL is pressed, relay 5 on RELAY_CARD is turned on. Also, the variable X is assigned the value of 5. The open brace indicates the beginning of the compound statement, and the close brace ends it.
Axcess Basics PUSH[TP,34] (* VCR PRESET *) { PULSE[RELAY,SCREEN_DN] PULSE[LIGHTS,LIGHT_OFF] PULSE[VPROJ,VPROJ_IN_1] } PUSH[TP,35] (* CD PRESET *) { PULSE[RELAY,SCREEN_UP] PULSE[LIGHTS,LIGHT_FULL] PULSE[VPROJ,VPROJ_IN_2] } These comments will help you find the SLIDE preset, VCR preset, and the CD preset of the Touch Panel much more quickly. Identifiers Identifiers are used to denote a device, constant, or variable.
Axcess Basics 2. Then, it starts at the beginning of mainline, the first line of program code after the DEFINE_PROGRAM header. While executing mainline, the Central Controller processes the statements in the program, taking whatever actions are defined by the program. 3. At the end of mainline, the Central Controller does some internal processing, then returns to the top of mainline to start another loop (FIG. 1). FIG.
Axcess Basics Definition Sections Starting a new program When you begin a new program with the New option in the File menu, there are several definition headings indicating what should be defined in each section: ! DEFINE_DEVICE ! DEFINE_CONSTANT ! DEFINE_VARIABLE ! DEFINE_LATCHING ! DEFINE_MUTUALLY_EXCLUSIVE ! DEFINE_START ! DEFINE_PROGRAM The program will not operate differently if you do not have any statements under a heading. However, you should keep the headings for reference.
Axcess Basics DEFINE_DEVICE VCR = 1 (* AXC-IR/S: VCR *) CD = 2 (* AXC-IR/S: CD PLAYER *) CASS = 3 (* AXC-REL8: VCR *) RELAY = 4 (* AXC-REL8: SCREENS AND DRAPES *) LIGHTS = 5 (* AXC-REL8: LOW VOLTAGE LIGHTING *) VPROJ = 6 (* AXC-IR/S: PROJECTOR *) TP = 128 (* AXU-CVA COLOR VIDEO PANEL *) From this point on, you can reference device 1 with the name VCR, device 2 with the name CD, and so on. The Push window at the bottom of the screen is changed.
Axcess Basics LIGHT_FULL = 1 LIGHT_MED = 2 LIGHT_LOW = 3 LIGHT_OFF = 4 VPROJ_IN_1 = 11 VPROJ_IN_2 = 12 VPROJ_IN_3 = 13 VPROJ_IN_4 = 14 (* LOW VOLTAGE LIGHTING PRESETS *) The value of the constant PLAY is now set to 1. Also, STOP has a value of 2. Both of these values cannot be changed anywhere in the program. With these constants set, if you need to activate the play function of the VCR later in your program, use the constant PLAY, and Axcess knows to use channel 1.
Axcess Basics DEFINE_MUTUALLY_EXCLUSIVE When a channel is turned on in a mutually exclusive set, it activates its physical output as long as the button is pressed. When the button is released, the physical output stops. The status, however, does not work the same way. Even after the physical output stops, the status still indicates the channel is on until another channel in the mutually exclusive set is activated. The status is left on to indicate which channel in the set was last activated.
Axcess Basics Controller gets to the end, it loops back to the top and passes through it again, as shown in FIG. 1 on page 8. PROGRAM_NAME Axcess uses a long file name to provide a more descriptive name for Axcess programs. Thre file name gets embedded into the program the first time it is saved, and will appear in the first line of the program. For example: PROGRAM_NAME='long file name goes here' This name is managed by Axcess and is automatically updated every time the file is saved.
Axcess Basics 14 Axcess Programming Language
Using Input and Output Using Input and Output Channels You define what happens when remote inputs occur in mainline. To get inputs into the program, and generate an output, use channels. Almost all methods of control using an Axcess Control System require the use of channels on devices, as shown in FIG. 2. Every channel has two aspects: the input function and output function. When a button is pressed on a control panel, the input function of the button sends an input change to your program.
Using Input and Output Input Change Keywords (Cont.) PUSH_DEVICE PUSH_DEVICE is a system variable containing the number of the device having the channel that was just turned on due to an input change. If a button for device T_PANEL was pressed, PUSH_DEVICE would be equal to the device number of T_PANEL. This variable is set when a channel is turned on, and it remains constant for one pass through mainline. If no channel has been turned on, PUSH_DEVICE will contain Ø.
Using Input and Output The output change keywords are described in the table below: Output Change Keywords ON The ON keyword turns on a channel or variable. If the channel or variable is already on, its status will remain unchanged. Here are two examples: ON [1,2] ON [TEMP] (* Turns on channel 2 of device 1 *) (* Sets the value of the variable TEMP to 1 *) A variable is considered ON if it contains a non-zero number; in this case, the value is 1. If a variable contains the value Ø, it is considered OFF.
Using Input and Output Direct Assignment Direct assignment is another method of generating an output change, that does not involve using keywords. Any reference to a device-channel that does not have the keywords PUSH or RELEASE preceding it is a reference to the output side of the channel. Thus, assigning a value directly to a device-channel changes the output of the channel.
Channel Characteristics Channel Characteristics This section contains information on channel characteristics and how to change the way the status of an output channel behaves. It includes explanations of channel concepts, and examples of Axcess programming code. In this chapter, you will learn how to change the status behavior, which in turn changes the way a channel reacts when it is activated by the output change keywords.
Channel Characteristics button is released), the channel does not go back to OFF (like a momentary channel), it stays ON. It only returns to OFF when the channel is reactivated by a TO keyword. As a result, the status of a latching channel reflects the true ON/OFF state of the channel. In your program, RELAY is already defined as device number 4 and SYS_POWER is defined as a constant having the value 3.
Channel Characteristics Once a channel has feedback in a mutually exclusive group, there will always be one channel with its status on in that group, unless it is turned off with TOTAL_OFF. You will also define the lighting relays as mutually exclusive so that you can utilize last button pressed logic when you program the feedback for these buttons. This will allow the user to look at the panel and know which lighting preset was activated last.
Channel Characteristics DEFINE_TOGGLING [RELAY,SCREEN_UP] [RELAY,SCREEN_DOWN] Putting it all to work Now that you know how all these different types of channels operate, proceed to the mainline section of the program and add the following lines to activate your system power, screen, drape, and lighting relays: DEFINE_PROGRAM PUSH[TP,8] (* POWER ON/OFF *) TO[RELAY,SYSTEM_POWER] PUSH[TP,1] (* SCREEN UP *) TO[RELAY,SCREEN_UP] PUSH[TP,2] (* SCREEN DOWN *) TO[RELAY,SCREEN_DN] PUSH[TP,3] (* DRAPES OPEN *
Channel Characteristics channel. Unlike the DRAPES_OPEN and DRAPES_CLOSE channels, however, the DRAPES_STOP channel turns off when the button is released. Like the others, its status stays on because it is in the mutually exclusive group with the other Drape channels. Programming Feedback This section describes how to assign feedback to a button. Feedback refers to the lighting of a button during and after it is pressed.
Channel Characteristics and all the feedback statements are together. A good compromise is to break your program into sections of code where each section has a similar group of functions, and put the feedback statements for each section right below it, as shown in FIG. 5. FIG. 5 Different positions for feedback statements Device and Channel Keywords Device and Channel keywords that you can use in the Axcess program are described in the table below.
Channel Characteristics Device and Channel Keywords (Cont.) DO_RELEASE This keyword causes an input change from on to off to occur on a specified device-channel without the device-channel being deactivated by external means. Here is the format: DO_RELEASE (device,channel) If a RELEASE statement corresponding to the device-channel is present in the program, it will be executed. The DO_RELEASE keyword also forces the release of a device-channel turned on by DO_PUSH.
Channel Characteristics Input and output changes occurring on non-combined panels will not affect combined panels, and vice versa. Define_Latching In this definition section, latching channels and variables are defined. A latching channel is a channel that only changes its state once per PUSH.
Channel Characteristics The Variable Assignment Method Another method of programming select groups is to use one variable, assigning different values to it depending on what is selected. This method is more powerful than the previous method, providing more flexibility while using less code. You will add just one variable, CUR_CAMERA. This will be the select variable. Then assign the device number of the currently selected camera to this variable.
Channel Characteristics Axcess first evaluates the Boolean expression. If the expression is evaluated as true, Axcess replaces the expression with a 1; otherwise Axcess replaces it with a Ø. Only one of these will be evaluated as true because a variable cannot have two different values at one time. Therefore, the direct assignment will assign a 1 (On) to the Touch Panel button for which the expression is true, and a Ø (Off) to those that are false.
Channel Characteristics The program is explained step-by-step in the following section. DEFINE_DEVICE VPROJ = 6 (* AXC-IR/S: PROJECTOR *) CAMERA_1 = 97 (* AXB-CAM: PAN/TILT *) CAMERA_2 = 98 (* AXB-CAM: PAN/TILT *) CAMERA_3 = 99 (* AXB-CAM: PAN/TILT *) TP = 128 (* AXU-CVA: COLOR VIDEO PANEL *) The section above defines the five devices used in the program. DEFINE_CALL 'CAMERA MACRO' (WHICH_CAM) { The section above begins the subroutine.
Channel Characteristics 30 Axcess Programming Language
Arrays and Strings Arrays and Strings In this section arrays and strings will be introduced. Understanding these concepts and the associated keywords will allow you to easily handle data, and will provide another means of communicating with the outside world. Defining Arrays In the program developed in the previous sections, you used a variable. A variable can only hold one value at a time. However, if you need a variable to hold several values at once, you can use an array.
Arrays and Strings FIG. 7 The value in CAM_PRESETS[3] is assigned to the variable CAM_PRESET_1 You can place values into a storage location by setting the particular location equal to the needed value. For example, CAM_PRESETS was previously defined as having six locations. If you want the second location to hold a value of 6 you would type the following: CAM PRESETS[2]=6 The number 6 is placed into the second location, as shown in FIG. 8. FIG.
Arrays and Strings pushes, PUSH [TP, 25] through PUSH [TP,31], are the buttons for PRESETS 1 through 7. Inside the block is an IF statement; the IF statement uses the state of the variable STORE_VOL_PRESET to determine whether to assign the volume card's level to a location in the VOL_PRESETS array, or to send a command to the volume card telling it to go to a previously stored level.
Arrays and Strings A string expression cannot contain another string expression; i.e., a set of double quotes cannot enclose another set of double quotes. Assuming that SCREEN_UP is a constant with the value of 1, and X with the value of 10, the string expression is evaluated as a string with values: 1, 5, Ø, 'N', 'O', 1Ø, as shown in FIG. 10. Since the expression is evaluated at run time, whatever value is in the variable X when the expression is evaluated is what is placed into the result. FIG.
Arrays and Strings PRESETS = 'FOUR (* LENGTH = 4 *) PRESETS = 'ONE' (* LENGTH = 3 *) PRESETS = "12,5,'123'" (* LENGTH = 5 *) PRESETS = "PLAY,5,Ø,'NO',X" (* LENGTH = 6 *) The length of a string array cannot exceed the number of storage locations allocated to it in the DEFINE_VARIABLE section. For example, if the string GOODBYE is placed in the CAM_PRESETS variable, the array will only contain the string GOODBY, dropping the final E because CAM_PRESETS was defined to hold a maximum of six locations.
Arrays and Strings DEFINE_PROGRAM TEMP[1] = SCREEN_UP TEMP[2] = 5 TEMP[3] = Ø TEMP[4] = 'N' TEMP[5] = 'O' TEMP[6] = X CAM_PRESETS = TEMP The contents of the array CAM_PRESETS, after this code is executed, depend on the length value of the TEMP variable. If this were the entire program, TEMP would have a default length of Ø, so nothing would be copied into CAM_PRESETS.
Arrays and Strings Array Manipulation Keywords (Cont.) FIND_STRING This keyword will search through a string for a specified sequence of characters. When a duplication of the sequence is found, it returns the beginning position of that sequence. The keywords explained previously are helpful when you know where certain parts of strings are located within a string array. However, there will be times when you don't know where certain parts of strings are located.
Arrays and Strings Uppercase vs. Lowercase When using FIND_STRING and REMOVE_STRING, as well as when comparing two string values, it is important to remember that such comparisons are case sensitive, which means that uppercase and lowercase values are not evaluated the same. As you recall, the compiler is not case sensitive when it comes to keywords and identifiers. However, the compiler is case sensitive when it comes to values inside single quotes (string literals).
Arrays and Strings Sending Strings To send a string to the outside world, use the SEND_STRING keyword. The syntax is: SEND_STRING device, The first value after the SEND_STRING keyword is the device number or identifier to which you wish to send the string. Following that is a comma, then the string, variable (which can be either a normal variable or an array), or string expression you wish to send.
Arrays and Strings Array Keywords (Cont.) MID_STRING Returns the specified number of characters starting at a specified location in the source string. The length value of the array must be greater than 0; the returned value is an array. Syntax: result = MID_STRING (string array, starting position, number of characters) REMOVE_STRING Finds and removes a specified sequence of characters in a specified string array. All characters up to and including the sequence are removed.
Levels Levels Introduction to Levels Devices such as volume control cards, voltage generator cards, and pan/tilt control cards use levels to interface with the outside world. Levels are values related to an analog input or output on an Axcess device. Several Axcess panels have bargraph displays capable of displaying a level. An input/output (I/O) channel in Axcess is usually digital in nature; that is, it is always either in an ON or OFF state.
Levels contain the value of the level with which it is associated. Since this association only needs to occur once, this keyword is only allowed to appear in the DEFINE_START section of your program. In this section, you will develop a new program that handles levels. This system contains a volume control card to control a volume level, and a Touch Panel for the user to control the volume card. On the Touch Panel there will be four buttons: Volume Up, Volume Down, Volume Mute, and Volume Preset.
Levels DEFINE_PROGRAM PUSH[TP,17] (* VOLUME UP *) { OFF[VOLUME,VOL_MUTE] TO[VOLUME,VOL_UP] } PUSH[TP,18] (* VOLUME DOWN *) { OFF[VOLUME,VOL_MUTE] TO[VOLUME,VOL_DN] } PUSH[TP,19] (* VOLUME MUTE *) [VOLUME,VOL_MUTE] = NOT [VOLUME,VOL_MUTE] [TP,17] = [VOLUME,VOL_UP] [TP,18] = [VOLUME,VOL_DN] [TP,19] = [VOLUME,VOL_MUTE] Notice that the Volume Up and Volume Down buttons will automatically un-mute the volume before starting to ramp the volume up or down.
Levels Using Levels Reading Levels When a level is associated with a variable using CREATE_LEVEL, Axcess continually keeps the variable updated with the value of that level. As the user ramps the volume level up, the value in VOL_LEVEL increases. When the volume is ramped up to the maximum, VOL_LEVEL will contain 255, and when the volume is muted, the variable will contain Ø. The AXC-VOL volume card remembers the last level when it is muted so that it can un-mute to that same level.
Levels Since this code resides in mainline, it will be executed continually, thus making sure that the bargraph always reflects the value of level number 1 of the volume card. As the volume ramps up, VOL_LEVEL increases and the bargraph fills. As the volume ramps down, VOL_LEVEL decreases and the level indicated on the bargraph also decreases. Since both volume levels are ramping together, you only have to track one of them for the bargraph.
Levels 46 Axcess Programming Language
Operators Operators Changing and Comparing Values In your Axcess program, you may need to increase the value of a variable, to see if that variable has reached a certain value, or to compare different values to each other. The tools that you use to perform these tasks are called operators. There are four types of operators in Axcess: arithmetic, relational, logical, and bitwise.
Operators X = 12 Y = 15 IF (X > Y) (* Statement 1 *) ELSE (* Statement 2 *) Notice that the result of the expression (X > Y) determines the path Axcess takes. Since X is less than Y, Statement 1 is bypassed and Statement 2 is executed. You do not have to specify two paths. However, if there is no ELSE present, Axcess will skip the statement or compound statement underneath the false relational expression.
Operators Logical Operators Logical operators, or Boolean operators, like relational operators produce either true or false result. Instead of using greater or less than signs, logical operators use the following keywords: AND Both conditions must be true for the result to be true. OR At least one of the conditions must be true for the result to be true. XOR Only one condition can be true for the result to be true. NOT This keyword uses only one condition.
Operators DEFINE_PROGRAM IF (X < 5) X = X + 1 ELSE X = Ø In this case, X acts like a counter. If X does not equal 5, its value is increased by one. Eventually X will equal 5; the Else statement will set it back to 0. Unlike relational operators, logical operators can appear more than once in an expression. For example: X = 2 Y = 7 Z = 12 IF ((X = 2) AND (Y > 4) OR (Z <= 8)) { (* Statement 1 *) } Since the operators AND and OR have the same precedence, AND is evaluated first since it appears first.
Operators Abbreviations Instead of typing AND and BNOT in your programs, you can use some abbreviations for the logical and bitwise operators. For example, the characters && can take the place of AND, and ~ can replace BNOT. Use the method you are comfortable with; one way is easier to read; the other is faster to type. The following table lists the supported logical and bitwise operators.
Operators result of this part of the expression is true, becoming the second condition to the AND operator. Since both portions of the AND statement are true, statement 1 executes. X = 2 Y = 7 Z = 12 IF ((X = 2) AND ((Y > 4) OR (Z <= 8))) (* Statement 1 *) Operator Keywords Operator keywords and abbreviations (logical and bitwise) supported in Axcess are listed below. Operator Keywords AND (&&) Evaluates two conditions. These conditions must be true for the entire expression to be true.
Operators Bitwise Operator Keywords Bitwise operator keywords and abbreviations supported in Axcess are listed below: Bitwise Operator Keywords BAND (&) Performs a bitwise And operation between two bytes. Each of these bytes can be a constant value, number, or variable. The result of the operation can be tested with an IF statement or assigned to a variable. Example: X = 5 BAND 14 BNOT (~) (* X is equal to 4 *) Performs a bitwise Not operation on a byte.
Operators 54 Axcess Programming Language
Variable Types and Conversions Variable Types and Conversions ASCII Codes A string is broken up into single letters when placed into a string array. Each storage space returns the letter it is holding when referenced. For the following example, assume that TEMP[3] holds the letter R.
Variable Types and Conversions There are certain limitations of integer arrays. If an integer array is assigned to a normal array. Values above 255 are truncated. For more information on truncating values, refer to Definition Sections on page 9. This also happens if an integer array is sent to a device using the keywords SEND_STRING or SEND_COMMAND. There is no problem, however, in assigning a normal array to an integer array.
Variable Types and Conversions Conversion Keywords (Cont.) ITOHEX ITOHEX stands for "integer to hexadecimal". It works in the same manner as ITOA, except that the integer is transformed into a hexadecimal ASCII string. If you substitute the ITOA keywords in the previous example with ITOHEX keywords, this would be the result: STR = ITOHEX(123) (* STR = '7B' *) STR = ITOHEX(CONST) (* STR = '1C8' *) STR = ITOHEX(VAR) (* STR = '315' *) Notice there are no dollar signs ($) in the results.
Variable Types and Conversions 58 Axcess Programming Language
Two-Dimensional Arrays Two-Dimensional Arrays The previous sections described how to group data into arrays and how to manipulate those arrays as single units. This section describes how to group multiple arrays together into one twodimensional array. Two-dimensional arrays provide greater flexibility and power for more complex applications. This section includes explanations of the concepts involved, and example Axcess programming code.
Two-Dimensional Arrays For example: DEFINE_VARIABLE NAMES[1Ø][3Ø] (* two-dimensional array *) PEOPLE[8][2Ø] (* another two-dimensional array *) ONE_NAME[3Ø] (* one-dimensional array *) A_VALUE (* single-value variable *) DEFINE_PROGRAM A_VALUE = 1Ø (* statement 1 *) ONE_NAME = 'EMMITT SMITH' (* statement 2 *) NAMES[1][1] = 6 (* statement 3 *) NAMES[1][2] = A_VALUE (* statement 4 *) NAMES[2] = 'TROY AIKMAN' (* statement 5 *) NAMES[3] = "1,2,ONE_NAME,3" (* statement 6 *) FIG.
Two-Dimensional Arrays This line of code takes whatever value is in the sixth location of the third row in the twodimensional array NAMES, and assigns it to the variable VALUE. In the context of the previous examples, VALUE will now contain an E. Only the first index value is used when retrieving a whole row. The index value indicates the row to be retrieved, and the length value for that row determines how many locations from the row are actually retrieved.
Two-Dimensional Arrays 62 Axcess Programming Language
IF and the Boolean Expressions IF and the Boolean Expressions While your first program may seem complicated, it doesn't show the real power of the Axcess language. At this point, the program is button-for-button. This means that each button has only one function, with no special conditions or considerations. The control panel has a separate section of buttons for each piece of equipment. In many cases, you may want the same number of functions with fewer buttons.
IF and the Boolean Expressions A Boolean expression can have one of two results: true or false. In Axcess, any non-zero value is true, while a zero value is false. When Axcess evaluates a Boolean expression, it assigns a 1 for a true result, and a Ø for a false result. The IF Statement The most common keyword in Axcess that uses Boolean expressions is the IF keyword. Every IF statement must be followed by a Boolean expression enclosed in parentheses.
IF and the Boolean Expressions IF (X = 5) IF (Y = 1Ø) (*Statement 1*) ELSE (*Statement 2*) The alignment of the ELSE statement with the IF (X = 5) suggests that they should be associated. The second IF statement in this example is not intended to have an ELSE counterpart. However, Axcess pairs the second IF statement with the ELSE, because the compiler associates the ELSE with the closest IF statement. Braces force the compiler to associate the ELSE with IF (X = 5).
IF and the Boolean Expressions SELECT { ACTIVE (condition) : (*statement*) ACTIVE (condition) : (*statement*) ACTIVE (condition) : (*statement*) ACTIVE (1) : (*default statement*) } Here, the last ACTIVE will always be true, and will execute only if all of the conditions of the previous ACTIVES are false. This makes the last ACTIVE's statement the default statement. More Boolean operators The previously discussed IF and IF...ELSE statements could only base the program flow on one condition.
IF and the Boolean Expressions FIG. 21 An example of how a Boolean expression table is used to compare multiple conditions. The Boolean expression tables in FIG. 22 are a quick reference guide for the result of a Boolean expression. FIG. 22 Sample Boolean truth table results Boolean Keywords The Boolean keywords supported by Axcess are described below: Boolean Keywords SELECT...ACTIVE The SELECT...ACTIVE statement allows easy placement of several branches from one path.
IF and the Boolean Expressions Boolean Keywords (Cont.) IF...ELSE The IF...ELSE statements are similar to the basic IF statement, with the addition of an alternative instruction. If the expression is false, Axcess executes a statement independent of the true expression. For example: IF (expression) (* Statement 1 *) ELSE (* Statement 2 *) If the expression is true, then Statement 1 is executed and Statement 2, underneath the ELSE statement, is ignored.
While Keywords While Keywords This section decribes the While keywords (WHILE, MEDIUM_WHILE, and LONG_WHILE). WHILE The WHILE family of keywords allow the program to loop through a certain section of a program until a condition becomes true. If the condition is false, Axcess skips the statements immediately following the WHILE. If the condition is true, Axcess executes the statements, and rechecks the WHILE's conditional expression. If the condition is still true, the statements are executed again.
While Keywords While Keywords While Keywords WHILE Axcess checks to see if the condition following it is true, then either executes statements within the WHILE statement, or continues to the next statements in the code. Example: DEFINE_VARIABLE RELAY_INDEX (* FOR TURNING ON RELAYS *) DEFINE_PROGRAM RELAY_INDEX = 1 WHILE (RELAY_INDEX <= 14) { ON[RELAY,RELAY_INDEX] RELAY_INDEX = RELAY_INDEX + 1 } In this example, the variable RELAY_INDEX is first set to 1.
While Keywords While Keywords (Cont.) LONG_WHILE In cases where a WHILE loop takes longer than one half-second to execute, change the WHILE keyword in question to a LONG_WHILE. You must provide a way out of your LONG_WHILE (by allowing the condition to become false), the program will become stuck inside the LONG_WHILE and no other code outside of the loop will be executed.
While Keywords 72 Axcess Programming Language
Using Buffers Using Buffers Communicating to the Outside World One of the most powerful features of Axcess is its ability to send and receive any combination of values using RS-232, RS-422, RS-485, PA-422, MIDI, and a variety of other formats. You have the ability to construct any combination of numbers and characters with the string expression and send it to an external device. In addition, you can receive strings from external devices and interpret them to obtain useful information.
Using Buffers If the buffer is full when a character needs to be inserted into it, Axcess drops the first character and shifts the contents of the buffer to the left, and inserts the new character at the end of the buffer, as shown in FIG. 24. FIG. 24 Inserting a character into a full buffer causes the first character to be dropped. Retrieving characters Use the keyword GET_BUFFER_CHAR to retrieve characters.
Using Buffers Getting the data out of the buffer as soon as it enters is usually a two-step process, as shown in this example: DEFINE_PROGRAM IF (LENGTH_STRING(SWT_BUFFER)) { TEMP_CHAR = GET_BUFFER_CHAR(SWT_BUFFER) IF (TEMP_CHAR = 'T' || TEMP_CHAR = '.') { SEND_STRING Ø,"'SWITCH COMMAND COMPLETE',$ØD,$ØA" } } These two lines of code are actually one IF statement. The condition of the IF is the result of the LENGTH_STRING keyword.
Using Buffers REMOVE_STRING will remove all characters up to and including the 'T' or the '.'. So if the SWT_BUFFER contained a 'CI1O1T', then after the line of code: TRASH = REMOVE_STRING(SWT_BUFFER,'T',1) TRASH would be equal to 'CI1O1T'. Once the proper response from the switcher is verified, it Axcess prints out the message SWT ACK to the terminal. Buffer Keywords The Buffer keywords supported by Axcess are described below: Buffer Keywords CLEAR_BUFFER BUFR Clears a buffer.
Using Buffers Buffer Keywords (Cont.) GET_BUFFER_CHAR It has a two-part operation: THIS keyword is used to remove characters from a buffer. • First, it retrieves the first character in the buffer for your own utilization. This creates the same effect as if you retrieved the first storage location of a normal string array. • Second, it removes that character from the buffer, causing all the other characters to shift up one place.
Using Buffers 78 Axcess Programming Language
Waits and Timer Keywords Waits and Timer Keywords Controlling Time in Axcess There are several of timing keywords available in Axcess. Functions can be delayed for a few seconds, or they can be delayed until certain conditions are right. The built-in stopwatch allows you to measure time intervals between operations in your program. For example, you can program Axcess to start playing a tape precisely on Saturday at 3:15 PM. This section describes the timing keywords and how to apply them to your programs.
Waits and Timer Keywords DEFINE_PROGRAM PUSH[TP,8] (* POWER ON/OFF *) { IF ([RELAY,RACK_POWER]) { CANCEL_WAIT 'AMPS ON' OFF[RELAY,AMP_POWER] WAIT 1Ø 'SYSTEM OFF' OFF[RELAY, RACK_POWER] } ELSE { CANCEL_WAIT 'SYSTEM OFF' ON[RELAY, RACK_POWER] WAIT 1Ø 'AMPS ON' ON[RELAY,AMP_POWER] } } Notice the organization of the above set of statements.
Waits and Timer Keywords Multiple Waits At this point, the System Power button completes two events, with a delay in between. In many cases, you may want to initiate a series of several events by pressing one button. In this section, you will make the System Power button accomplish several more things when the power is turned on and off. For example, when the power is turned on, you may want a series of timed events to take place. First, the rack power comes on.
Waits and Timer Keywords Naming Waits When a WAIT is given a unique name, it can be either canceled, paused, or restarted. To name a WAIT, place a name in single quotes after the WAIT statement. For example: WAIT 3Ø 'DELAY' There are certain considerations in naming WAITs: ! They should not be previously defined constants or variables. ! They cannot be names that have already been assigned to buffers or subroutines. For detailed information on buffers refer to Using Buffers.
Waits and Timer Keywords In this example, Axcess waits 20 seconds, turns on the Screen Up relay, waits 20 more seconds, then turns off the Screen Up relay. Any timed sequence of events can be accomplished with or without nested WAITs. In many cases, using nested WAITs is more readable than non-nested WAITs Special Uses of Wait A WAIT time of Ø is a special case. The code following the WAIT will be executed directly after the current pass through mainline. This is because the WAIT goes into the wait list.
Waits and Timer Keywords It is not necessary to use WAIT_UNTIL in your program yet, but the following program segment illustrates the possible misuse of WAIT_UNTIL: DEFINE_PROGRAM WAIT_UNTIL (Y = 4) { X = Ø Y = Ø } Y = 4 Y = 3 In this example, Y will never equal 4 at the end of mainline. The WAIT_UNTIL in this case is useless. This problem could make its way into a large program. Axcess cannot detect this sort of logic error, so be sure that each WAIT_UNTIL statement can become true.
Waits and Timer Keywords Timer Keywords (Cont.) GET_TIMER The GET_TIMER system variable contains the current status of the timer. Usually this keyword is used in conjunction with an IF statement, as shown in the following example: DEFINE PROGRAM IF (GET_TIMER >= 1ØØ) { SEND_STRING Ø,"'TIMER VALUE IS = 1ØØ',$ØD,$ØA" } In this example, a greater-than sign was combined with the equal sign (³).The timer could reach the number 100 while the program is being executed elsewhere.
Waits and Timer Keywords 86 Axcess Programming Language
Using Time, Date, and Day Using Time, Date, and Day The system variables TIME, DATE, and DAY can be used to create timing functions. TIME contains the current time in the form of the string HH:MM:SS, in which HH equals hours, MM equals minutes, and SS equals seconds. The time is given in a 24-hour format (military time). DATE contains the current date in the form of the string MM/DD/YY, in which MM equals month, DD equals day, and YY equals year.
Using Time, Date, and Day Time, Date, and Day Keywords Time, Date, and Day Keywords DATE The system variable DATE returns the current date in the form of the string MM/DD/YY, in which MM equals month, DD equals day, and YY equals year. DAY The system variable DAY returns the current day of the week in the form of one of the strings MON, TUE, WED, THU, FRI, SAT, or SUN.
Using Subroutines Using Subroutines In larger programs, you may want to break the program into smaller, more manageable parts called subroutines. A subroutine is a section of code that stands alone and can be called from anywhere else in the program. The most common usage of subroutines is to execute the same group of instructions from different places in the program. Using a subroutine allows you to avoid having to retype those instructions over and over in the program.
Using Subroutines Local Variables and Parameters Two features that expand on the functionality of subroutines are local variables and parameters. Using these features can help simplify your programs, add more power to your code, and make your program easier to read and understand. Local Variables The first of these two features is the local variable. A local variable is a variable which is declared inside a DEFINE_CALL and can only be used inside that same DEFINE_CALL.
Using Subroutines DEFINE_CALL 'DO SWITCH' (CARD,INPUT,OUTPUT) { SEND_STRING CARD,"'CI',ITOA(INPUT),'O',ITOA(OUTPUT),'T'" } This subroutine is defined as having 3 parameters, CARD, INPUT and OUTPUT (enclosed in parentheses), which are essentially local variables of the subroutine. These variables, however, have their initial values set by the parameters in the CALL statement which called the routine.
Using Subroutines When the subroutine SQUARE is called with a variable as a parameter (in this case, X), a series of events occurs. ! The value of the variable (in this case, 5) is assigned to NUMBER. ! The subroutine takes the parameter, multiplies it by itself (squaring it) and assigns the result back to itself. ! Axcess then reassigns NUMBER back to the variable X, so that upon return from the subroutine, X will contain its previous value squared.
Using Subroutines Local Variables and Parameter Keywords The Local Variables and Parameter keywords supported by Axcess are described below: Local Variables and Parameter Keywords CALL To tell Axcess to execute a subroutine, use the CALL keyword and the name of the subroutine in single quotes. DEFINE_CALL In Axcess, subroutines are created using the DEFINE_CALL statement.
Using Subroutines 94 Axcess Programming Language
Include Files and System_Calls Include Files and System_Calls Managing Large Programs Include files and SYSTEM_CALLS are important in managing large programs, and in simplifying basic programming. Include files allow you to break a large program into smaller, more manageable files. SYSTEM_CALLS provide ready access to pre-canned programming solutions and tools, without having to rewrite them. Include files Typically, your program will reside in a single file.
Include Files and System_Calls ! Place each definition section in its own include file ! Group sections of the main program into include files ! Place all subroutines into an include file ! Place routines that you want to share between multiple programs into an include file ! Place code you wish to re-use in other systems into include files Include files are loaded and edited using the Axcess editor much like normal program files.
Include Files and System_Calls FIG. 27 Compilation flow using an include file When using SYSTEM_CALLs, you do not have to implicitly include the file with the subroutine you wish to use; Axcess does this for you automatically. The SYSTEM_CALL is like a combination of the INCLUDE and CALL keywords. Factory System_Calls AMX has written a number of SYSTEM_CALLs to handle many of the most common programming requirements in Axcess Control Systems, called Factory SYSTEM_CALLs.
Include Files and System_Calls DEFINE_VARIABLE NUM1 NUM2 DEFINE_PROGRAM NUM1 = 5 NUM2 = 6 SYSTEM_CALL 'SQUARE' (NUM1) SYSTEM_CALL 'SQUARE' (NUM2) This code generates two calls to the subroutine SQUARE in the library file, but it only includes and compiles the library file once. The two SYSTEM_CALLs call the same routine. This is acceptable for most SYSTEM_CALLs, but there are occasions where this could cause problems, as shown in the following example.
Include Files and System_Calls The number in the brackets is the instance number. The instance number tells the compiler to compile multiple copies of the routine, and have the different SYSTEM_CALLs each call a separate copy. The compiler does this by using the instance number to modify the actual name of the DEFINE_CALL before compiling it. When compiling a library file called with an instance number, Axcess converts the number to ASCII and appends it to the DEFINE_CALL name, as shown in FIG. 28. FIG.
Include Files and System_Calls 100 Axcess Programming Language
Pre-Processor Statements Pre-Processor Statements Pre-Processor Statements supported by Axcess include the Include File and System_Call Keywords, described below: Include File and System_Call Keywords INCLUDE When the compiler reaches the INCLUDE statement, it jumps to the specified file and continues compiling. When it has reached the end of that file, it comes back to the line following the INCLUDE statement and continues compiling.
Pre-Processor Statements Include File and System_Call Keywords (Cont.) Its purpose is to remind the user of certain conditions that were placed in the program. For example: This compiler directive keyword forces a warning mes#WARN 'This is obsolete code' sage to be displayed after the #End_If program is compiled. This keyword marks the end of an #IF_DEFINED or #IF_NOT_DEFINED block of code.
Debugging Debugging No programs are ever written without errors on the first try, and one of the most time-consuming parts of programming is debugging. Use this section as a reference to help minimize this process. Types of Errors There are three general types of programming errors: ! Compilation errors: Errors that occur at compile time. The Axcess compiler alerts you to these errors immediately and identifies each error and the line where it is located.
Debugging Compilation Errors and Warnings (w) Cannot assign unlike types This warning occurs when a variable or value of one type is assigned to a variable of a different type. Here are some examples: • Assigning a string literal, string expression, or array to a non-array variable. • Assigning a non-array variable to an entire array. • Assigning an integer array to a non-integer array. • Assigning a two-dimensional array to a one-dimensional array, or vice versa.
Debugging Run-Time Errors In many cases, a program is compiled and sent to the Central Controller error-free, but the system does not act in the way it should. If the program code is correct, you should check for run-time errors. These errors occur in the Central Controller, usually when it could not perform a particular operation in the program. Using AMX BUG Normally, there is no way to tell if a run-time error occurred, or what type of run-time error occurred.
Debugging Tracking down your errors Finding run-time errors and logic errors can sometimes be difficult. Observing the values of variables during program execution, following program flow through conditional statements, and finding the locations of run-time errors are not easy tasks. However, there are some tools to help in your debugging. Tracing program flow Many times, you may want to know if or when your program reaches a certain point.
Debugging Viewing Variables There are two ways to view the values in variables as a program is executed. You can use the SEND_STRING Ø method to display a variable's value at certain points in a program, or you can use the variable watch window. The variable watch window is accessed through the Diagnostics menu, and it can only be activated if there is a compiled program loaded in the computer and Central Controller. FIG. 29 shows the variable watch window. FIG.
Debugging 108 ! - Toggles the Step mode between run and single step mode. In run mode, the system program is executed normally in the Central Controller. In single step mode, program execution is suspended between each pass through mainline. ! - In single step mode, this key causes mainline to be executed once. This key only functions in single step mode. ! - Allows you to change the way the variable is displayed.
Compiler Error Messages Compiler Error Messages This section lists all of the messages that can occur when there is an error during the compilation of your program. Unlike warnings, errors must be corrected before your Axcess program can be executed. Compiler Error Messages Error Description A "" was expected The compiler is expecting a certain symbol at this particular place. Active keyword expected An ACTIVE keyword is not present after a SELECT keyword.
Compiler Error Messages Compiler Error Messages (Cont.) Library file not found The library file containing the specified SYSTEM_CALL could not be found. Maximum string length exceeded String literals are limited in length to 132 characters, including spaces. Must be char array reference An array type variable was expected in CREATE_BUFFER, CREATE_MULTI_BUFFER, or CLEAR_BUFFER. Must be integer reference The identifier in question must be an integer.
Compiler Error Messages Compiler Error Messages (Cont.) Too few parameters in Call There are not enough parameters being passed to the subroutine. Too many include files A program may only contain up to 20 include files. Too many parameters in Call There are too many parameters being passed to the subroutine. Type mismatch in function call A function was called with a parameter of the wrong type. For instance, attempting to use ITOA with an array as a parameter will result in an error.
Compiler Error Messages 112 Axcess Programming Language
The External_Control Protocol The External_Control Protocol Controlling Axcess from the Outside Not every Axcess system is controlled by control panels; sometimes the control comes from another device, such as a computer (via modem, if necessary) or another Axcess system. To facilitate this, Axcess supports a simple serial communications protocol that allows every Axcess function to be controlled from an outside source via an AXC-232 RS-232/422 Control Card or RS232 port on another Axcess control system.
The External_Control Protocol Command packets (Cont.) Command Packet structure SET BYTE LEVEL '*' <13> SET WORD LEVEL '*' <14>
The External_Control Protocol This is the exact packet as sent previously with the exception of a different attention byte; it is $26 because this is a response. If you don't want these responses to appear, you can turn them off by sending the RESPONSE MASK command (11) with the appropriate mask byte. Only three responses can be turned off, and their mask bit positions are shown in FIG. 30. A zero (Ø) bit turns the response off, and a one (1) bit turns the response on. FIG.
The External_Control Protocol 116 Axcess Programming Language
Appendix Appendix This section contains Axcess-related reference material in the following sub-sections: ! Axcess Programming Standards ! Axcess Keywords ! ASCII Code Chart ! ASCII Code Chart Abbreviations Axcess Programming Standards 1. Keep pertinent job information in a consistent order in the program name.
Appendix Standard: PROGRAM_NAME='AMX01, BOARDROOM, SO#99999, REV2, XXX/BETA' (* DATE:04/08/95 TIME:01:23:45 *) (* SYSTEM TYPE: ENHANCED MASTER V3.
Appendix Standard: SLD_L = 96 (* AXB-SLD - LEFT PROJECTOR *) SLD_R = 97 (* AXB-SLD - RIGHT PROJECTOR *) FLOPPY = 127 (* AXB-FD - *) RADIO = 128 (* AXR-RF - TXC16,RC8; TXC16,RC9 *) RADIO2 = 129 (* AXR-RF - COMBINED *) TP_PODIUM = 130 (* AXP-EL+ - PODIUM PANEL *) TP_CONTROL = 131 (* AXP-EL+ - CONTROL ROOM PANEL *) 7. List all devices in numerical order in the DEFINE_DEVICE section, using descriptive names.
Appendix Standard: DEFINE_DEVICE (* devices here *) DEFINE_COMBINE (* makes things more obvious *) DEFINE_CONSTANT (* constants here *) 10. Include files should be listed after all DEFINE_CALLs and before DEFINE_START. Standard: DEFINE_CALL 'IMPORTANT STUFF' (* IMPORTANT STUFF CODE *) INCLUDE 'MORECODE.AXI' (* CONTAINS CODE THAT *) (* DOES VARIOUS THINGS *) DEFINE_START 11. Comments and code should be in upper case.
Appendix 13. Every command should be on its own line. Not recommended: OFF [RELAY,1] OFF [RELAY,2] WAIT 30 'STOP DECK' OFF [RELAY,3] Standard: OFF [SYS_PWR,1] (* SYSTEM POWER OFF *) OFF [AMP,AMP_PWR] (* AMP POWER OFF *) WAIT 30 'STOP DECK' OFF [VCR,VCR_STOP] 14. Braces should get their own line.
Appendix 16. No line should extend beyond the edge of the screen, and multi-line commands should be aligned. Not recommended: IF(SYSTEM_POWER AND(SYSTEM_POWER AND([INPUT,TV_POWER]OR IN | CALL 'CHANGE CHANNEL' (TUNER,CHANNEL) | [TP,169]=SYTEM_POWER AND ([INPUT,TV_POWER] OR [(INPUT,VCR_| Standard: IF(SYSTEM_POWER AND (SYSTEM_POWER AND ([INPUT,TV_POWER] OR | INPUT,VCR_POWER]))) | CALL 'CHANGE CHANNEL' (TUNER,CHANNEL) | [TP,169] = SYTEM_POWER AND ([INPUT,TV_POWER] OR | [INPUT,VCR_POWER]) 17.
Appendix Not recommended: PUSH[TP,25] TO [RELAY,3] (* LIGHTS OFF *) [TP,25]=[RELAY,3] SYSTEM_CALL [1] 'VCR1' (VHS,TP,1,2,3,4,5,6,7,0,0) PUSH[TP,26] TO [RELAY,4] (* LIGHTS ON *) [TP,26]=[RELAY,4] Standard: (* TRANSPORT CONTROL ***************************) SYSTEM_CALL 'VCR1' [1] (VHS,TP,1,2,3,4,5,6,7,0,0) (* LIGHTING CONTROL ****************************) PUSH[TP,26] TO [RELAY,4] (* LIGHTS ON *) [TP,26]=[RELAY,4] PUSH[TP,25] TO [RELAY,3] (* LIGHTS OFF *) [TP,25]=[RELAY,3] 22.
Appendix Standard: (* LIGHTING CONTROL ****************************) PUSH[TP,25] TO [LIGHTS,LIGHTS_ON] (* LIGHTS OFF *) PUSH[TP,26] TO [LIGHTS,LIGHTS_OFF] (* LIGHTS ON *) [TP,25]=[LIGHTS,LIGHTS_ON] [TP,26]=[LIGHTS,LIGHTS_OFF] Also acceptable: (* LIGHTING CONTROL ****************************) PUSH[TP,25] TO [RELAY,3] (* LIGHTS OFF *) [TP,25]=[RELAY,3] PUSH[TP,26] TO [RELAY,4] (* LIGHTS ON *) [TP,26]=[RELAY,4] 24.
Appendix 26. Every DEFINE_CALL should at least have a descriptive name and descriptive names for all parameters and local variables. Not recommended: DEFINE_CALL 'DO SOMETHING' (C,N) LOCAL_VAR LOOP (* LOOP COUNTER *) { LOOP= Ø WHILE (LOOP < N) { LOOP=LOOP+1 OFF [C,LOOP] } } Standard: DEFINE_CALL 'TURN RELAYS OFF' (CARD,RELAY_NUMBER) LOCAL_VAR LOOP,PRE (* LOOP COUNTER *) { PRE=1ØØ LOOP=Ø WHILE (LOOP
Appendix DEFINE PROGRAM ... (* KEYPAD *) IF(PUSH_CHANNEL>=8Ø AND PUSH_CHANNEL<=89) { (* CODE TO EXECUTE GOES HERE *) } Axcess Keywords Keywords are certain identifiers that are reserved for Axcess commands, functions, and system variables. These are integral to the system and cannot be redefined or used as identifiers. The table below contains an alphabetical list of the Axcess keywords.
Appendix ASCII Code Chart FIG. 32 lists the hexadecimal values for all ASCII characters. FIG.
Appendix Hexadecimal Chart Abbreviations The following table defines the abbreviated terms in the ASCII chart.
Accessing the AMX BBS Accessing the AMX BBS About Worldgroup Manager Worldgroup Manager is a Windows application designed to provide an intuitive, graphical user interface to the AMX BBS. The software is easily installed on your PC from the Control Disc. Installing Worldgroup Manager Find the folder (directory) named WorldGrp on the Control Disc. Inside you will find the file, SETUP.EXE. Run this program and follow/answer the prompts to install the program.
Accessing the AMX BBS a. Leave Log on as new user checked. b. You will need to fill in your user information the first time you log on. After you log in the for the first time, call AMX technical support to get your account updated properly. 6. Click on OK to close the Online Service Properties dialog box. 7. Set up the AMX BBS in the Online Service Properties dialog for internet (telnet) connection. a. Type AMX BBS in the name field b. Click Telnet in the How to Connect section c. Enter "BBS.AMX.
Index Index Symbols #DEFINE 101 #END_IF 101 #IF_DEFINED 101 #IF_NOT_DEFINED 101 #WARN 102 $26 (&) 114 $2A (*) 114 'name' 111 (w) Cannot assign unlike types 104 (w) Define_Call is not used 104 (w) Integer applies to arrays only 104 (w) Long_While within While 104 (w) Possibly too many nested levels 104 (w) Variable is not used 104 _ _ VERSION _ _ 102 _ _FILE_ _ 102 _ _LINE_ _ 102 _ _NAME_ _ 102 _ _TIME_ _ 102 A A "" was expected 109 Accessing and Storing Array Values 31 Active keyword expected 109 Allowed
Index Constants 10 Controlling Time in Axcess 79 Conversion Keywords 56 ATOI 56 INTEGER 56 ITOA 56 ITOHEX 57 F Factory System_Calls 97 Feedback 23 feedback statement 23 G CREATE_BUFFER 73, 76 CREATE_LEVEL 41 CREATE_MULTI_BUFFER 76 Creating buffers 73 Creating Levels 41 D DATE 87, 88 DAY 87, 88 Debugging 103 DEFINE_CALL 93 Define_Call must have a name 109 Define_Call name already used 109 Define_Combine 25 DEFINE_DEVICE section 9 Define_Latching 26 Define_Mutually_Exclusive 26 DEFINE_PROGRAM header 12
Index Local Variables 90 Local Variables and Parameter Keywords 93 Local Variables and Parameters 90 LOCAL_VAR 93 Logic errors 103 Logical Operators AND 49 NOT 49 OR 49 XOR 49 Passing values back to the caller 91 precedence among the operators 51 Pre-Processor Statements 101 Program_Name must be on line 1 110 Programming Feedback 23 PULSE 113 Push/Release not allowed within Push/Release 110 Push/Release not allowed within Wait 110 Push_Channel not allowed within Wait 110 Push_Device not allowed within Wa
Index String Lengths 34 String literal expected 110 string literals 33 Strings 33 Subroutine may not call itself 110 Subroutines 89 Syntax error 110 SYSTEM_CALL 101 System_Call name not same as Program_Name in 110 System_Calls and Library files 96 T The IF Statement 64 The If...Else If Set of Statements 64 The If...Else Set of Statements 64 The Select...
Index Axcess Programming Language 135
brussels • dallas • los angeles • mexico city • philadelphia • shanghai • singapore • tampa • toronto* • york 3000 research drive, richardson, TX 75082 USA • 469.624.8000 • 800.222.0193 • fax 469.624.7153 • technical support 800.932.6993 033-004-1818 2/02 ©2002 AMX Corporation. All rights reserved. AMX, the AMX logo, the building icon, the home icon, and the light bulb icon are all trademarks of AMX Corporation. AMX reserves the right to alter specifications without notice at any time.