StorTrends® iTX Software CLI (Command Line Interface) (Version 2.
© Copyright 1985-2010 American Megatrends, Inc. All rights reserved. American Megatrends, Inc. 5555 Oakbrook Parkway Norcross, GA 30093 This publication contains proprietary information which is protected by copyright. No part of this publication can be reproduced, transcribed, stored in a retrieval system, translated into any language or computer language, or transmitted in any form whatsoever without the prior written consent of the publisher, American Megatrends, Inc. American Megatrends, Inc.
01/25/10 03/30/10 04/11/10 06/07/10 06/07/10 06/07/10 06/07/10 06/07/10 06/07/10 06/07/10 Updated the iSCSI commands and corrected wrong format updation Corrected the Create Volume usage and Get Eventlog Usage. Update the create replication commands Corrected the output of ‘cli main’. Removed the term apple Corrected set -t nfs command. Corrected set raid commands. Added available cache options for create raid. Since alarm and cache is supported for set raid; the ‘not supported’ was removed.
Table of Contents Revision History ......................................................................................................................................... ii Table of Contents ..................................................................................................................................... iv Table of Contents ..................................................................................................................................... iv Limited Warranty .........
Limited Warranty The buyer agrees that if this product proves to be defective, American Megatrends is only obligated to repair or replace this product at American Megatrends’ discretion according to the terms and conditions of the warranty registration software that accompanies this product. American Megatrends shall not be liable in tort or contract for any loss or damage, direct, incidental or consequential resulting from the use of this product.
Disclaimer This manual describes the operation of the American Megatrends StorTrends® iTX Software.
Chapter 1 Overview of CLI Preface Our feature rich StorTrends® iTX comes with a built-in command line interface (CLI) that provides extensive options to monitor and control “managed objects”. Wherever applicable, CLI follows industry standards and uses extensible ‘tags’ for new features and objects. The command line utility can be accessed through an in-band special console connected to the StorTrends® iTX system or out-of-band via a SSH or telnet client.
Initial Setup Network Configuration Once the StorTrends® iTX is installed in a new system, please ensure that the initial network configuration is proper. The system factory defaults to DHCP setup. The configured network settings can be verified by the following CLI commands: CLI> get –-type or –t port -–name or –n NIC-1 --info or -i network Example: get –t port –n nic-1 –i network This will display the NIC-1 network settings.
Volume Configuration Initial volume configuration can be done in three stages. 1. RAID Disk Creation At the base level is the RAID CONTROLLER. CLI> list –-type or –t controller raid Example: list –t controller raid This will list the available RAID controllers in the system. By default, Software MD will be shown as a RAID controller with controller number “0”. If Hardware RAID controllers present, then they will take precedence over Software MD.
2. Container and Volume Configuration Next step is the AMI DVM container creation. This can be done by the following commands: CLI>create –-type or -t container –-containername or -c container1 –-chunksize or –k 64 –-ldname or –l /dev/md0 volume Example: create –t container –c accounting –k 64 –l /dev/sdb volume (for a 3U) This command creates a container named “accounting” from the LD /dev/sdb. On a 1U, LDs are created with names of /dev/mdX, with X as 0, 1, and so on.
Similarly a SAN volume can be created as follows: CLI>create –-type or –t volume –-containername or -c container1 –-volumename or -v sanvol0 –-volumesize or -z 1000 –-provisiontype or -p 0 –-volumetype or -e 0 –-voldialect or -f 0 --chunksize or –k (8 or 64 for 8KB and 64KB chunk sized volume respectively.
Then, to enable the target, use the syntax below: CLI>enable –-type or –t tgt –-targetname or -n sanvol0 iscsi Example: enable –t tgt –n sanvol0 iscsi Next step is to activate a port for iSCSI traffic. CLI>activate –-type or –t portal –-ipaddress or -p 10.0.0.100 –-portaltag or -g 1 iscsi Example: activate –t portal –p 10.0.0.100 –g 2 iscsi We recommend that you assign different portal tags to the two portals if they are on different subnets.
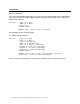
Chapter 2 Command Set Command Set The CLI design being similar to the DMTF SMASH specifications follows the standard to a great extent. The commands supported can be represented grammatically as follows:
For example: To find out how the show command works, type: CLI>show -h This will display the many ways the show command can be used. (this is redundant) For example: To display the available targets/verbs, the user has to enter: CLI>show –d targets CLI>show –d verbs The show option can display the functions available for a target or even the functions available for a verb.
Alert Configuration These commands configure the way alerts are generated. Command get alert get alert delete alert delete alert set alert set alert Argument -t/--type snmp For example: get –t snmp alert -t/--type email For example: get –t email alert -t/--type snmp -v/--value -x/--xml alert For example: delete -t snmp -v 10.0.3.155 -v 10.0.0.203 -x alert -t/--type email -v/--value -x/--xml alert For example: delete -t email -v sam@yahoo.com -v yyy@ami.
Date/Time Configuration These commands configure the time zone and date.
Event log Commands These commands display or clear the event log.
Firewall Configuration These commands configure the network firewall options. Command add firewall add firewall edit firewall delete firewall edit firewall Argument -a/--allow or -b/--block -i/--ip -m/--mask -p/--proto {icmp} -x/--xml -a/--allow -b/--block -i/--ip -m/--mask -s/--sport -e/--eport -p/--proto {tcp/udp} For example: add –a –i 10.10.1.
General Server Configuration These commands retrieve the general server information, such as build version, build date and so on. It also allows configuration of a new server name. Command get serverinfo Argument For example: get serverinfo set serverinfo -n/--name -x/--xml For example: set –n newitx serverinfo set serverinfo -p/--password –u/--user{root/cli} -x/--xml create dump Description Displays the server information such as server name, build version, build date and so on.
iSCSI Configuration Note: Targetname input: Only the suffix portion of the targetname is required. For example: “iqn.1991-10.com.ami:itx001a2b3c4d5e2006:test1” . The user needs to input only “test1”.
Command add iscsi remove iscsi get iscsi get iscsi get iscsi add iscsi remove iscsi get iscsi remove iscsi list iscsi list iscsi get iscsi set iscsi set iscsi get iscsi get iscsi set iscsi Argument -c/--containername -m/--mode {0/1/2} For example: set –t lunwritecachemode –v v1 –c c1 –m 0 iscsi -t/--type {processor} -n/--targetname -t/--type {processor} -n/--targetname -t/--type {statistics} For example: get –t statistics iscsi -t/--type {portalstat
Command enable iscsi disable iscsi get iscsi set iscsi enumerate iscsi add iscsi remove iscsi rescan iscsi update iscsi reset iscsi get iscsi set iscsi Argument For example: set –t tgtoptimizations –n t1 –p y –g 10 iscsi -t/--type { iSNSservice} -t/--type { iSNSservice} -t/--type {iSNS} -t/--type {iSNS} -e/--entityname -a /--aliasname -t/--type {initiator} -n/--targetname -t/--type {iSNSServer} -i/--ipaddress -t/--type {iSNSSe
Network Controller Configuration These commands configure the network ports. They can also be used to create virtual bonding network ports (teams) for high availability and/or load balancing.
Command remove network Argument -p/--port -t/--type alias -n/--name Description Removing an alias adapter NAS Quota Configuration These commands configure quotas for the NAS volumes of your iTX box.
NAS User / Group Configuration These commands allow viewing and configuration of the NAS Users and groups accounts. Note: Command add ug add ug delete ug get ug list ug get ug get ug set ug Known Issue: As iTX software supports enabling of ADS and NIS simultaneously, the user/group list retrieved will be given for both instead of singly.
set ug -t/--type {group} -g/--groupname -u/--username -x/--xml Adds the given user to the specified group. Multiple users can be added using –u/--username switch. (maximum of 8 users at a time) Protocol Configuration These commands configure the various network protocols supported.
RAID & Disk Management Commands These commands allow management of disks and RAID creation.
Command expand raid transform raid blink raid blink raid set raid Argument -t/--type {ld} -l/ -- ldname -d/ --diskname -s/--disksize -b/--subdisk -e/--distspare -n/--controllerno -d / --diskname -r/ --raidlevel
Command Argument -l / --ldname -m/--cachemode Cache Modes - ld 0 - None 1 - Read 2 - Write 3 - Read-Write Description rescan raid -n/--controllerno remove raid -t/--type {spare} -d / --diskname -l/ --ldname (for dedicated spare) -n/--controllerno For example: remove -t spare -d 3 -n 0 raid remove -t spare -l /dev/md0 -d /dev/sdb raid -t/--type {spare} -d / --diskname or slotindex or enclosurenumber:slotindexl/--l
Share, Directory & ACL Configuration These commands work on NAS shares and directory.
LEVEL FOR NT 0 - Apply to all levels 1 – Apply to first level PERMISSIONS FOR POSIX 0 - Read Write 1 - Read Only 2 - Deny PERMISSIONS FOR NT : The 14 bits in following order A - Traverse Folder / Execute file B - List Folder / Read Data C - Read Attributes D - Read Extended Attributes E - Create files/ Write Data F - Create folders / Append Data G - Write Attributes H - Write Extended Attributes I - Delete Subfolders and files J - Delete K - Read Permissions L - Change Permissions m - Take Ownership INHERIT
System Control Configuration These commands configure the System controls. Command shutdown system get system Argument For example: shutdown system For example: cli get -x system set system -f/--fansensors -t/--tempsensors -x/--xml reboot system Description Shuts the system down. Gets the auto shutdown information. Sets the fan sensors or temperature sensors on or off for autoshutdown (only temperature supported at this release). Reboots the system.
Command Argument -L/--localsnap delete volume -t/--type {container} -c/--containername -f/--force (optional) -r/--recursive (optional) -t/--type {volume} -c/ --containername -v/ --volumename -f/--force (optional) -t/--type {snap} -c/ --containername -v/ --volumename -s/ --snapname -f/--force (optional) -t/--type {snap} -c/ --containername -v/ --volumename -s/ --snapname -L/--localsn
Command get volume get volume get volume activate volume deactivate volume rollback volume freeze volume set volume Argument -c/ --containername -v/--volumename -t/--type {snap} -c/--containername -v/--volumename -u/--schedule -t/--type { snap} -i/--info -c/--containername -v/--volumename -s/--snapname For example: get –t snap –i –c c0 –v v0 –s snap00 volume -t/--type {container} -n /-- count -t/--snap
UPS Configuration These commands configure the UPS for power management.
Synchronous replication These commands configure synchronous replication and High Availability using Windows DSM (iTX 2.7v 2.x). Command create syncreplica Argument –l/--local < cont_vol_name> -r/--remote < cont_vol_name> -p/--priority -i/--localhost -m/--remotehost -d/--mode [sync | ha] Example: replication in local volumes create -l c0_v0 -r c1_v1 -p 50 -i 172.16.70.
High Availability (iTX27 v3.x and up ) These commands configure High Availability which is OS Agnostic Command syncparams syncreplica Argument -r/--remoteip < remote ipaddress > -x/--xmlflag For example: syncparams -r 172.16.70.
Command Argument -g/--rgname -x/--xmlflag For example: update -l c0_v0 -p 50 -m 172.16.70.102 -x syncreplica Description Update command is used to move a replication volume pair from Resource group to another. -g stands for the destination rg name.
Asynchronous Replication These commands configure asynchronous replication.
Command list asyncreplica Argument Example: list -c c0 asyncreplica -c/--containername -n/--name Example: list -n name -c c0 asyncreplica pause asyncreplica Description container. This command can be issued on both Primary and Secondary storage systems. Lists all the common snapshots (of all volumes) in the asynchronous replication pairs in the given container.
Command Argument -c/--containername -d/--index Example: failback -n name -c c0 –d 1 asyncreplica rollbackjoin asyncreplica -n/--name -c/--containername -s/--snapgrouptnum -d/--index Example: rollback -n name -c c0 –s 30 –d 1 asyncreplica rollback asyncreplica -n/--name -c/--containername -s/--snapgrouptnum -d/--index
Command update asyncreplica update asyncreplica update asyncreplica update asyncreplica update asyncreplica update asyncreplica update asyncreplica update asyncreplica update asyncreplica add asyncreplica Argument -n/--name -c/--containername -d/--index -z/--secsnapcount Example: update -n myname -d 1 -c Cont0 -z 200 asyncreplica Description Update ‘secondary snap count’ field alone.
Command Argument -s/-- schedule> -d/--index Description Replication. Note : Example: add -n myname -c Cont0 -s "0-24 0-7" -d 1 asyncreplica add -n myname -c Cont0 -s "* 0-7" -d 1 asyncreplica add -n myname -c Cont0 -s "0-24 *" -d 1 asyncreplica add -n myname -c Cont0 -s "* *" -d 1 asyncreplica 1) The periodicity can be of one of the following a.“- -” b.“ -” c.“- ” d.
Command enable asyncreplica Argument -n/--cgname -s/--schedulesnap -d/--description -b/--backuptargetname -p/--scheduleType <0-Windows,1-Local> Example: set -t snap -c Cont0 -n mysar0 -s 5:10 -s 60:20 -d testing -b backuptest -p 0 asyncreplica -t hasar -n/--name < asynchronous replication name> -c/--containername -d/--index -i/--ip Description Enables HA-DR with the HA p
Journal Volume Management These commands configure a journal and journal file. create journal -t/--type journal -j/--journalname -l/--ldname Creates journal.
get -t snaptable -c c0 -f cg0 -n 10 journal list journal list journal list journal creategroup journal creategroup journal -t/ --type journal List journal information. -t/ --type journalfile -c/--containername -f/--journal/CG name List journal file information.
Continuous Data Protection These commands are to view cdp for journal file.
remove recoverywizard -c/--container -v/--volume -s/--snap -t/--tgt_name -x/--xml (optional) Example: remove -c c0 -v vol1 -s snap1 -t iqn.199110.com.ami:itx00c09f2164459105:t08212006tgt1 recoverywizard rollback recoverywizard remove -c c0 -v vol1 -v vol2 -v vol3 –s snap4v1T2 -s snap5v2T2 -s snap6v3T2 -t iqn.199110.com.
Local and Replicated Snapshot validation These commands are used as part of snap validation.
-v/--volumename -x/--xml Example: pause -t SRP -c Cont0 -v Volume0 snapvalidation pause -t HA -c Cont0 -v Volume0 snapvalidation get snapvalidation t/--type (SRP/HA) -c/--containername -v/--volumename -x/--xml Example: get -t SRP -c Cont0 -v Volume0 snapvalidation get -t HA -c Cont0 -v Volume0 snapvalidation resume snapvalidation -t/--type (CG) -c/--containername -n/--cgname -x/--xml Example: resume -t CG -c Cont0 -n CG1 snapvalidation paus
Appendix A Code 0 1 2 3 4 5 6 10 11 12 13 14 15 20 21 22 23 24 25 26 27 31 32 33 34 35 36 37 38 40 41 42 43 44 45 46 47 51 52 53 54 55 56 57 58 59 60 61 62 63 64 65 68 69 Error Codes Description Command Succeeded Command Failed Invalid Parameter Insufficient buffer Insufficient memory Invalid Operation Error in opening file User does not exist User already exists Selected user is a NIS user User type did not match ADS NIS and LOCAL User Count in UserList is not set Invalid User ID Group does not exist Gro
Code 70 71 72 73 74 75 76 77 78 79 80 81 82 83 84 85 86 87 88 90 91 92 93 94 95 96 97 98 99 110 111 112 113 114 115 116 117 118 119 120 121 122 150 151 160 161 162 163 164 165 166 167 168 169 170 171 172 174 Description Null parameter Invalid disk channel Invalid Disk Invalid Username Invalid password Invalid groupname Invalid Network port Invalid Path Invalid Volume Name Invalid share name Invalid server name Invalid member type Invalid member count Invalid access rights Invalid address Retry after system
Code 175 200 201 202 203 204 205 220 230 231 232 233 234 235 240 241 250 251 252 253 254 260 261 262 263 264 265 266 267 268 270 280 281 282 290 291 292 293 300 301 302 303 304 305 306 307 310 311 312 320 330 331 332 333 334 335 336 337 Description Error in mounting the share Upgrade version error Upgrade package already installed Upgrade package dependency failure Upgrade package installation failed Upgrade requires more disk space Invalid package name Error in upgrade operation Duplicate IP address Inval
Code 338 350 351 352 353 354 355 500 501 502 503 504 505 506 507 508 509 510 511 512 513 514 515 516 517 518 519 520 521 522 523 524 525 526 527 528 529 550 551 552 553 554 555 556 557 558 559 560 561 562 601 603 604 605 606 607 608 609 Description License file read write error Duplicate Alias Name Alias not found Invalid Alias Name DHCP is not supported for Alias Adapters Maximum Alias Adapter count exceeded Maximum Alias per NIC exceeded No Target found Object Not Found Internal error Limits exceeded for
Code 610 611 612 613 614 615 616 617 618 619 620 621 622 623 624 625 626 627 628 629 631 632 633 634 635 636 637 638 639 640 642 643 644 645 701 702 703 704 705 706 707 708 709 710 711 712 713 714 715 716 717 718 719 720 721 722 723 724 Description No spare support Max limit reached No MD device available MD creation failed Add entry to configuration file failed disk is not free Minimum disk count Error in updating configuration file Error in reading from configuration file read error Raid hot remove faile
Code 725 726 727 728 729 730 731 732 734 735 736 737 738 739 740 741 742 743 744 745 746 747 748 749 750 751 752 753 754 760 800 801 802 803 852 853 854 855 856 857 858 859 860 861 862 863 864 865 866 867 868 869 870 871 872 873 874 875 Description Error in mounting file system Error in getting snap info Error in creating writable snap Error in getting volume info Max space reached Invalid dialect Invalid Snap Error in rolling back Snap Error in unmounting file system Error in reading metadata Serial alrea
Code 876 877 878 879 880 881 882 883 900 901 902 903 904 905 906 907 908 909 910 911 912 913 914 915 916 917 918 919 1001 1002 1003 1004 1005 1006 1007 1008 1009 1010 1011 1012 1013 1014 1015 1016 1017 1018 1019 1020 1021 1022 1023 1024 1025 1026 1027 1028 Description Error in BIND License - HA pair creation license expired/disabled License - Unable to Read the License File License - License Validation Failure License - New Motherboard or New Motherboard with Some External NIC cards found, For service key
Code 1029 1030 1031 1032 1101 1102 1103 1104 1105 1106 1107 1108 1109 1110 1111 1112 1113 1114 1115 1116 1117 1118 1119 1120 1121 1122 1123 1124 1125 1126 1127 1128 1130 1131 1132 1200 1201 1202 1203 1204 1205 1206 1207 1208 1209 1210 1211 1212 1213 1214 1215 1250 1300 1301 1302 1303 1304 1305 Description Replication - Volume is not in sync Replication - Box owns RG but volumes are secondary Replication - Box is not the orignal owner of the RG Replication - Box does not own RG but volumes are primary Async
Code 1306 1307 1308 1325 1326 1327 1345 1351 1352 1353 1354 1355 1400 1401 1402 1403 1404 1405 1406 1407 1408 1409 1410 1411 1412 1413 1414 1415 1504 1506 1507 1508 1509 1510 1511 1512 1513 1514 1515 1516 1517 2001 2002 2003 2004 2005 2006 2010 2011 2012 2013 2014 2015 2016 2017 4096 4097 4098 Description Snap Validation – Local snapshot not available Snap Validation – User snapshot validation pending Snap Validation – Snapshot already validated Read only snap count max reached Snap count per volume max re
Code 4099 4100 4101 4102 4103 8192 8193 8194 8195 8196 8197 8198 8199 8200 8201 8202 8203 8204 8205 8206 8207 8208 8209 8210 8211 8212 8213 8214 8215 8216 8217 8218 8219 8220 8221 8222 8223 8224 8225 8226 8227 8228 8229 8230 8231 8232 8233 8234 8236 Description DVM - Device open error DVM - Device access error DVM - general error DVM - Lib DM suspend error DVM - Lib DM resume error DVM - generic error DVM - memory allocation errors DVM - IOCTL Parameter passing failures copy_from_user, copy to user etc DVM