
Technical data

SPEEDDOME ULTRA 8 CONFIGURATION UTILITY 8200-0600-01, REV. C
OPERATOR’S GUIDE
50 of 138
Programming Privacy Zones
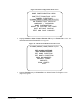
1. Select Alarms/Areas/Home/Presets/PZ from the Dome Configuration Menu.
2. Select Privacy Zones.
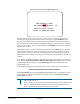
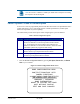
3. The Program Privacy Zones screen appears. Select Add Privacy Zone.
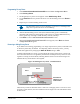
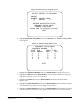
4. Use the Pan/Tilt control to position the arrows over the boundary point. Press Zoom to
create.
5. Repeat step 4 to create boundary points 2 and 3.
Tip: Remember, if the arrows are blinking, you are not in a valid target area.
Only select a point if the arrows are not blinking.
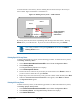
6. After the third boundary point is created, the fourth boundary point is automatically
calculated. The new Privacy Zone appears on the screen. To program additional Privacy
Zones, repeat steps 3 through 5. When finished, continue with step 7.
7. Select Exit to return to Alarms/Areas/Home/Presets/PZ screen.
8. When the Alarms/Areas/Home/Presets/PZ screen appears, select Exit. The Dome
Configuration Menu appears.
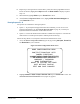
Removing or Hiding Privacy Zones
If you make an error during programming or no longer require Privacy Zones, individual zones
or all Privacy Zones may be deleted. To temporarily remove the Privacy Zones, you may
disable their appearance by changing the Hide All Zones setting to Yes.
To delete individual Privacy Zones, you must adjust the position of the arrows to the area of
the screen where the zone is recognized by the firmware. If multiple Privacy Zones are close
together or overlap, the arrows blink, indicating that the selection is not allowed.
Figure 38
illustrates Privacy Zones that are close together.
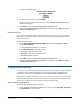
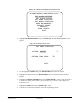
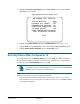
Figure 38. Deleting Privacy Zones – Invalid Selection
Three Privacy Zones are illustrated. Zones 1 and 2 are overlapping. Zone 1 and 3 are in close
proximity. In this situation, the arrows blink because the target area is the same distance from
all three zones.
Navigate zone
ZOOM to delete zone
FOCUS quits w/o changing
Zone 1
Zone 2
Zone 3
Arrows blink to
indicate this is an
invalid selection.