Installation and Operating Manual Advantage DK ADV-1000 ADV-1000i (intercom) Digital Access Control Station American Access Systems, Inc. 7079 South Jordan Road, #6 Centennial, CO 80112 800.541.5677 www.americanaccess.
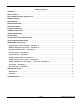
Table of Contents WARRANTY ...................................................................................................................................................................... 3 PARTS CHECKLIST ............................................................................................................................................................. 4 TOOLS NEEDED FOR BASIC INSTALLATION.........................................................................................................
Two-Year Limited Warranty This Warranty applies to: American Access Systems “Advantage DK” access controls What is Covered: Any defects in materials or workmanship Coverage Period: Two years from date of purchase What We Will Do: If your American Access Systems, Inc. (AAS) product is defective and returned within two years of purchase, well will repair, or at our option, replace the unit at no charge to you. If we repair your AAS Product, we may use new or reconditioned parts.
PARTS CHECKLIST Parts that are included in the box include the following items. If any of the items is missing, contact American Access Systems (AAS).
Page 5 © American Access Systems
INTRODUCTION The American Access Systems (AAS) Advantage DK unit is a high-quality, user-programmable, commercial-duty digital key control station designed to control access to a passageway using 4-digit access codes. The Advantage DK integrates state-of-the-art electronics resulting in a product which is highly sophisticated, yet inexpensive. The Advantage DK unit features: 1 programmable 4-digit Master Code.
INSTALLATION MOUNTING THE UNIT The tools and instruments needed to install your unit and a Parts Checklist are shown on page 4. Make sure you have all the tools listed before you begin. It’s a good idea to make sure to check off the items enclosed with the unit. If any parts are missing from the package, contact American Access Systems immediately.
HARNESS COLOR CODES WHITE (AC Hot) (DC +) 11.5 - 29 volts AC or DC WHITE (AC Neutral)(DC -) 11.
WIRING CONNECTIONS 1. The DK unit is designed to operate between 11.5 volts minimum and 29 volts AC maximum. Using a multi-meter, measure the supply line voltage to make sure it falls within these tolerances. IMPORTANT: TURN OFF THE POWER SUPPLY BEFORE MAKING ELECTRICAL CONNECTIONS 2. Locate the two white wires on the circuit board main harness and, WITH THE POWER OFF, connect them to the power supply leads. Use wire nuts or connectors to secure the connections. The DK unit is rectified.
THE IDLE MODE When the desired connections are complete and power is supplied to the unit, the unit will be in the IDLE MODE. The IDLE MODE is the normal mode of operation, meaning the unit is ready to accept input from the keypad. When in the IDLE MODE, you have approximately 4 seconds between key presses. If this time is exceeded, you will receive an ERROR TONE. Any time you hear an ERROR TONE, simply begin whatever operation you were attempting over again.
GOOD TONES and ERROR TONES The DK unit sounds an audible tone each time a key is pressed. The star (Å) key serves as the clear key and a double tone is sounded when the star (Å) key is pressed. The pound (#) key is the exit key and exits the programming mode any time it is pressed. A "GOOD TONE" is an oscillating high tone. It is very distinct. An "ERROR TONE" is represented by a single low tone. It also is very distinct.
PROGRAMMING THE DK UNIT To access the program mode, enter the MASTER CODE. When the correct MASTER CODE is entered the yellow LED will light and a GOOD TONE will sound. You can now enter any of ten programming SUB MODES described below.
Program Relay “A” Access Codes - Sub-Mode 1 To program Relay “A” access codes, use the following steps: - Enter 1 2 5 1 (or, if the factory MASTER CODE has been changed, enter the programmed MASTER CODE) - Unit will sound a GOOD TONE - Enter the numeral 1 - Unit will sound a GOOD TONE - Enter a four-digit code combination other than the MASTER CODE (for example enter 4 3 2 1) - If you receive an ERROR TONE after an entry it means that particular code is already assigned and you must select anothe
Delete Individual Access Codes -- Sub-Mode 2 To delete programmed Access Codes: - Enter the Master Code - Unit will sound a GOOD TONE - Enter the numeral 2 - Unit will sound a GOOD TONE - Enter the Access Code you want to delete - Unit will sound a GOOD TONE - An ERROR TONE indicates that Access Code is not in the memory - If you make an entry error, simply press the star (Å) key then enter the correct code - Continue to enter Access Codes you wish to delete OR - Enter pound (#) to exit t
NOTES: - Be sure to make a note of the new Master Code. It is the password to system operation. - If the Master Code has been forgotten or lost, and you cannot enter Sub-Mode 3, you must perform a Master Reset which will reset the Master Code to 1 2 5 1. You can then use SubMode 3 to change the Master Code. Set Sleep Code -- Sub-Mode 4 DETAILS: The Sleep Code is used to disable all Relay A and Function Codes from the keypad.
Set Latch Code -- Sub-Mode 5 DETAILS: The Latch Code toggles the state of the main relay (A) of the circuit board. The red LED will remain lit while the relay is in the latched position. The latch code is useful in applications where the gate is desired to hold open. If the operator's close circuit is controlled by loops, timers, etc., they will be overridden by the latched state of the relay and the gate will hold open.
- Continue to enter new Relay B Access Codes - If the memory becomes full, you will not be able to add more Relay B Access Codes - Press the pound (#) key to exit the programming mode Note: If the memory is full, you will not be able to access Sub-Mode 7. You will hear an ERROR TONE instead.
Event Input -- Sub-Mode 9 DETAILS: Programming Sub-Mode 9 allows a user with Master Code privileges to program the unit to connect to an external device to control a specific function. (MAYBE PUT AN EXAMPLE HERE) Note: Relay A codes can be turned off by an external switch. When inactive, all Relay “A” codes will be disabled. However, the Relay “B,” program and function codes will continue to be accessible to the Master user.
• Enter the numeral 1 to activate relay A OR • - Enter the numeral 2 to activate relay B Unit will sound a GOOD TONE 4.
RESETTING THE DK UNIT The Advantage DK has two special reset types: Master Reset and Unit Reset. Choose the procedure that you want to use carefully. Master Reset ; Should be used if the Master Code is lost or forgotten. The procedure will reset the Master Code to the 1 2 5 1. ; Should be used if the unit is in the Latch or Sleep Mode and the Latch or Sleep code is lost or forgotten.
MASTER RESET Follow these steps exactly. If you make an error, an ERROR will occur (you will hear a low ERROR tone) and you will need to start over from Step 1. 1. Open the unit face plate using the key provided. 2. Disconnect power from the unit by gently pulling the wire harness connector away from the board. Make sure to note the orientation of the connector. 3.
Event Input Page 22 © American Access Systems
Troubleshooting Problem Solution When I enter 1 2 5 1 on the keypad the gate will not open. 1 2 5 1 is the Master Code or programming access code. It will not open the gate unless the unit is in sleep mode. Program a gate access code into the unit using Sub-Mode 1(listed in the programming instructions). No response from keypad. Verify power input across the two white wires on the main harness. Check blue night light LED’s to see if they are on.
Notes Use this space to track Access Codes and the Master Code _______________________________________________ _______________________________________________ _______________________________________________ _______________________________________________ _______________________________________________ _______________________________________________ _______________________________________________ _______________________________________________ _______________________________________________ ________________