USER MANUAL
Thank you very much for your choice of this product designed by our company! Contents For your safety ..................................................................................................................................2 About Your Phone.............................................................................................................................3 Preparing Your Phone .................................................................................................................
SWITCH OFF WHEN REFUELING Switch off the phone at a refueling point or any fuel or chemicals places. SWITCH OFF NEAR BLASTING POINT Don’t use the phone where blasting is in progress. Observe restrictions, and follow any regulations or rules. INTERFERENCE All wireless phones may be susceptible to interference, which could affect the performance. USE NORMALLY Use in the normal position explained in the product documentation. Don't touch the antenna unnecessarily.
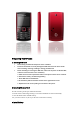
Preparing Your Phone 1. Installing SIM Card 1. Please keep your SIM card away from reach of children. 2. Scratches and bends can easily damage the SIM card. Please be extra careful when installing, removing, handling or storing your SIM card. 3. Before installing or removing the SIM card, make sure the phone is switched OFF, and then remove the back cover and battery. a. Slide the back covers upward the bottom of the phone until it can be removed. b. Remove the battery (see Removing Battery). c.
1. Connect the battery’s metal touch points separately with the battery compartment metal touch points, and put the battery base to the slot. 2. Put the back cover to its place. 4. Remove Battery Remove the back cover then lift the bottom of the battery and remove it. Notes: Settings and data stored in the phone or SIM card may be lost after the battery is removed. 5. Charge Battery Connect the charger to power supply, and then insert the charger pin into the I/O jack. Notes: 1.
The PUK (Personal Unblocking Key) code is required to unblock a blocked PIN code. It is normally supplied with the SIM package; otherwise contact your service provider for the code. Keep your PUK code in a safe place, do not throw it away. Contact your service provider if it is lost. If your SIM is blocked,your phone will ask you to enter PUK code to unblock. You have 10 tries to enter the right PUK code, after which your SIM might be permanently blocked. 4.
3. Call options During a call, the options content is changeable according to your call status. The functions of Call Waiting, Call Hold need the support of net work. Here are some parts of the options, like “Hold single call”, “End single call”,, “New Call”, “Phone Book”, “Messaging”, “Sound Recorder”, “Mute ” and “DTMF”. Text entry You may be requested to input text message many times when you using this phone.
Insert name: insert the name stored in the phonebook. Insert bookmark: insert the bookmarks stored in the phone. Text format: to adjust text size/test style/alignment/new paragraph 5. Save to Drafts: store this message into draft box, and the message has not been sent. 1.1.2Multimedia message a. Send to: sent the message to a receiver b. Input method: to change the input method c. Add picture: add a picture into the message d. Add sound: add a sound into the message e.
1. Inbox: Delete all messages from Inbox. 2. Drafts: Delete all messages from Drafts. 3. Outbox: Delete all messages from Outbox. 4. Sent messages: Delete all messages from Sent messages. 5. All messages: Delete all messages from all folders. 1.7 Email You can create an Email account to send E-mail via this handset 1.8 Broadcast message Broadcast public information sent by the network providers. Use Cell Broadcast service, you can receive information on various subjects from network provider.
as one phone book for viewing. Select any call and press “options” to achieve functions as follow: 1. View: to view the information of the selected call 2. Send text message: to send short message to the call 3. Send multimedia message: to send multimedia message to the call 4. Call: to use SIM 1/SIM 2/SIM 3/SIM 4 to dial 5. Edit: to edit the selected call 6. Delete: to edit the selected call from phone book 7. Copy: copy the call from phone to phone or from SIM card to SIM card 8.
3.2.1 SIM1 (SIM2/3/4) calls settings: 1. Caller ID There are these options; “Set by network”, “Hide id”, and “Send id”. 2. Call waiting If it is supported by your service provider, call waiting will notifies you of an incoming call even if you are in a call. You can then accept, reject, or ignore the incoming call. To make this function available, please contact local network provider. 3.
4. File manager Our phone provides you space to store files it also supports T-Flash card. To enter File manager under the main menu, press left soft key for follow options: 4.1 Open: Open one selected file folder 1. Open: open one selected file, press options to achieve functions as follow: 1. View/Play: view or play selected file, there are differences according to different files. 2. Send: send as multimedia message or via Bluetooth. 3. Use as: wallpaper/screen saver/power on/off display 4.
7. Services 7.1 Opera mini Connect internet first, then input ID and Password to operate, detailed information please check Help and Instruction of Opera mini. 7.2 Internet service Your phone support internet function. After the necessary settings, you can use this function normally. Notes: To open this function, you should apply GPRS service to your SIM card. In internet service user can visiting homepage, bookmarks, input address, recent pages, service inbox, and settings. 7.
3. Language Select the operating language. 4. Preferred input methods You can set the default input methods in text editor. 5. Display Set Wallpaper, Screen Saver, Power On/Off Display, Show date and time. 6. Auto update time Set the state to “on” or “off”. If the state is “on”, when connecting to swap network, the date and time will be update. 7. Flight mode You can choose to use normal mode or flight mode 8. Misc. settings You can set the LCD backlight duration and brightness. 9.
Set the phone to ask for your security code each time you start your phone. Default is 1122. 2. Change password You can change password of the phone 9.5.3 Auto Keypad lock You can set the auto lock time in the submenu of this function(none,5sec,30sec,1min,5min) then the key will automatically be locked if there is no more action of the phone. 9.5.4 Certificate manager You can take a view of Auth. Certificate and User certificate 9.6 Bluetooth The phone supports Bluetooth.
9.11 Restore factory settings You can reset some of the Phone settings to their original values by input phone lock password. 9.12 Sound effects You can adjust the audio effect such as bass, dance, classical, treble, party, pop, rock and normal 10. Twitter Connect internet first, then input ID and Password to operate, detailed information please check Help and Instruction of Twitter. 11. Multimedia 11.1 Camera Select camera item in main menu to enter preview screen.
of the screen. 11.3 Video recorder Enter video recorder, touch left soft key can enter some options: 1. Camcorder settings: to adjust EV, Night mode, Anti-flicker. 2. Video settings: to adjust the video quality. 3. White balance: to select Auto/Daylight/Tungsten/Fluorescent/Cloudy/Incandescent 4. Effect settings: to select Normal/Grayscale/Sepia/Sepia green/Sepia blue/Color invert. 5. Storage: store the video into phone or memory card. 6. Restore default: to get back to the ex factory settings.
enter the following options: 1. Play: Play the selected recording file. 2. Append: Append the recording data to the end of the selected file. (Only AMR format files support this operation.) 3. 4. 5. 6. 7. Rename:Rename the selected file name. Delete:Delete the selected recording file. Delete all files:Delete all the recording files. Use as:use the recording as user profiles. Send:Send recording file to MMS or Bluetooth. 11.
uncompleted/Send vCalendar/Save as file. If you have set alarm for the memo, when the time is up, the handset will give of tip sound and display the memo information. 12.3 Alarm When the mobile is off, if the battery has sufficient power, the alarm will continue working. You can set five alarms, you may turn on one or all of them as per request. Each alarm can be set individually. When the alarm time is up, the handset will give of tip sound. Press key stop then it can stop ringing.
about 1.5 to 4 hours. The charging condition is being displayed on screen. You may use your phone while charging. Headset You can accept or reject the coming call by hook key in headset. Notes: Don’t plug out headset when call in or call out process. Maintenance and Care Caring for Battery This phone uses a rechargeable battery as power source, when the battery is weak, recharge immediately to protect the battery life. It is best to drain the battery first.
prosecuted or banned from using cellular networks in the future if you do not abide by these regulations. Environment safety 1. Your phone is a radio transmitter which may interfere with electronic medical equipment implants, such as hearing aids, pacemakers, insulin pumps, etc. It is recommended that a minimum separation of 15 cm be maintained between the phone and an implant. Your doctor or the manufacturers of such equipment will be able to give you any advice you may need in this area 2.
FCC RF Exposure Information and Statement The SAR limit of USA (FCC) is 1.6 W/kg averaged over one gram of tissue. Device types: U-350-2(FCC ID:ZU3UNNECTOEDGE) has also been tested against this SAR limit. The highest SAR value reported under this standard during product certification for use at the ear is 0.472W/kg and when properly worn on the body is 0.363W/kg. This device was tested for typical body-worn operations with the back of the handset kept 1.5cm from the body.