
User guide


110
This document describes the process by which an SGG plug-in can be wrapped within a custom node, how to expose
a UI in the Parameter tab and pass any arguments from this interface to the SGG plug-in and, finally, how to
actually resolve the plug-in.
Throughout this document it is assumed that you have already written and successfully complied the SGG plug-in
perform your task. For further information on this aspect of plug-in development please refer to Help >
Documentation > Guides > Scene Graph Generator Plug-ins.
The next section provides an explanation of the Python class you must define to create a custom node and how to
install this in Katana.
Creating A Custom Node
Before diving into the actual code used to create a Node it is beneficial to first look at the Node in terms of its core
elements.
NOTE: The code, which accompanies this tutorial, is in the archive:
${KATANA_ROOT}/docs/pdf/GeometryImporterNodeTutorialFiles.tar.gz
One extracted, navigate to //tutorial/Plugins/MyCustomImporter.py
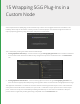
This class provides a custom node which wraps up the Alembic_In SGG and provides a UI to mirror its
behavior. To try out this plug-in simply append the tutorial directory to your $KATANA_RESOURCES
environment variable.
NOTE: When constructing nodes of your own, ensure that you adhere to Katana's naming rules. This
includes using only alphanumeric characters and underscores, and beginning the name with an alphabetic
character or an underscore. This is enforced at the API level.
These requirements are broadly similar to Python's naming rules. For more information, refer to
15 WRAPPING SGG PLUG-INS IN A CUSTOM NODE | CREATING A CUSTOM NODE