
Installation and Operation Guide


TS-3000i Web Clock Installation & Operation Guide 4-25
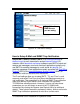
How to Setup Time Synchronization Schedules
At a pre-determined time of the day and day of the week, the TS-3000i
Web Clock can be set to confirm or validate that a time/date
synchronization signal has been received. This is called time
synchronization or “Signal Validation". The clock has two default Time
Sync schedules called “Before Trading” and “After Trading” to ensure
that time validation automatically occurs using default settings with no
user intervention. The Before Trading schedule is predefined to sync at
06:13 (6:13am) each day, while the After Trading Schedule is set to sync
at 18:13 (6:13pm). Time Sync schedules as described in the following
procedure can be created, edited and deleted:
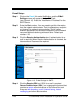
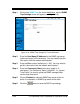
Step 1. Click on the Schedules link under Scheduling, and the
Schedule List screen will appear (see Figure 4-20).
Figure 4-20: Schedule List
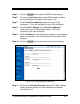
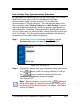
Step 2. Highlight the desired time sync schedule to modify and click on
the
button to edit an existing schedule, or click on
the
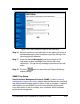
button to create a new schedule and the
Schedule Settings setup screen will appear
(see Figure 4-21).
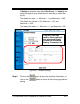
Note
– Select a schedule and click on the
Delete
button to
delete. When deleting a schedule, the prompt, “Are you sure
you want to delete this Schedule?” will appear. Click Yes to
confirm and delete.