
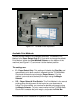
Installation and Operation Guide


3-6 TS-3000i Web Clock Installation & Operation Guide
Look – Skip Step 3 if the default clock settings are acceptable.
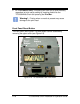
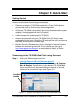
Step 4. Click on the General Settings link under Print
, and the Print
General Settings screen will appear (see Figure 4-6) to setup:
minute format, Dual Print (On/Off), Dual Print Timeout (0-60
seconds), Print leading Zero (On/Off), Print Direction (L/R),
and Auto Numbering. Click on the
button to save
general print options settings.
Look – Skip Step 4 if the default general print options are
acceptable.
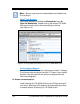
Step 5. To define custom print out, click on the Print Lines 1 & 2 link
under Print
and the Print Lines 1 & 2 screen will appear (see
Figure 4-10). Click on the
button to save custom Print
Lines 1 and/or 2 in the clock flash memory.
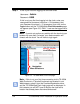
Look – Skip Step 5 if the default NASDAQ print for Line 1 and
the clock IP/MAC address for Line 2 is acceptable. The following
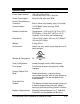
is an example of default print set up for line 1:
YYYY/MM/DD hh:mm ss
s
Four digit Year
Two di
g
it Month
Two digit Date
24 Hour:Minutes
Seconds
Seconds
Indicator
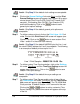
Line 1 Print Sample = 2008/07/08 18:30 15s
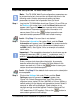
Step 6. To define custom Time Synchronization, click on the Settings
link under Time Sync
, and the Time Sync Settings screen will
appear (see Figure 4-11). Click on the
button to save
custom Time Sync settings.
Look – Skip Step 6 if the default time sync settings are
acceptable.
Step 7. To define custom Time Servers and/or order of use, click on
the Time Servers link under Time Sync
, and the Time Server
List screen will appear (see Figure 4-12). The TS-3000i Web
Clock provides 18 default Stratum 1 NTP servers for the user.
Click on the
or buttons to add or customize Time
Server Settings. Any added time server will appear at the top
of the list.