
Installation and Operation Guide


TS-3000i Web Clock Installation & Operation Guide 2-9
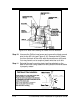
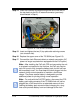
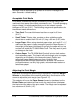
Figure 2-10: PoE/FPR & Mounting Bracket
Step 8. Install the two plastic rivets (1 per each side) through the main
clock frame into the locating holes as illustrated in Figure 2-10
to help align and secure the mounting bracket.
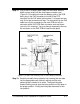
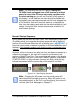
Figure 2-11: Front PCB & Mounting Bracket
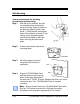
Step 9. Remove the rear wall mounting plate (see Wall Mounting).
Disconnect the AC power connector from the PCB (red & white
wires – see Figure 2-12).