
Installation and Operation Guide

TS-3000i Web Clock Installation & Operation Guide 7-3
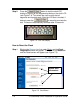
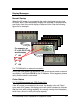
Step 2. Select Yes and press the button to manually
Time Sync the clock. The status of the synchronization will be
displayed. If everything is performed within the configured
deviation you will see “Successful” in the Status field.
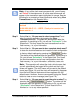
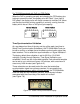
Note – This operation does not change time sync schedules. A
manual time sync will be designated in the transactions report as
a “USER TIME SYNC”. See the following example, which was
obtained by using “View Transactions” in the Reports Utility.
01/06/2009 09:40:13 : - USER TIME SYNC - Successfully sync
time to the clock : TS-3000i (Marketing)
00:40:9D:36:B0:4D(192.168.0.225) with deviation of 954 ms
01/06/2009 09:40:13 : - USER TIME SYNC - Time sent to the
clock = 01/06/2009 09:40:13
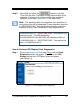
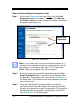
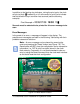
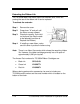
How to Perform LCD Display Clock Diagnostics
Step 1. Click on the Diagnostics link under Clock, and the Clock
Diagnostics screen will appear. Then click on the LCD
Display tab and the LCD Display screen will appear
(see Figure 7-3).
Figure 7-3: LCD Display Clock Diagnostics