
Installation and Operation Guide


6-8 TS-3000i Web Clock Installation & Operation Guide
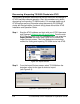
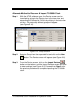
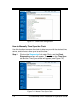
Figure 6-9: Imported TS-3000i Clocks
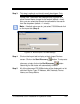
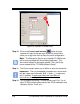
Step 10. Click on the Launch web browser button and your
browser will open to the web login screen for that clock to
allow you to login the clock to setup the clock configuration.
Note – The Description field for any imported TS-3000i clock
will be auto populated with the following statement; “This
device was created in the import module”. Also, the Group
name created will be “TS-3000i (Default Group)”.
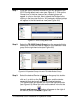
Step 11. The Device screen allows you to define a name for the device.
Important – The only acceptable characters for a clock name
are ‘a-z’ upper and lowercase, ‘0-9’, (-) dash, (_) underscore,
and (*) asterisk. If uppercase letters are used they will
automatically be changed to lowercase.
Step 12. This completes importing TS-3000i clocks into ATVS. For all
other ATVS functions please consult the ATVS Installation and
Operation Guide. Thank you…..