
user manual
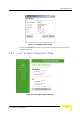
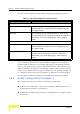
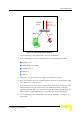
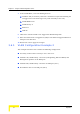


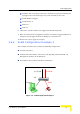


Table Of Contents
- Voice Gateways System Manual
- About This Manual
- Contents
- Chapter 1 - System Description
- Chapter 2 - Installation
- Chapter 3 - Using the Web Configuration Server
- 3.1 Introduction to the Web Configuration Server
- 3.2 Accessing the Web Configuration Server
- 3.3 Using the Web Configuration Server
- 3.4 Home Menu - Product Info Page
- 3.5 WAN Menu
- 3.6 VLAN Tagging Menu
- 3.7 Telephone Menu
- 3.8 BW Reservation - DRAP Configuration Page
- 3.9 System Menu
- 3.10 Upgrade Page
- 3.11 Restart Page
- 3.12 Logout Page
- 3.13 Parameters Summary
- Appendix A - Internal Class 5 Services
- Appendix B - Default Telephony Parameters
- Appendix C - New Features
- Glossary
VLAN Tagging Menu
Voice Gateways System Manual 31
1 In the VLAN page, click Add VLAN to open the VLAN Editor.
2 In the VLAN Editor, enter the follwing for Voice and Management VLAN:
VLAN ID: 100
VLAN NAME: Voice&Mng
VLAN Priority: 5
WAN: Yes
LAN: No
3 Click OK to add the VLAN to the Tagged Port Membership table.
4 Enter the VLAN ID for Voice and Management (100) in the field Default VLAN
ID on WAN port, and click Save.
5 In the Page Selection bar, click on VoIP VLAN Configuration to open the VoIP
VLAN Configuration page. Enter 100 in the VLAN Tag fields for both Call
Signaling and RTP. Enter 7 in the Priority Tag field for both Call Signaling and
RTP. Click Save VoIP VLAN Settings. Go back to the VLAN Tagging page.
6 In the VLAN page, click Add VLAN to open the VLAN Editor to configure the
data VLAN.
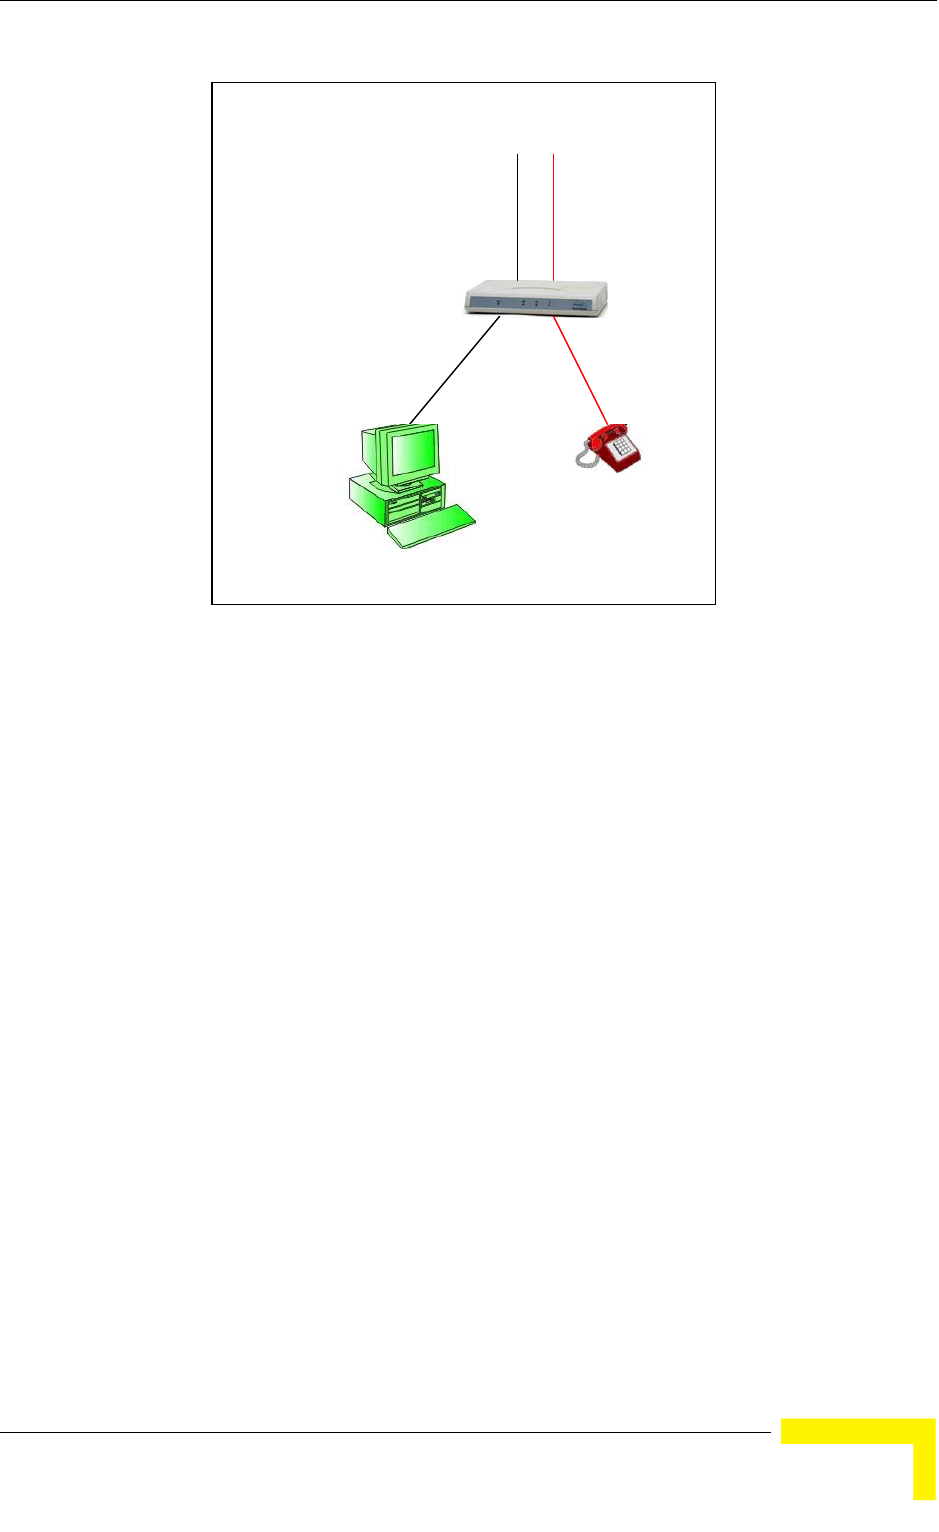
Figure 3-9: VLAN Configuration Example 1
POTS
Untagged
VLAN100
(Voice &
Management)
VLAN200
(Data)