
User's Manual

Basic Installation
Base Station Equipment Installation Manual 16 BreezeACCESS Series
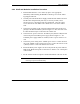
2.7 Installing the AU-NI Indoor Unit
1.
Place the AU-NI unit in an appropriate location on a shelf or a table. The unit
can be wall mounted using the installation materials provided with the unit.
Use a 6mm (1/4") drill and the supplied template plate for easy and accurate
marking of the holes.
2.
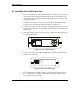
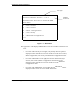
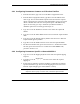
Connect the AU -PS DC power cord to the DC In jack (marked DC-12V)
located on the rear panel of the Indoor unit (shown in Figure 2-7).
3.
Connect the IF cable to the IF connector (marked IF) on the rear panel of the
Indoor unit. The other side of the IF cable should already be connected to the
Outdoor unit.
4.
Connect the mains power cord to the AU -PS. Connect the mains power plug
to a mains power outlet.
+
DC - 12V
ETH
IF
Figure 2-8. AU -NI Rear Panel
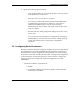
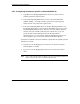
5.
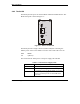
Verify that the Power LED (marked PWR) located on the front panel of the
Indoor Unit is turned ON.
PWR
WLNK
MON
Figure 2-9. AU -NI Front Panel
6.
Use a straight Ethernet 10baseT cable to connect the base station network
(e.g., a hub, switch or router) to the Ethernet port (marked ETH) located on
the rear panel of the AU-NI unit.