
User Manual


SA-PCR PRO.11 PC Card Installation, Setup, and Management
BreezeNET PRO.11 Series 4-9 User’s Guide
4.1.4. Checking the LED Indicators
Verify proper operation of the SA-PCR using the LED indicators:
Color Description Meaning
Yellow Link Status Blink – Scanning
Solid –Associated
Green Data Traffic Blink – According to traffic
The LED indicators are useful only if there is an activated AP in the area.
4.1.5. Installing the Applications
If the SA-PCR applications have been previously installed, uninstall them
before reinstalling (refer to section 4.1.8).
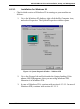
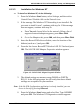
⇒ To install the SA-PCR applications:
1. Insert the BreezeCOM application diskette.
2. Press the Windows Start button and select Run. Type A:\setup and
press OK.
3. In the Choose the Destination Location window, choose a location
for the installation, and press Next.
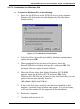
4. When the Setup Complete window appears, press Finish. Icons for
the applications are added to the Windows Programs menu, and a
SA-PCR Configuration icon is added in the Control Panel.
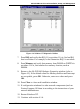
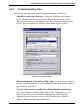
4.1.6. Initial Configuration
If your wireless network uses a non-default ESSID, enter the proper ESSID
as follows:
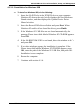
1. Start the SA-PCR Configuration application.
Press the Windows Start button, select Program, select
BreezeCOM, and then select Configuration.
2. Edit the ESSID parameter.
Go to the WLAN Paramters tab and enter the ESSID that matches
the AP unit.
3. Restart the computer.