
User Manual

Basic Installation
BreezeNET PRO.11 Series 2-1 User’s Guide
2. BASIC INSTALLATION
This chapter describes how to physically install most BreezeNET PRO.11
Series units. Installation for the SA-PCR PRO.11 PC Card Adapter is
described in Chapter 4.
The BreezeNET PRO.11 Series is a plug-and-play solution, and the units
begin to function when the following basic installation is complete.
However, you can adapt the system to your particular needs using the local
terminal (see Chapter 3).
For a description of various overall system configurations, refer to
Chapter 5.
2.1. Basic Installation Checklist
Standard installation involves the following steps:
• Check the Package List.
• Position the unit and the antenna in the best location.
• Connect the power supply to the unit.
• Connect the Ethernet port to the unit.
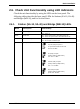
• Check unit functionality using the LED indicators.
2.2. Check the Package List
When you first open the package, verify that the unit is complete with the
following components:
• The unit, complete with two omni-directional antennas or RF connectors
for use with external antennas (“D” models).
• Quick Installation Guide/Card.
• 5V DC power supply transformer.
• Mounting bracket for wall or ceiling installations and torque key for
antenna connectors (supplied with "D" models).