
User's Guide


BreezeNET Management Utility
BreezeNET PRO.11 Series 4-15 User’s Guide
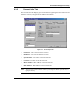
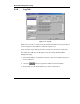
4.1.9 Debug Info(rmation)
This option allows you to create a log file named BreezeLog.log. You can send this
log file to BreezeCOM technical support and receive help based on the information
recorded in this file.
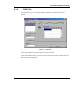
To start recording, open the Debug Info option and select Start Log.
When you finish recording (usually after 24 hours) select Stop Log and send the
file to BreezeCOM technical support representatives.
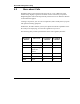
4.2 Quick Start to Wireless Networking
Perform the following steps to configure a WLAN for the first time:
1. Physically connect the Base stations to the Ethernet LAN. Make sure they are
switched on. The DS.11 wireless network will be up and running immediately.
If you are content with the default settings of the Base stations, you can stop
right here. It is more likely however, that you want to assign different radio
frequencies to each Base station, or impose some restrictions on the use of your
wireless network.
2. To be able to manage the Base stations via SNMP, every Base station needs a
unique IP address. If you provide a DHCP or BOOTP service on your LAN
(and have sufficient free IP addresses available) this will be taken care of
automatically. If not, refer to Section 0 for further information on assigning IP
addresses.
3. Use the BreezeNET Management utility to configure the Network Settings to
reflect your situation.
4. Select the radio channels of the Base stations according to your cell plan.
See Section 0 for further information. Add descriptive information about each
Base station for later reference.