
user manual


Q U I C K C H I L L E R • I NS T A L LA T I O N/ O P E RA T I O N/ S E R VI C E M AN U A L • 4.
INSTALLATION REQUIREMENTS
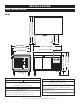
The model QC-3 is a counter mounted unit and
must be sealed to the counter with a NSF listed
silicone sealant.
For all other
models, install
the appliance
on a smooth and
level floor surface. Use the adjustable
cabinet legs to level the Quickchiller.
Adjust from front-to-back and from side-to-side
with the use of a spirit level to evenly distribute
the cabinet weight and avoid pulling the cabinet
alignment out of square.
After leveling the cabinet of cart equipped models,
check the height relationship of the roll-in cart
to the cabinet. Adjust the Quickchiller height as
needed to accommodate the cart and to securely
close the Quickchiller door(s).
DOOR SEAL:
Check the door gasket to make certain it is sealing
properly and that the gasket provides an even and
positive seal around the entire door frame.
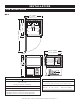
WATER DRAINAGE
A 1/2" I.D. (12,7mm) PVC pipe is furnished with
each QC-50 and QC-100 model. Use PVC glue
to attach the pipe into the drain opening at the
rear of the unit. Insert the PVC pipe into the
drain opening with a 1/4" (6mm) clockwise turn.
Connect the PVC pipe to discharge through an
indirect waste pipe into an open-site drain by
means of a 2" (51mm) air gap. Connection must
be within 10' (3m) of the unit.
NOTE: In the U.S.A., this equipment is to
be installed to comply with the Basic
Plumbing Code of the Building Officials
and Co de Administrators International,
Inc. [BOCA], and the Food Service
Sanitation Manual of the Food & Drug
Administration [FDA].
DRAINAGE:
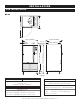
QC-3 QC-20 QC-40
EVAPORATOR PANS: NO INSTALLATION REQUIRED
QC-50 QC-100
ONE (1) FLOOR DRAIN:
1/2" (12,7mm) DIAMETER
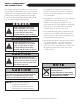
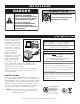
CAUTION
TO PREVENT PERSONAL INJURY,
USE CAUTION WHEN MOVING OR
LEVELING THIS APPLIANCE.
drain opening
at rear
INSTALLATION
SITE INSTALLATION