MAXCS Release 7.
AltiGen Communications, Inc. 679 River Oaks Parkway, San Jose, CA 95134 Telephone: 888-AltiGen (258-4436) | Fax: 408-597-9020 E-mail: info@altigen.com Web site: www.altigen.com All product and company names herein may be trademarks of their registered owners. Copyright © AltiGen Communications, Inc. 2014. All rights reserved. Page 2 of 37 MAXCS 7.
Contents Introduction ..........................................................................................................................................................5 The Softswitch Small Business Deployment ....................................................................................................................... 5 The Softswitch Standard Deployment .................................................................................................................................
Step 17: Channel Configuration ........................................................................................................................................ 30 Configure the First Half of the Channels........................................................................................................................ 31 Configure the Second Half of the Channels ..................................................................................................................
Introduction This document is provided for AltiGen partners who will be performing a fresh installation of MAX Communication Server (MAXCS) ACM Release 7.5 All-Software Softswitch Solution for their clients. There are two types of Softswitch deployments for MaxCS 7.5: • Small Business Softswitch • Standard Softswitch Some notes regarding this Softswitch installation: • • • This is a software-only installation process. This installation does not support redundancy or gateway installation.
Additional Licenses Available The following additional license bundles are available for the Softswitch Standard deployment: • The Contact Center Combo license bundle (ALTI-ACMCOMBO) includes the following licenses: • The Station Combo license bundle (ALTI-COMBOSTATION-XX) includes the following licenses: • 1 Softswitch Station license 1 IP Talk license 1 Exchange integration license 1 MaxMobile license 1 ACM Agent seat 1 MaxAgent seat 1 MaxCall seat 1 HMCP Combo Codecs The Super
AltiConsole license CTI Integration Connector Seat license Call Recording Session and Seat licenses SIP Trunk license Third Party SIP Device license VRmanager license MaxInsight Session license Client Application SDK Session license Trunk Control APC SDK Session license SightMax Integration license Salesforce Connector license Polycom Advanced Features license Licenses Not Available The following licenses are not available for the MAXCS All-In-One Softswitch Solution.
Play and record voice files • Announce system and queue phrases • Process auto attendant • Process voice mail • Call recording Provide conferencing resources • Barge-in/silent monitor/coaching • Station conference and MeetMe conference For a full explanation of HMCP and the roles it plays in the MAXCS All Software Solution, review the training presentation “What is HMCP?” in the AltiGen Communications Learning portal (http://learn.altigen.com/login/index.php).
7. On the next panel, select only the first two options, Softswitch (including VM and Enterprise Manager) and HMCP Media Server. Click Next. 8. If you have not yet installed the MAXCS 7.5 HMCP Certification tool, you are prompted to do so now. You must run the certification tool before you install MAXCS. Click Yes to install the tool now. 9. The HMCP Certification tool installation wizard starts. Click Next. 10. In the next panel, enter a user name and organization, and then click Next. 11.
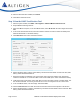
13. After the files have been installed, click Finish. 14. Click Yes to restart the server. Step 2: Run the HMCP Certification Tool 1. After the system restarts, click Start > All Programs > AltiGen HMCP Certification Tool. 2. Stop all AltiGen switching services. 3. When the HMCP tool opens, in the Test Mode section, select All In One. Set CPU Usage Threshold to 30%. 4. In the Codec Assessment section, enter the maximum number of codecs in those two fields (enter 2000 for both Max G.711 and Max Combo) 5.
12. After the tool finishes its assessment, it shows the results. These values are the maximum quantities you should consider configuring. If you exceed these values, voice quality may start to degrade. Write down these values; you will refer to them later. Example: If you enter G.729 for the Combo Codec and set the CPU Usage Threshold to 30%, the tool will determine the optimal combination of G.711_only and Combo channels in the HMCP server. 13. Click OK to close the results window.
9. If you are prompted to do so, install the software for KEYLOK, to support the soft system key: click Install and complete that installation process. 10. A warning indicates that you have not entered a system key. You will do this later; click OK. 11. When prompted, specify the country, the local area code for this server, and the number of digits you want for phone extensions. Click OK. 12. A window shows you the password; click OK. 13. You are reminded to upgrade other components, click OK. 14.
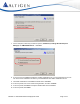
7. In the License Configuration panel, check the box Use Soft System Key. 8. Click Enter the System Key. MAXCS 7.
9. Enter the System Key, which was provided by AltiGen Communications. This string usually begins with the prefix “SS.” You must enter this key in uppercase letters. Click OK. 10. If you do not see the string in the field, click Refresh. The key will now appear in the System Key field. Step 5: Register Licenses Next, you will upload the license file(s) for this client. 1. In the License Configuration panel, click Add License. 2.
By default, the system grants 60 conference members in a maximum of 40 bridges. You can change the number to as many as 120 members in a maximum of 40 bridges, and you can activate other HMCP resources. 1. In MAXCS Administrator, open the Boards panel and double-click HMCP. 2. Click Board Configuration. 3.
Note: Do not exceed the maximum numbers provided by the HMCP Certification Tool (from page 11). The next section describes the parameters in this dialog box. 4. After adjusting these values, you may need to reboot the system so that the changes can take effect.
About Media Pass-Through Support One MaxCS 7.5 enhancement for system performance and voice quality is the Media Pass-through feature. While the Media Pass-through feature is enabled, the HMCP driver does not need to do encoding and decoding on both channels. In addition to benefits to direct calls, pass-through applies during call recording, silent monitoring, and coaching. G.722 pass-through is enabled by default.
3. To enable the feature, select the checkbox and specify which codec to use (G.729 or G.711 Mu-Law). Click Ok. Codec Preference - Incoming Calls When the Codec Preference feature is enabled, the system uses the following logic for handling incoming calls, based upon the content of the first SIP INVITE request. Incoming Calls - Preferred Codec G.729 First SIP Invite Request Content Codec Used for the Call SIP Trunk supports G.729 The IP Codec table of Enterprise Manager is ignored.
Does not support G.729 No codec is enforced. Outgoing Calls, 3rd-Party IP Phones - Preferred Codec G.711 Mu-Law First SIP Invite Request Content Codec Used for the Call Supports G.711 The IP Codec table of Enterprise Manager is ignored. The system uses codec G.711 to negotiate with the endpoint. Does not support G.711 No codec is enforced. If the source extension is enabled for Fax-over-IP (FoIP), then no codec is enforced.
When an IP phone registers to the system, a channel ID will be assigned to the IP extension. However, these channels are only responsible for processing protocol and call control signals. They require a media path from a VoIP board or from the IP phone to establish a voice steam so that both sides can hear. Notes • • • • Make sure you have enough VoIP resource boards. The more signal channels in the system, the more system memory and CPU power is required.
5. After restarting the services, open MAXCS Administrator, double-click SIPSP in the Boards panel and then click Advanced Configuration to manage the Trusted SIP Device list. To move an IP address from one list to the other, select the IP address and click either the right or left arrow button. Step 9: Block Unauthorized SIP Invite Messages You can perform this step now, or return and configure these settings later. You can block unauthorized SIP invite messages; this setting is disabled by default.
2. Click Board Configuration, and then click Advanced Configuration. 3. Check Block Unauthorized SIP Invite and click OK. Step 10: Configure the SIP Trunks Next, you need to configure SIP trunk channels. Before you start, note the following: • An AltiGen SIP Trunking channel is licensed. You need to buy and register a license to be able to configure this option. • AltiGen does not guarantee the voice quality of the SIP dial tone coming from your service provider.
4. Edit or fill in parameters as needed. To edit a line, click Edit and update the entry). Click OK. • SIP Server IP Address – The SIP Trunk service provider’s server IP address. • User Name – Assigned by the SIP Trunk service provider. • Password – Assigned by the SIP Trunk service provider. • Domain – The Domain Name of the SIP Trunk service provider, if required. • SIP Register Period – How frequently the AltiGen system needs to send SIP registration packets to the service provider.
6. In Enterprise Manager, add the SIP Trunk service provider’s IP address to the IP Device Range (on the Servers > IP codec tab) and select the proper codec profile for this service. Failure to do this step may result in no audio, even if the SIP Trunk channel shows the call is connected. Step 11: Configure SIP Trunk Groups You can configure trunk groups so that SIP devices can exchange their status.
SIP Options can be enabled or disabled for each SIP Server. By default, SIP Options is disabled. • SIP Server Name – A name for this SIP Server. • Enable SIP OPTIONS – Enable or disable this feature for the selected SIP Trunk group. • SIP Options Interval – How often, in seconds, the server sends a “keepalive” message to this enabled SIP trunk group. The default interval is 30 seconds.
SIP Trunk Profile Field Description SIP Protocol Field Not Sent (default) – Do not send transmitted caller ID FROM Header – Send the caller ID using the SIP FROM header P-Preferred Identity – Send the caller ID using the SIP P-Preferred Identity header P-Asserted Identity – Send the caller ID using the SIP P-Asserted Identity header Carrier can accept any number This is the default.
3. Check whether a profile named SIPTrunk has been preconfigured for you. If it has already been configured, confirm that the settings are correct. If this profile was not preconfigured, click Add and create a profile with the following parameters: • • • • • • For the name, enter SIPTrunk. Set the Selected Codec to G.
Step 15: Configure NAT To confirm that NAT support has been configured, 1. Click the IP Networks tab and confirm that both of the NAT support checkboxes are selected. If they have not been selected, check both boxes. 2. Close Enterprise Manager. Page 28 of 37 MAXCS 7.
Step 16: Add a New SIP Trunk Profile We recommend that you add a new SIP Trunk profile. 1. Open the SIP Trunk Configuration panel: a. b. c. d. e. In MAXCS Administrator, open Trunk view. Double-click an unconfigured SIP Trunk. In the Trunk Configuration panel, click Trunk Properties. In the next dialog box, click SIP Trunk Configuration. Click SIP Trunk Profile. 2. Create a new SIP Trunk profile, specifying the following parameters. • • • • • • Set the SIP Protocol Field to FROM Header.
Step 17: Channel Configuration Note: These steps apply only to deployments using AltiGen SIP Trunks. Before you begin, retrieve the configuration details from the MaxCS Cloud Services portal, in the SIP Services section of the General tab of your account. If your deployment uses SIP services from another AltiGen-certified SIP Trunk carrier, you will need to get the specific configuration details from that provider. Configuration details will vary from one provider to another.
Configure the First Half of the Channels First, configure the first half of the SIP Trunk channels, which will be assigned to the first server. 1. Log into the MAXCS Cloud Services portal and retrieve the details on the General tab of your account. Server 1 Server 2 2. Switch back to MAXCS ACM Administrator. You should be in the SIP Trunk Configuration page. If not, open it now. 3. Select the first SIP Trunk channel and click Edit.
4. Copy that configuration to the rest of the first half of the channels: a. Select the first channel and click Copy To. b. Select the range of channels from the second channel through the end of the channels that belong with the first server. Do not include ChannelB or any channels beyond ChannelB. For the scenario in our example, you would copy the configuration of channel 00 to channels 01 through 09. Click OK. 5.
• For Password, paste the same string as for the first set of channels; click Hide/Show Password to see it. • For Domain, paste the URL from the second SIP Trunk address in the Cloud portal. This will be different from the URL for the first set of channels. In our example, this is gw2.sip.us. • Set the SIP Register Period to 0. (You will modify this again, for just ChannelB, later) • Set the SIP Trunk Profile to Default. • Set the SIP Source Port to 5060. • Set the SIP Destination Port to 5060.
3. Return to the main Trunk view (close the various panels to reach that view) and confirm that all configured SIP trunk channels show as Idle, including the two channels that are configured Step 18: Out Call Routing You can configure out-call routing rules; this step is optional. Refer to the Out-Call Routing Configuration chapter of the MAXCS 7.5 ACM Administration Manual for full details. 1. Identify the system home area code: Select System > System Configuration.
4. Switch to the Default Routes tab. Set the following routes and click OK. MAXCS 7.
• • • • • • • • Set Local Route 1 to 3: Primary Local Set Local Route 2 to 4: Secondary Local Set International Route 1 to 1: Primary Set International Route 2 to 2: Secondary Set Long Distance Route 1 to 1: Primary Set Long Distance Route 2 to 2: Secondary Set Emergency Call Route 1 to 1: Primary Set Emergency Call Route 2 to 2: Secondary Step 19: Configure Inbound Routing Carriers send 11 digits as DNIS; configure your inbound routing rules accordingly.
If all representatives are busy, your call will be returned in the order it was received, within four hours under normal circumstances. Outside AltiGen business hours, only urgent calls will be returned on the same day (within one hour). Non-urgent calls will be returned on the next business day.