
User guide


Exporting and Importing Extensions
MAXCS ACM 6.5 Administration Manual 443
4. Check the records you want to import. Click the Select All and Clear All buttons to
select or clear all the check boxes.)
5. Click Import.
A progress bar lets you see the progress of the import. When the import is finished,
a message lets you know how many extensions were imported, how many
extensions were skipped and how many extensions failed.
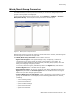
6. If an extension already exists, a dialog box pops up asking if you want to replace the
extension:
If you overwrite an extension, fields that are not specified in the .csv file are not
overwritten with default values or blank values. For example, if the column
Department is not included in the .csv file, but is configured in the extension that
you overwrote, the Department field is not reset to the default value when the
extension is overwritten.
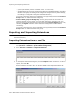
When the import is finished, a report file opens showing detailed information for
every extension you attempted to import. If some fields are invalid, the system
replaces them with a default value, except for the extension number field.
The name of the text file is the same as the .csv file, except that the file extension
is .txt.
Importing Extensions from the Active Directory
1. First, back up your system configurations, using AltiGen’s System Data Management
tool (Services > Utilities > System Data Management).
2. Go to Services > Utilities > Import Extensions from Active Directory.
The Import from Active Directory dialog box appears.