
User manual


User Manual of Hikvision iVMS-4200 v2.0
50
Back to Parent Map
Go back to the parent map.
5.2 The Hot Spot Function
Purpose:
The cameras and alarm inputs can be added on the map and are called the hot spots. The hot spots
show the locations of the cameras and alarm inputs, and you can also get the live view and alarm
information of the surveillance scenarios through the hot spots.
5.2.1 Adding Hot Spots
Adding Cameras as Hot Spots
Steps:
1. Click the Edit Map button in the E-map toolbar to enter the map editing mode.
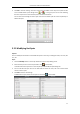
2. Click the icon in the toolbar to open the Add Hot Spot dialog box.
3. Check the checkboxes to select the cameras to be added.
4. Optionally, you can edit hot spot name, select the name color and select the hot spot icon.
5. Click OK to save the settings. The camera icons are added on the map as hot spots and the icons
of added cameras changes from to in the group list. You can click-and-drag the camera
icons to move the hot spots to the desired locations.
You can also click-and-drag the camera icons from the group list to the map directly to add the
hot spots.
Adding Alarm Inputs as Hot Spots
Steps:
1. Click the Edit Map button in the E-map toolbar to enter the map editing mode.
2. Click the icon in the toolbar to open the Add Hot Spot dialog box.
3. Check the checkboxes to select the alarm inputs to be added.
4. Optionally, you can edit hot spot name, select the name color and select the hot spot icon.