5 MINUTE EASY SETUP GUIDE PXE-H650 EX PER lEN C E TH E 0 R I V E" #$'/iLPINE Mobil~ M.dld 'l.
STEP 5: PXE-H650 5 MINUTE EZ SETUP GUIDE STEP 1: Insert included calibration disc, set factory volume to 3/4, play track 1. Make sure factory bass/treble/balance/fader controls are set flat. STEP 2: Power up the PXE-H650; the display will read "ENTER TO SETUP" so press "enter" to start the Auto Ranging/Auto Summing procedure. If the display reads something different refer to pg.15 of the owners manual for Factory Reset procedure.
PXE-H650 INSTALLATION & USAGE TIPS Output channels configuration: • Amp gains must be set so that speaker levels (SPL) are matched prior to MultEQ calibration. This will help assure that one or more channels do not clip the MIC input during measurements. • To assist with setting proper amp gains, the AUX input clip LED functions as a MIC input clip indicator during MultEQ calibration.
ffffMLPINER Mobile Media Solutions PXE·H650 SYSTEM INTERGRATION AUDIO PROCESSOR PROCESSEUR AUDIO D'INTEGRATION SYSTEME OWNER'S MANUAL MANUEL DU PROPRIETAIRE IMPRINT
Caution • Read this manual thoroughly before starting installation and operation. You will find a number of Safety Warnings in this manual to tell you about things that could hurt you or other people if you were to ignore the Warnings. We cannot be responsible for problems resulting from failure to observe the Warnings in this manual. • This manual uses a symbol to show how to use this product safely and to avoid harm to yourself and others and damage to your property. Here is what this symbol means.
Temperature Be sure the temperature inside the vehicle is between +60 0 e (+140°F) and -10 0 e (+ 14°F) before turning your unit on. Fuse Replacement When replacing the fuse(s), the replacement must be of the same amperage as shown on the fuse holder. If the fuse(s) blows more than once, carefully check all electrical connections for shorted circuitry. Also have your vehicle's voltage regulator checked. Maintenance If you have problems, do not attempt to repair the unit yourself.
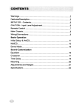
Warnings 2 Features/Description 5 SETUP CD - Contents 6 CAUTION - Input Level Adjustment.
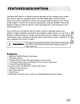
The Alpine PXE-H650 is a versatile processor that takes an OK sounding factory system turns it into a high-end, audiophile system. The PXE-H650 utilizes advanced sound tuning of the factory equipment to correct the acoustical problems inherent in the vehicle. Using AntEQTM to remove any factory pre-equalization, Audyssey MultEQTM flattens the frequency response inside the vehicle's interior and adjusts the overall response to a preselected target curve.
Input Level Adjustment The overall sound quality of the PXE-H650 is determined by the adjustments made by the Digital Signal Processor. The accuracy of these adjustments are directly affected by the input to the processor. Therefore, it is very important that the output from the factory radio be properly set so the PXE-H650 receives the correct audio level (not so high that it's distorted and not so low that it's noisy). This ensures that the DSP chip in the unit can see every detail of the audio signal.
Remote Function Call-outs 1 AUX Source Select 2 Factory H/U Select 3 Volume UP 4 User Preset 1 5 Subwoofer DN 6 Subwoofer UP 7 Volume DN 8 User Preset 2 9 Treble EO UP/DN 10 Midrange EO UP/DN 11 Bass EO UP/DN 12 Balance Left (CLEAR) 13 Balance Right (DONE) 14 Fader Rear (CANCEL) 15 Fader Front (MEASURE) 000 000 &A88 MID TREB RIGHT o ~ C 13 Mute Center (both BAL and FAD)
------... I:@.~
Front Panel Chassis 1 USB Port - USB cable required for PC control/setup (PC software on supplied CD) 2 MULTEQ LED - Output for included LED; EQ Status indicator during setup 3 RESET - Press & Release button for: Clear settings, Factory Reset, or Redo MultEQ setup Rear Panel Chassis 4 POWER SUPPLY Harness (6-Pin) • 5 6 7 8 9 10 11 12 13 Ground (BLK) Connect this lead to a good chassis ground on the vehicle. Make sure the connection is made to bare metal and is securely fastened using a sheet metal screw.
Before Running AntEQ The following guidelines will ensure a smooth and accurate setup procedure. Have the MultEQ CD, microphone and LED available and take a note of the conditions below as they are needed in the next section. Some type of stand is also needed to place the microphone at different locations in the vehicle. A clip or tape is not always a good idea as not everyone's ear can be stuck to the headliner or clipped to the visor.
Initial Setup & AntEQ Initially, a blank display is shown during sleep mode (before head unit powers up). 1. TURN ON Vehicle Ignition Switch 2. TURN ON Factory Radio Power and insert the H650 Setup CD. If properly connected, the Factory Radio Power should automatically turn ON the PXE-H650. The PXE-H650 display = "ALPINE PXE-H650" if already setup. If this is the very first time the PXE-H650 is being used, the system will enter the SETUP mode automatically. When it does so, follow the steps below.
7. "AntEQ SAVING" - AntEQ completes and saves the resulting filters. AntEQ has flattened out any equalization that is inherent in the factory radio. This is in preparation for the MultEQ process in the upcoming steps. After completing this process, the settings are saved and recalled when required for new settings. 2-Way Output Settings 8. "2-WAY OUTPUT" - Following "AntEQ SAVING" If the FRONT Output is configured as a 2-Way system, select 'Y' at the prompt and press "ENTER.
MultEQ Calibration At this point in the process, a baseline response curve has been created and stored for your specific vehicle. This curve ensures that the MultEQ algorithms are working with a reasonably neutral sounding curve. This eliminates all the peaks and dips in the source unit, making MultEQs job much easier. 1. "ENTER TO START MULTEQ" - Prepare vehicle for calibration Make sure the MultEQ LED and microphone are connected (TIP: LED is OFF if no mic connected).
5. "MEASURE POS 2" Reposition the microphone to the secondary position in the vehicle. When ready, exit the vehicle and press "MEASURE" on the remote control to begin. The MultEQ LED illuminates a steady green. . 6. "CHK OUTPUTS & MIC" If the MultEQ LED is blinking fast, something may have happened to the mic during the user's exit. Make any necessary corrections to position, etc. It will then be necessary to restart the calibration sequence.
NOTE: Press the "RESET" button on the main chassis, any time during the calibration process, to return to the Main Menu. From the Main Menu, four options are available. • RECALIBRATE MULTEQ: Press ENTER at this display to clear the previous MultEQ settings. The current levels and AntEQ settings are not changed. • CLEAR SETTINGS: Press ENTER at this display to clear all Customization settings. This returns the processor to the last MultEQ baseline response.
Introduction Each output of the PXE-H650 has a 3-Band, parametric equalizer, up to 10 ms of time correction and customizable crossover points for High-pass, Low-pass and Subwoofer. Experimentation with the sound is encouraged, as a simple press of the RESET button and selecting "CLEAR SETTINGS" will return all settings back to their original, corrected levels before customization began. The following procedure explains the steps necessary to customize the Parametric EQ, Time Delay and Crossover.
4. 5. Select the EQ Band to adjust. a) Use the Tor .. button to make the selection. In this example, "BASS" (or "MID" or "TREB"). b) Once the Band has been selected, Press "ENTER" to begin making the adjustments. Modify 3 different EQ parameters: LEVEL, Q, and Fc. Use the ~ or ~ buttons to choose the parameter to modify. Use the Tor .. buttons to change the parameter. a) LEVEL is adjustable from -6 dB to +6 dB using the T or .. buttons.
3. Crossover Adjustment a) Use the ~ or. button to make the selection. In this example, "CROSSOVER" b) The user can also use these buttons to select "TIME DELAY." The following "FRONT 2" adjustment procedures will be similar in nature to adjustments for the other channels. Just substitute "FRONT 1," "REAR," or "SUBWOOFER," for "FRONT 2." The procedure is the same with only the parameters slightly different, as shown at the end of this section. 4. Enter the Channel select mode by using the ~ button.
Time Delay Overview MultEQ determines the default delay during initial Setup. However, there may be times when the delay needs to be tweaked or temporarily modified. Be advised, any changes made causes deviation from MultEQ's default specs and no longer conforms to its ideal sound stage. All channels have delays adjustable from 0 to 10ms in 0.1 ms steps. Time Delay 1. Press MODE twice to enter Custom Tuning mode. 2.
E E 0"1 ---------v-------...-l ...-l -4-T-~-------------------------_+i.t__ 00 000 o E E 1.0 ......
3 Band Parametric Q Level Bass Frequency Mid Treble Digital Crossovers High Pass (@ -12 dB/oct) 0.5 to 2 (0.5 steps) -6 to +6 dB (1 dB steps) Fe = 30, 40, 50, 60, 80, 100, 125, 150 Hz Fe = 0.5, 0.75, 1.0, 1.5, 2.0, 3.0, 4.0, 5.0 kHz Fe = 6, 7.5, 10, 12.5, 15, 17.5 kHz 2-Way F1 200, 220, 250, 280, 315, 360, 400, 450, 500, 560, 630, 710, 800, 900, 1k .......................... 1.2k, 1.4k, 1.6k, 1.8k, 2k, 2.2k, 2.5k, 2.8k, 3.2k, 3.6k, 4k, 4.
MAIN UNIT MAIN Input AUX Input SPECIFICATION VALUE Max Input Level 16 Vrms Max Input Level 1.5 Vrms (AUX PRIMARY OFF) Max Input Level 2.5 Vrms (AUX PRIMARY ON) GENERAL Output Impedance <1kn Frequency Response 20 Hz to 20 kHz THD <0.2% SNR 82 dB Power Requirement 12.0 VDC (11-16 VDC allowable) Operating Current < 700 mA Operating Temperature +14°F to +140°F -10°C to +60°C) Dimensions 252mm x 38mm x 149mm Weight 1.0kg/35.3 oz Accessories RUE-4265 Remote Control..
I Front LIft lW~ I Front LIft WP I I 8 .. r~~~ ~O_:_M_:_ofer __ r-------------------------! l1 :J f-------------------------!1.11 ~ f-----------------------~All IRs..- :Y=is Full Range Syatem • AUX Primary Source switch must be OFF for this system --- __ In_~ _ONc-. _CUTc-. L _ ~------------------------- r-----~-------------- r-------------------------r-------------r-------------------------- G~"'a_part'" IJ cMNIa bodJ wllIla _ . lIuIIwocn' 0Ulpul ,.., 0Ulpul (L) ,..
_. _. " - - ON Cable - -- -=- :~~~@l.:@ T TT @N Q -o-0'!" ...... -. - - 1I:IIl........ OUT c.bIe - IR8eneor - --. 00 ...:.::.u 8B --- " - - Q>nIIaI c:.IIle iii ""'"'" OUT c:.IIle QI'OlIIld C'" - I a-y " - c:.
NOTES
LIMITED WARRANTY ALPINE ELECTRONICS OF AMERICA, INC. AND ALPINE OF CANADA INC. rAlplne'), are dedicated to quality craftsmanship and are pleased to offer this Warranty. We suggest that you read It thoroughly. Should you have any questions, please contact your Dealer or contact Alpine at one of the telephone numbers listed below. ePRODUCTS COVERED: This Warranty covers Car Audio, Navigation Products and Related Accessories ('the producf). Products purchased in the canada are covered only In the canada.
ALPINE ELECTRONICS, INC. Tokyo office; 1-1-8 Nishi Gotanda, Shinagawa-ku, Tokyo 141-8501, Japan Tel.: (03) 3494-1101 ALPINE ELECTRONICS OF AMERICA, INC. 19145 Gramercy Place, Torrance, California 90501, U.S.A. Tel.: 1-800-ALPINE1 (1-800-257-4631) 1-888-NAV-HELP (1-888-628-4357) ALPINE ELECTRONICS OF CANADA, INC. Suite 203, 7300 Warden Ave. Markham, Ontario L3R 9Z6, Canada Tel.: 1-800-ALPINE1 (1-800-257-4631) ALPINE ELECTRONICS OF AUSTRALIA PTY. LTD.
.#AY/iLPINE. Mobil, Mect~ SokIlkoftl PXE-H650 SETUP DISC V2.2.7 rl\UDYSSEY ......
~/iLPINE. Customer Care Registration ......... For easy on-line registration, go to ..www.alpine-usa.com/registration.. Thank you for choosing Alpine! Please register your product with us so we can serve you better. First name: ----,. Last name: _ _ ~ _ • Product purchased _ 1,0 Cassette Player 2. 0 CD Player 3. 0 MD Player 4. 0 DVD Player 5. 0 CD Changer 6. 0 Amplifier 7.0 Speaker 8.
II NO POSTAGE NECESSARY IF MAILED IN THE UNITED STATES BUSINESS REPLY MAIL FIRST-CLASS MAIL PERMIT NO. 320 TORRANCE CA POSTAGE WILL BE PAID BY ADDRESSEE ATIENTION MARKETING SERVICES ALPINE ELECTRONICS OF AMERICA INC PO BOX 2859 TORRANCE CA 90509-9939 1111111111111111111111111111111111111111111111111111 _______________________ .o~~~ _=~. __ ~C~_ ~- =_-~_-~-- ~.~ _ _ ~_~ _ _ ~_~ _ _-=-, __ i FOR USE IN USA, PLEASE FOLD HERE AND ENSURE THAT AMERICAN ADDRESS FACES UP.