FROM 3DA-W882 13-10-97 Español Français R MDA-W890 MD/In-Dash CD Changer/ DSP Receiver • OWNER'S MANUAL Please read this manual to maximize your enjoyment of the outstanding performance and feature capabilities of the equipment, then retain the manual for future reference. • MODE D'EMPLOI Veuillez lire ce mode d'emploi pour tirer pleinement profit des excellentes performances et fonctions de cet appareil, et conservez-le pour toute référence future.
English Precautions WARNING The exclamation point within an equilateral triangle and "WARNING" are intended to alert the user to the presence of important operating instructions. Failure to heed the instructions will result in severe injury or death. Le point d'exclamation dans un triangle équilatéral et la mention "WARNING" sont destinés à attirer l'attention de l'utilisateur sur la présence d'instructions importantes. Le non respect de ces instructions peut provoquer de graves blessures, voire la mort.
Français Précautions Español Precauciones Avertissement Advertencia NE PAS DEMONTER NI MODIFIER. Il y a risque d'accident ou de choc électrique. NO DESMONTE O ALTERE. Si lo hace, podrá ocasionar un accidente, incendio o descarga eléctrica. NE PAS LAISSER DE PETITES PIECES A PORTEE DES ENFANTS. En cas d'ingestion, consultez immédiatement un médecin. MANTENGA LOS OBJETOS PEQUEÑOS FUERA DEL ALCANCE DE LOS NIÑOS. Si tragasen algo, consulte a un médico inmediatamente.
English Precautions WARNING DO NOT USE THIS EQUIPMENT FOR PURPOSES OTHER THAN STATED FOR THE VEHICLE. Failure to do so may result in electric shock or injury. DO NOT PLACE FOREIGN OBJECTS IN INSERTION SLOTS OR GAPS. Do not insert hands, fingers or foreign objects in the disc insertion slots. Doing so may result in personal injury or damage to the equipment. DO NOT MIX NEW BATTERIES WITH OLD BATTERIES. INSERT WITH THE CORRECT BATTERY POLARITY.
Français Précautions Español Precauciones NE PAS UTILISER L'APPAREIL DANS D'AUTRES BUTS QUE CEUX ENONCES. Il y a sinon risque de choc électrique ou de blessure. NO UTILICE ESTE EQUIPO CON OTROS FINES A LOS INDICADOS PARA EL VEHICULO. De lo contrario, podrá ocasionar una descarga eléctrica o heridas. NE PAS INSERER D’OBJETS ETRANGERS DANS LES FENTES D’INSERTION OU ORIFICES. Ne pas mettre les mains, les doigts ou des objets étrangers dans les fentes d’insertion de disque.
Contents English Page/Page/Página 10/ 11 ........................................................................... Precautions Basic Operation 16/ 17 ........................................................... Initial System Start-Up 16/ 17 ..................................................... Turning Power On and Off 18/ 19 ........................................................... Subwoofer On and Off 20/ 21 ........................................................................
Contenu Français Indice Español ................................................... Précautions .................................................... Precauciones Fonctionnement de base ........................... Mise en service de l'appareil ............................... Mise sous et hors tension ............ Mise en et hors service du subwoofer .................................................. Démonstration .................................................. Guide sonore ..........................
Contents English Page/Page/Página D.H.E. Operation 90/ 91 ........................................................... Selecting D.H.E. Mode L.P.S. Operation 92/ 93 ................. Choosing the Listening Position Selector (L.P.S.) 94/ 95 ...................................................................... Adjusting L.P.S. Surround Operation 96/ 97 ........................................................... DSP Surround Presets 98/ 99 .............................................
Contenu Français Indice Español Fonctionnement du D.H.E. ............................... Sélection du mode D.H.E. Operación del D.H.E. ................................. Selección del modo D.H.E. Fonctionnement du L.P.S. ......... Choix du sélecteur de position d'écoute (L.P.S.) ........................................... Réglage du L.P.S. Operación del L.P.S. .... Elección del selector de posición de escucha (L.P.S.) ................................................ Ajuste de L.P.S.
Precautions English Thermal Protection Circuit +60°C –10°C Be sure the temperature inside the vehicle is between +60°C (+140°F) and –10°C (+14°F) before attempting to play a disc. If the temperature is over +60°C (+140°F), the protection circuit functions to stop the CD player, and "High-Temp" is displayed. Moisture Condensation You may notice the CD playback sound wavering due to condensation. If this happens, remove the disc from the player and wait about an hour for the moisture to evaporate.
Précautions Français Circuit de protection thermique Vérifier que la température à l'intérieur du véhicule est comprise entre +60°C (+140°F) et –10°C (+14°F) avant de reproduire un disque. Si la température dépasse +60°C (+140°F), le circuit de protection se déclenche pour arrêter le lecteur CD et l'indication "High-Temp" est affichée.
Precautions Center Hole Orifice central Orificio central Center Hole Orifice central Orificio central Bumps Résidus Abultamientos English New Discs – CD – As a protective measure, the CD player will automatically eject discs that have either been inserted incorrectly or have irregular surfaces. If a new disc is ejected immediately after loading, use your finger to feel around the outer edge of the CD and its center hole.
Précautions Français Precauciones Español Disques neufs – CD – Discos nuevos – CD – Par mesure de protection, le lecteur éjecte automatiquement les disques qui sont incorrectement insérés ou qui ont une surface irrégulière. Si le lecteur éjecte un disque neuf aussitôt après la charge, toucher le contour de l'orifice central et de la périphérie du disque avec le doigt. Si le disque contient des résidus ou des irrégularités, il ne pourra pas être chargé.
Precautions English Using an MD Check and ensure the following: Under no circumstances should you open the MD’s shutter and touch the inside of the disc. Do not expose the MD to direct sunlight. Place only 1 label in its proper position. Make sure the MD is clean before inserting into the player. Fuse Replacement When replacing the fuse(s), the replacement must be of the same amperage as shown on the fuse holder.
Précautions Français Precauciones Español Utilisation d’un MD Uso de un MD Vérifier et s’assurer de ce qui suit : En aucune circonstance le volet de fermeture de la disquette du MD ne peut être ouvert ni l’intérieur du disque touché. Ne pas exposer le MD aux rayons directs du soleil. Placer seulement une étiquette dans la position adéquate. S’assurer que le MD soit propre avant de l’introduire dans le lecteur.
Basic Operation English 1 Initial System Start-Up 1 Immediately after installing or applying power to the unit, it should be initialized. At the upper-left corner of the front panel is a small button. Using a pencil or other pointed object, press this reset button to complete the initialization procedure. 1 Turning Power On and Off 1 Press the PWR button to turn on the unit. INTLZ PWR Note: The unit can be turned on by pressing any other button except the eject ( h ), O/C and CLK buttons.
Fonctionnement de base Français Operación básica Español Mise en service de l'appareil Puesta en funcionamiento inicial del sistema Immédiatement après l'installation ou l'application d'alimentation à l'appareil, celui-ci doit être initialisé. Dans le panneau avant, sur le côté supérieur gauche il y a une petite touche. En utilisant un crayon ou autre objet pointu, appuyez sur cette touche de réinitialisation pour compléter la procédure d'initialisation.
Basic Operation English Subwoofer On and Off This unit is not equipped with a low pass filter. Turn on the Subwoofer Output when an amplifier having the built-in filter is connected to drive your subwoofer. 1 1 MODE SUB W. Sub-W ON Sub-W OFF Press and hold the SUB W. button for at least 3 seconds. With each press, Subwoofer is toggled On or Off. Notes: • Initial mode is "Sub-W OFF." • Leave the "Sub-W OFF" as long as the Subwoofer output is not being used.
Fonctionnement de base Français Operación básica Español Mise en et hors service du Activación y desactivasubwoofer ción de subgraves Cet appareil n’est pas équipé de filtre passebas. Mettez la sortie subwoofer en service quand un amplificateur intégrant un filtre est raccordé pour entraîner un subwoofer. Esta unidad no está dotada de un filtro de paso bajo. Cuando conecte un amplificador que lleve incorporado el filtro de paso bajo, active la salida de subgraves para excitar su altavoz de subgraves.
Basic Operation English Demonstration Equalizer/surround/D.H.E. demonstration functions are provided in this unit. 1 2 1 2 20 DEMO D.H.E. Press and hold the DEMO button for at least 2 seconds to activate the DEMO mode. The unit automatically performs the following operations. 1 Equalizer scanning operation (set by the manufacturer). 2 Surround scanning operation (set by the manufacturer). 3 D.H.E. scanning operation. 4 Operations 1 – 3 are carried out repeatedly.
Fonctionnement de base Français Operación básica Español Démonstration Demostración Cet appareil est équipé de fonctions de démonstration d’égaliseur/ambiance/D.H.E. Esta unidad incluye funciones de demostración de ecualizador/sonido envolvente/D.H.E. Appuyer sur la touche DEMO et la maintenir enfoncée pendant au moins 2 secondes pour activer le mode DEMO. L’appareil effectue automatiquement les opérations suivantes. 1 Balayage d’égaliseur (réglé par le fabricant).
Basic Operation English Sound Guide Function 1.# 2 1 2 Press and hold the INTLZ button for more than 3 seconds. INTLZ PWR BEEP ON 1 BEEP OFF 3 INTLZ PWR This function will give audible feedback with varying tones depending upon the button pressed. Press the Preset 1 button and the display shows "BEEP ON." Pressing the button again turns the Sound Guide function off. "BEEP OFF" will be displayed and no tones will be heard. Press the INTLZ button to activate the normal mode.
Fonctionnement de base Français Operación básica Español Guide sonore Función de guía acústica Grâce à cette fonction l'opération que vous effectuez est confirmée par des tonalités qui diffèrent selon la touche sur laquelle vous appuyez. Esta función ofrecerá retroalimentación audible con tonos variables dependiendo del botón presionado. Appuyez sur la touche INTLZ et maintenez-la enfoncée pendant plus de 3 secondes. Presione el botón INTLZ y manténgalo presionado durante más de 3 segundos.
Basic Operation English Adjusting the Contrast When the dot-matrix display is hard to see, you can adjust the contrast (bright or dark). 1.$ 2 3 1 PWR 2 3 4 24 Press and hold the INTLZ button for at least 3 seconds. INTLZ Press the 2 DN INTLZ PWR UP 2 (preset) button. Press the 9 DN or UP 8 buttons until you clearly see the display. The contrast can be adjusted in 12 steps from –6 to +6. After the settings, press the INTLZ button to activate the normal mode.
Fonctionnement de base Français Operación básica Español Réglage du contraste Ajuste del contraste Si vous avez du mal à voir l'affichage de matrice à points, vous pouvez régler le contraste (clair ou obscur). Si tiene dificultad para ver el visualizador de matriz a puntos, puede ajustar el contraste (claro u obscuro). Appuyez sur la touche INTLZ et maintenez-la enfoncée pendant au moins 3 secondes. Presione el botón INTLZ y manténgalo presionado durante al menos 3 segundos.
Basic Operation English Turning Mute Mode On/Off 1.# 2 1 2 Press and hold the INTLZ button for at least 3 seconds. INTLZ PWR 3 With a cellular phone connected, audio will be interrupted whenever a call is received. This function can be turned ON or OFF from the head unit by following procedure below. MUTE ON Press the Preset ON or OFF mode. 3 button to select the MUTE MUTE OFF 3 26 INTLZ PWR Press the INTLZ button to activate the normal mode.
Fonctionnement de base Français Activation/Désactivation du mode de sourdine du téléphone Si un téléphone cellulaire est raccordé, le son est coupé dès qu'un appel est reçu. Cette fonction peut être activée ou désactivée à partir de l'unité principale en suivant la procédure ci-dessous. Appuyez sur la touche INTLZ et maintenez-la enfoncée pendant au moins 3 secondes.
Basic Operation Adjusting Volume/Balance/Fader 1 2 1 MODE VOL BAL FAD Sub-W 2 Press and release the MODE button repeatedly to choose the desired mode. Notes: • If the > or < button is not pressed in 5 seconds after selecting the BALANCE and FADER modes, the unit automatically returns to the VOLUME mode. • With the Subwoofer mode turned on, Subwoofer output level can be adjusted. Press the button > or < until the desired sound is obtained in each mode.
Fonctionnement de base Français Réglage du volume/balance droite-gauche/ balance avant-arrière Enfoncez et relâchez la touche MODE de façon répétée pour choisir le mode de réglage souhaité. Remarques: • Si vous ne pressez pas la touche > ou < dans les 5 secondes qui suivent la sélection des modes BALANCE et FADER, l'appareil revient automatiquement en mode VOLUME. • Si le mode Subwoofer est activé, le niveau de sortie du haut-parleur de sous-graves peut être réglé.
Basic Operation English Using the Function Button The chart below describes the function of each preset button. The function will change depending upon the source selected and the condition of the FUNCTION switch, ON or OFF. 2 1 1 Press the F (FUNCTION) button. The function mode will change each time you press the button. (Refer to the chart below.) F 2 Press any one of the 1 1 – M 6 buttons.
Français Fonctionnement de base Español Operación básica Utilisation de la touche de Uso del botón de función En el diagrama de abajo se describe la función fonction Le tableau ci-dessous décrit la fonction de chaque touche préréglée. La fonction change en fonction de la source sélectionnée et la position du commutateur FUNCTION, ON ou OFF. de cada botón de preajuste. La función cambiará dependiendo de la fuente seleccionada y de la posición de ajuste del interruptor FUNCTION (ON u OFF).
English Radio Operation 2 1 Manual Tuning 3 1 TUNER 2 Press the SOURCE button to select the radio mode. SOURCE MD 3D * (* Only with the CD shuttle connected.) CD CHANGER BAND FM-1 T.S.M. Press the BAND button repeatedly until the desired radio band is displayed. FM-2 AM 3 FM1 DN Downward/ Vers le bas/ Hacia abajo 32 UP ST 90.
Réception Réception radio radio Français Operación de de la la Operación radio radio Español Accord manuel Sintonía manual Appuyez sur la touche SOURCE pour sélectionner le mode radio. Presione el botón SOURCE para seleccionar el modo de radio. (* Seulement si le CD Shuttle est connecté.) (*Sólo si el cambiador de CD está conectado.) Appuyez plusieurs fois sur la touche BAND jusqu'à ce que la gamme souhaitée soit affichée.
English Radio Operation 2 1 3 Automatic Seek Tuning 4 1 Press the SOURCE button to select the mode. SOURCE TUNER MD 2 3D * (* Only with the CD shuttle connected.) CD CHANGER FM-1 BAND T.S.M. Press the BAND button repeatedly until the desired radio band is displayed. FM-2 AM 3 3 When the Function mode is ON*, press the 3 (TUNE) button to illuminate the DX indicator in the display. With the DX mode activated, both strong and weak stations will be tuned automatically.
Réception Réception radio radio Français Operación de de la la Operación radio radio Español Accord par recherche automatique Sintonía con búsqueda automática Appuyez sur la touche SOURCE pour sélectionner le mode. Presione el botón SOURCE para seleccionar el modo. (* Seulement si le CD Shuttle est connecté.) (*Sólo si el cambiador de CD está conectado.) Appuyez plusieurs fois sur la touche BAND jusqu'à ce que la gamme souhaitée soit affichée.
English Radio Operation 1 1 1 2 Manual Storing of Station Presets 1. Tune in the desired radio station you wish to store in the preset memory. 2. Press and hold any one of the preset buttons ( 1 through 6 ) for at least 2 seconds. The frequency display will begin to blink. 3. Press the preset button into which you wish to store the station while the display is blinking (within 5 seconds). The display stops blinking once the station has been memorized. The display shows the band, preset No.
Réception Réception radio radio Français Operación de de la la Operación radio radio Español Mémorisation manuelle des stations Almacenamiento manual de emisoras 1. Sélectionnez la gamme d'ondes et accordez la station à mémoriser. 2. Appuyer sur une des touches de préréglage ( 1 à 6 ) et la maintenir enfoncée pendant au moins 2 secondes. L'afficheur de fréquence commencera à clignoter. 3.
English Radio Operation 1 1 2 Mono/Stereo Switching MONO MONO (OFF) "ST" indicator appears when a stereo station is tuned in. When the Function mode is ON*, press the 2 (MONO) button to switch from stereo to monaural FM reception. This will help in reducing the noise of weak FM Stereo broadcasts. In the monaural mode, the "ST" indicator turns off. Press the 2 (MONO) button again to return to the stereo mode. * 38 Refer to "Using the Function button" on page 30.
Réception Réception radio radio Operación de de la la Operación radio radio Français Español Commutation mono/ stéréo Cambio entre monoaural/ estéreo L'indicateur "ST" apparaît quand une station stéréo est accordée. Lorsque le mode de fonctionnement est activé*, appuyez sur la touche 2 (MONO) pour passer de la réception FM stéréo à la réception FM mono. Le bruit des émetteurs FM stéréo ayant un signal de faible puissance sera réduit. En mode mono, l'indicateur "ST" s'éteindra.
English Radio Operation 1 Automatic Memory of Station Presets 2 1 BAND T.S.M. FM-1 Press the BAND button repeatedly until the desired radio band is displayed. FM-2 AM 2 M 6 When the Function mode is ON*, press the 6 (A. ME) button. The frequency on the display continues to change while the automatic memory is in progress. The tuner will automatically seek and store 6 strong stations in the selected band in order of signal strength.
Réception Réception radio radio Operación de de la la Operación radio radio Français Español Mémorisation automatique des stations Almacenamiento automático de emisoras Appuyez plusieurs fois sur la touche BAND jusqu'à ce que la gamme souhaitée soit affichée. Presione repetidamente el botón BAND hasta que se visualice la banda deseada. Lorsque le mode de fonctionnement est activé*, appuyez sur la touche 6 (A. ME).
English Radio Operation Storing into Direct Access Preset (D.A.P.) Band 1 1 A combination of radio stations from any band, AM and FM (up to 6 stations) can be manually preset onto the D.A.P. band. When the Function mode is ON*, press the (D.A.P.) button to activate the D.A.P. mode. 1 1 D.A.P. * D.A.P. Refer to "Using the Function button" on page 30. (OFF) Press the BAND button to select FM or AM. The selected band will be displayed. To memorize stations onto the D.A.P.
Réception Réception radio radio Operación de de la la Operación radio radio Français Español Mémorisation sur la gamme D.A.P. (préréglage d'accès direct) Almacenamiento en la banda de memorización de acceso directo (D.A.P.) Vous pouvez prérégler manuellement en tout 6 stations radio des gammes AM et FM sur la gamme D.A.P. En la banda D.A.P., podrá memorizar manualmente una combinación de emisoras de cualquier banda, AM y FM (hasta 6 emisoras).
English Radio Operation 1 Tuning to Preset Stations 2 1 BAND T.S.M. FM-1 Press the BAND button repeatedly until the desired band is displayed. FM-2 AM Press the 1 (D.A.P.) button when the station desired was stored using the D.A.P. function. D.A.P. 2 1 3 44 M FM1 90.1 2 CT 4 H 5 M 6 Press the station preset button ( 1 through 6 ) that has your desired radio station in memory. The display shows the band, preset number and frequency of the station selected.
Réception Réception radio radio Français Operación de de la la Operación radio radio Español Accord des stations préréglées Sintonía de emisoras memorizadas Appuyez plusieurs fois sur la touche BAND jusqu'à ce que la gamme souhaitée soit affichée. Presione repetidamente el botón BAND hasta que se visualice la banda deseada. Appuyez sur la touche 1 (D.A.P.) lorsque la station désirée a été stockée avec la fonction D.A.P. Presione el botón 1 (D.A.P.
English Radio Operation 2 Titling Stations 4 3 1 Tune in a station to be titled. 2 TITLE or/ou/o CLK Change to the TITLE mode. Press and hold the TITLE button for at least 3 seconds. The first digit will blink. BLPINE 3 A DISP 4 Alphabet/ Alphabet/ Alfabeto 0 ! Number/ Numéro/ Número Symbol/ Symbole/ Símbolo A or/ou/o DN DN 46 UP UP Press DISP button to select the desired mode. It will change each time you press the button. Refer to “Character and Symbols” on page 50.
Réception Réception radio radio Français Operación de de la la Operación radio radio Español Attribution d'un nom à une station Titulación de emisoras memorizadas Accordez la station à laquelle vous voulez donner un nom. Sintonice la emisora que desee titular. Passer au mode TITLE (titre). Appuyer sur la touche TITLE et la maintenir enfoncée pendant au moins 3 secondes. Le premier chiffre clignote alors. Cambie el modo TITLE (título). Presione el botón TITLE durante por lo menos 3 segundos.
English Radio Operation Titling Stations (Continued) 5 5 A TITLE CLK or/ou/o ALPINE Press the TITLE button to store the first character. The first character will stop blinking and the display will automatically advance to the next character. When that character begins to blink, you may choose the next letter or symbol of your title. 6 Repeat the steps 3 – 5 above to complete the titling. All 10 character positions should be filled.
Réception Réception radio radio Français Operación de de la la Operación radio radio Español Attribution d'un nom à une station (suite) Titulación de emisoras memorizadas (Continuación) Appuyez sur la touche TITLE pour mémoriser le premier caractère. Le premier caractère cesse de clignoter et l'affichage passe automatiquement au caractère suivant. Quand le caractère suivant clignote, vous pouvez choisir la lettre ou le symbole suivant de votre titre.
English Radio Operation 1.# Searching Titled Stations (Title Search Menu) 2 1 BAND ALPINE T.S.M. 2 DN 3 Press and hold the T.S.M. button for at least 2 seconds while the station title is displayed. The titled station in memory blinks in the display. Press the c DN or UP f button to select the desired station title. UP Press the T.S.M. button to play the selected station. The unit will automatically search the station and will play that station. BAND T.S.M.
Réception Réception radio radio Operación de de la la Operación radio radio Français Español Recherche d’une station par son nom (Menu de recherche de station) Búsqueda de emisoras tituladas (Menú de búsqueda por títulos) Appuyez sur la touche T.S.M. et maintenez-la enfoncée pendant au moins 2 secondes quand le nom de la station est affiché. Le titre de la station en mémoire clignote sur l’affichage. Presione el botón T.S.M.
CD Operation English Preparation for Playback 1 CD Insert your discs (up to 3) into the disc slots of Disque compact the CD magazine with the label side facing up. Disco compacto Magazine Magasin Depósito 2 Insert the CD magazine all the way into the MDA-W890 with the arrow pointing toward the unit as shown here. 3 To remove discs from the CD magazine, first find the lever corresponding to the CD you would like to remove. Push the lever away from the magazine.
Fonctionnement du lecteur CD Français Operación del reproductor de CD Español Préparation pour la lecture Preparación para la reproducción Insérer les disques (jusqu'à 3) dans les fentes à disque du magasin de disques compacts avec l'étiquette orientée vers le haut. Inserte sus discos (hasta un máximo de 3) en las ranuras para discos del depósito de CD con el lado con la etiqueta orientado hacia arriba.
CD Operation 4 2 4 3 1 3 English Normal Play and Pause 1 Insert the magazine all the way as instructed on top of the magazine. 2 Press the SOURCE button repeatedly to select the 3D mode. SOURCE TUNER MD 3D * 3 D2 T-02 or/ou/o 1 2 (* Only with the CD shuttle connected.) CD CHANGER DN UP Press one of the preset number buttons ( 1 – 3 ) to select a disc set in the magazine. The disc can also be selected with the disc select switch.
Fonctionnement du lecteur CD Français Operación del reproductor de CD Español Lecture normale et pause Reproducción normal y pausa Insérer le magasin à fond, comme se montre sur la partie supérieure de celui-ci. Inserte un depósito a fondo como se muestra en la parte superior del mismo. Appuyez sur la touche SOURCE de façon répétée pour sélectionner le mode 3D. Presione de manera repetida el botón SOURCE para seleccionar el modo 3D. (* Seulement si le CD Shuttle est connecté.
CD Operation English Fast Forward and Backward 1 1 DN Press and hold the c DN or UP f button to quickly move backward or forward until you reach the desired section of the track. UP Repeat Play 1 1 H Press the 5 (RPT) button to play back repeatedly the track being played. The unit enters the Repeat mode and the track will be played repeatedly. H 5 RPT RPT ALL Press the 5 (RPT) button again to deactivate the repeat play.
Fonctionnement du lecteur CD Français Operación del reproductor de CD Español Avance et inversion rapides Avance y retroceso rápidos Appuyer sur la touche c DN ou UP f et la maintenir enfoncée pour reculer ou avancer rapidement jusqu'au passage souhaité de la plage. Presione el botón c DN o UP f y manténgalo presionado para retroceder o avanzar rápidamente hasta llegar al punto deseado de la canción.
CD Operation English Music Sensor (Skip) 1 1 Momentarily press the c DN button once to return to the beginning of the current track. If you wish to access a track further back, repeatedly press until you reach the desired track. DN T04 UP T05 Press the UP f button once to advance to the beginning of the next track. If you wish to access a track further ahead, press repeatedly until the desired track is reached. (The example shows the Music Sensor operation starting from track No. 4.
Fonctionnement du lecteur CD Français Operación del reproductor de CD Español Sensor de canciones (SalDétection de plage (saut) to) Appuyez une fois, momentanément, sur la touche c DN pour revenir au début de la plage en cours de lecture. Pour localiser les plages précédentes, appuyez de façon répétée jusqu'à ce que la plage souhaitée soit atteinte. Presione una vez, momentáneamente, el botón c DN para retroceder hasta el comienzo de la canción actual.
English CD Operation M.I.X. (Random Play) 1 1 Press the 4 (M.I.X.) button in the play or pause mode. The unit enters the M.I.X. mode and the tracks on the disc will be played back in a random sequence. After all the tracks on the disc have been played back once, the player will load the next disc and begin a new random sequence until the M.I.X. mode is canceled. CT CT 4 M.I.X. M.I.X. (OFF) To cancel M.I.X. play, press the button again. CT 4 (M.I.X.
Fonctionnement du lecteur CD Français M.I.X. (Lecture aléatoire) Operación del reproductor de CD Español M.I.X. (Reproducción al azar) Appuyez sur la touche 4 (M.I.X.) en mode de lecture ou de pause. L’unité entre le mode M.I.X. et les plages du disque sont reproduites dans un ordre aléatoire. Quand toutes les plages du disque ont été reproduites une fois, le lecteur chargera le disque suivant et commencera une nouvelle séquence de lecture aléatoire jusqu’a ce que vous annuliez le mode M.I.X.
CD Operation English Scanning Programs 1 1 Press the 6 (SCAN) button to activate the Scan mode. The first 10 seconds of each track will be played back in succession. M M 6 SCAN SCAN (OFF) 62 To stop the Scan, press the to deactivate the Scan mode.
Fonctionnement du lecteur CD Français Operación del reproductor de CD Español Balayage des plages Exploración de programas Appuyez sur la touche 6 (SCAN) pour activer le balayage. Les 10 premières secondes de chaque plage sont reproduites dans l’ordre. Presione el botón 6 (SCAN) para activar el modo de exploración. Se reproducirán los primeros 10 segundos de cada canción en sucesión. Pour arrêter le balayage, appuyez sur la touche 6 (SCAN) pour désactiver le mode de balayage.
CD Operation English Titling Disc 2 4 3 1 Select a disc for which you want to enter a title. 2 TITLE or/ou/o CLK Change to the TITLE mode. Press and hold the TITLE button for at least 3 seconds. The first digit will blink. BLPINE 3 A DISP 0 Alphabet/ Alphabet/ Alfabeto 4 DN Number/ Numéro/ Número 64 UP Symbol/ Symbole/ Símbolo Press the DISP button to select the desired mode. The mode will change each time you press the button. Refer to “Characters and Symbols” on page 70.
Fonctionnement du lecteur CD Français Operación del reproductor de CD Español Titrage d'un disque Para titular los discos Sélectionnez un disque sur lequel un titre doit être entré. Seleccione un disco en el que desee ingresar un título. Passer au mode TITLE (titre). Appuyer sur la touche TITLE et la maintenir enfoncée pendant au moins 3 secondes. Le premier chiffre clignote alors. Cambie al modo TITLE (título). Presione el botón TITLE durante por lo menos 3 segundos. El primer dígito destellará.
CD Operation English Titling Disc (Continued) 5.& 5 TITLE AL CLK 6 Press the TITLE button to store the first character. The first character will stop blinking and the display will automatically advance to the next character. When that character begins to blink, you may choose the next letter or symbol of your title. Repeat the steps 3 – 5 above to complete the titling. Pressing the TITLE button after entering the 12th character, automatically stores the title into memory.
Fonctionnement du lecteur CD Français Operación del reproductor de CD Español Titrage d'un disque (suite) Para titular los discos (continuación) Appuyez sur la touche TITLE pour mémoriser le premier caractère. Le premier caractère cesse de clignoter et l'affichage passe automatiquement au second caractère. Quand ce caractère clignote, vous pouvez choisir la lettre ou le symbole suivant de votre titre. Refaites les opérations 3 – 5 ci-dessus pour inscrire tout le titre.
CD Operation English 2.$ Erasing Disc Title 3 1.% 1 When it is not in clock mode, press the TITLE button to select the disc titling mode. Then, press and hold for at least 3 seconds. TITLE CLK 2 ALPINE O/C OPEN/CLOSE 3 4 DN O/C UP Press and hold the O/C button for at least 3 seconds to activate the title scanning mode. The title in the display will blink, for example "ALPINE". Press the c DN or UP f button repeatedly until the disc title you want to erase is displayed.
Fonctionnement du lecteur CD Français Operación del reproductor de CD Español Effacement du titre d'un disque Borrado de títulos del disco Lorsque l'unité n’est pas en mode d’horloge, appuyez sur la touche TITLE pour sélectionner le mode de titrage de disque. Appuyez ensuite sur cette touche et maintenez-la enfoncée pendant au moins 3 secondes. Cuando la unidad no se encuentra en modo de reloj, presione el botón TITLE para seleccionar el modo de titulación de disco.
CD Operation 1.# English Searching Titled Discs (Title Search Menu) 2 1 Press the T.S.M. button while the title is displayed. The title in memory blinks in the display. BAND T.S.M. 2 ALPINE DN 3 Press the c DN or UP f button to select the desired disc title. UP Press the T.S.M. button to play the selected disc. The unit will automatically search the disc and will play that disc. BAND T.S.M.
Français Fonctionnement du lecteur CD Operación del reproductor de CD Español Recherche d’un titre de disque (Menu de recherche de titres) Búsqueda de títulos de disco (Menú de búsqueda por títulos) Appuyer sur la touche T.S.M. et la maintenir enfoncée pendant l'affichage du titre. Le titre en mémoire clignote sur l’affichage. Presione y mantenga presionado el botón T.S.M. mientras esté visualizándose un título. El título en memoria parpadeará en el visualizador.
English CD Shuttle Operation Operation of 6-Disc Shuttle (Option) 1 2 If an Ai-NET applicable CD Shuttle made by ALPINE is connected, this unit can operate the CD Shuttle. 2 3 1 Press the SOURCE button to activate the CD Shuttle mode. The mode will change each time the button is pressed. SOURCE TUNER 2 MD 3D * CD CHANGER 1 Press one of the buttons 1 – 6 to select a disc set in the CD Shuttle. The disc can also be selected with the disc select switch. The disc No. selected is displayed.
Français Fonctionnement du changeur CD Fonctionnement du Shuttle 6 disques (optionnel) Si un CD Shuttle applicable Ai-NET fabriqué par ALPINE est connecté, cet appareil peut faire fonctionner le CD Shuttle. Español Operación del Shuttle de discos compactos Operación de un cambiador de 6 discos (opcional) Si se conecta un cambiador CD aplicable AiNET fabricado por ALPINE, esta unidad podrá controlar el cambiador de CD. Appuyez sur la touche SOURCE pour activer le mode CD Shuttle.
English CD Shuttle Operation Operation of 12-Disc CD Shuttle (Option) If an Ai-NET applicable CD Shuttle made by ALPINE is connected, this unit can operate the CD Shuttle. 1 2 3 1 SOURCE TUNER 2 Disc No. 1 3 Press the SOURCE button to activate the CD Shuttle mode. The mode will change each time the button is pressed. MD 3D DN 2 * CD CHANGER Press the Disc Select button to select a disc in the CD Shuttle. The disc No. selected is displayed.
Fonctionnement du changeur CD Français Español Operación del Shuttle de discos compactos Fonctionnement du Shuttle 12 disques (optionnel) Operación de un cambiador de 12 discos (opcional) Si un CD Shuttle applicable Ai-NET fabriqué par ALPINE est connecté, cet appareil peut faire fonctionner le CD Shuttle. Si se conecta un cambiador CD aplicable AiNET fabricado por ALPINE, esta unidad podrá controlar el cambiador de CD. Appuyez sur la touche SOURCE pour activer le mode CD Shuttle.
MD Operation English 1 Opening and Closing of the Movable Display 1 O/C OPEN/CLOSE O/C OPEN/CLOSE 76 Press the O/C button. The movable display opens. To close the movable display, press the O/C button again. The movable display closes. Notes: • When the movable display is opened, do not place any object on the display and be careful not to bump or apply any pressure to the door while it is open. This can cause damage to the mechanism.
Fonctionnement du lecteur de MD Français Operación del reproductor de MD Español Ouverture et fermeture de l’affichage mobile Apertura y cierre de la consola abatible Appuyez sur la touche O/C. L’affichage mobile s’ouvre. Pour fermer l’affichage mobile, appuyez à nouveau sur la touche O/C. L’affichage mobile se ferme. Presione el botón O/C. La consola abatible se abrirá. Para cerrar la consola abatible, vuelva a pulsar el botón O/C. La consola abatible se cerrará.
MD Operation English Normal Play and Pause 2 1 1 1 Open the movable display and insert an MD. The movable display automatically closes and the playback starts. When an MD is already inserted, press the SOURCE button to set the mode to MD. The mode will change each time the button is pressed. O/C SOURCE Note: Insert the MD in the direction the arrow indicates with the label facing up. TUNER 2 MD 3D O/C * (* Only with the CD shuttle connected.
Fonctionnement du lecteur de MD Français Operación del reproductor de MD Español Lecture normale et pause Reproducción normal y pausa Ouvrir l’affichage mobile et introduire un MD. L’affichage mobile se referme automatiquement et la lecture commence. Si un MD est déjà introduit, appuyez sur la touche SOURCE pour régler en mode MD. Le mode change à chaque pression sur la touche. Abra la consola abatible e inserte un MD. La consola abatible se cerrará automáticamente y la reproducción comenzará.
MD Operation English Music Sensor (Skip) 1 2 1 2 Momentarily press the c DN button once to return to the beginning of the current track. If you wish to access a track further back, repeatedly press until you reach the desired track. DN T04 UP T05 80 Press the UP f button once to advance to the beginning of the next track. If you wish to access a track ahead, press repeatedly until the desired track is reached.
Fonctionnement du lecteur de MD Français Détecteur de musique (saut) Operación del reproductor de MD Español Sensor musical (salto) Momentanément appuyez une fois sur la touche c DN pour retourner au début de la plage en cours. Pour accéder à une des plages précédentes, appuyez de manière répétitive jusqu’à ce que la plage désirée soit atteinte. Presione el botón c DN una vez, momentáneamente, para volver al principio de la pista que está siendo reproducida.
MD Operation Fast Forward and Fast Backward 1 1 DN Downward/ Vers le bas/ Hacia abajo Press and hold the c DN or UP f button to quickly move backward or forward until you reach the desired section of the track. UP Upward/ Vers le haut/ Hacia arriba Repeat Play 1 1 English Press the 5 (RPT) button to play back repeatedly the track being played. H H 5 RPT Press the 5 (RPT) button again to deactivate the repeat play.
Français Fonctionnement du lecteur de MD Operación del reproductor de MD Español Avance rapide et recul rapide Avance rápido y retroceso rápido Appuyer et maintenir la touche c DN ou UP f pour aller rapidement en arrière ou en avant jusqu’à ce que la section désirée de la plage soit atteinte. Presione y mantenga presionado el botón c DN o UP f para retroceder o avanzar rápidamente a la sección deseada de la pista.
MD Operation M.I.X. (Random Play) 1 1 English Press the 4 (M.I.X.) button. The unit enters the M.I.X. mode and the tracks on the MD will be played back in a random sequence. CT CT 4 M.I.X. To deactivate, press the M.I.X. button again. M.I.X. (OFF) 84 Note: After all the tracks on the MD have been played back once, the player begin a new random sequence.
Fonctionnement du lecteur de MD Français Operación del reproductor de MD Español M.I.X. (Lecture aléatoire) M.I.X. (reproducción arbitraria) Appuyez sur la touche 4 (M.I.X.). L’appareil entre en mode M.I.X. et les plages du MD sont lues dans un ordre aléatoire. Presione el botón 4 (M.I.X.). La unidad asumirá el modo M.I.X. y las pistas del MD serán reproducidas en orden arbitrario. Pour désactiver, appuyez à nouveau sur la touche M.I.X. Para cancelar este modo, vuelva a pulsar el botón M.I.X.
MD Operation English Scanning Programs 1 1 Press the 6 (SCAN) button to activate the scan mode. The first 10 seconds of each track will be played back in succession. M M 6 SCAN SCAN (OFF) Press the 6 (SCAN) button to deactivate the SCAN mode. The track will be played normally.
Fonctionnement du lecteur de MD Français Operación del reproductor de MD Español Balayage des programmes Exploración de programas Appuyez sur la touche 6 (SCAN) pour activer le mode de balayage. Les 10 premières secondes de chaque plage sont lues successivement. Presione el botón 6 (SCAN) para activar el modo de exploración. Los primeros 10 segundos de cada pista serán reproducidos en orden. Appuyez sur la touche 6 (SCAN) pour désactiver le mode SCAN. La plage est lue normalement.
MD Operation 2 1 1 2 TRACK NAME CLOCK/TRACK NAME 3 To Display/Scroll MD titles Press the TITLE button during play back of MD. The display will change each time you press the button. TITLE CLK MD TITLE English CLOCK/MD TITLE If the MD title or track name is longer than 12 characters, press the 3 (SCROLL) button. It (Example:ALPINE Love Story) will display the entire title by scrolling 1 character at a time to the left in the display.
Fonctionnement du lecteur de MD Français Operación del reproductor de MD Español Pour afficher/faire défiler (Display/Scroll) les titres du MD Cómo visualizar/hacer desfilar títulos de MD Appuyez sur la touche TITLE pendant la lecture du MD. L’affichage change à chaque fois que la touche est enfoncée. Presione el botón TITLE durante la reproducción del MD. La indicación exhibida cambiará cada vez que usted presione el botón.
cuidado icon English MD Operation D.H.E. Operation Selecting D.H.E. Mode Using digital signal processing technology, D.H.E. (Digital Harmonics Enhancer) operates on harmonic components which determine tone and coloration of the musical instruments. The process operates independently on individual frequency bands, so each instrument or vocal will be distinct. Play back clarity is enhanced to compensate for road noises which would normally detract from the listener’s enjoyment. 1 1 2 3 1 D.H.E. D.H.
Fonctionnement du lecteur D.H.E de MD Français Operación del reproductor D.H.E. de MD Español Sélection du mode D.H.E. Selección del modo D.H.E. Grâce à une technologie de traitement de signal numérique, le D.H.E. (Digital Harmonics Enhancer, ou amplificateur d’harmonique numérique) fonctionne sur des éléments harmoniques qui déterminent la tonalité et la coloration des instruments de musique.
English Equalizer L.P.S. Operation Operation Choosing the Listening Position Selector (L.P.S.) 1 1 L.P.S. This feature gives the user the ability to adjust the time delay of the 4 main speakers to provide the ideal sound stage for each listener in the car. The staging can be optimized for the front passenger, driver, front passenger and driver, or front and rear passengers and driver. Press the L.P.S. button repeatedly to select the desired listening position. The L.P.S.
Fonctionnement du d'égaliseur L.P.S. Français Choix du sélecteur de position d'écoute (L.P.S.) Cette fonction donne à l'utilisateur la possibilité d'ajuster le temps de retard des 4 enceintes principales afin de fournir l'étage sonore idéal pour chaque auditeur dans la voiture. La séparation d'étage peut être optimisée pour le passager avant, le conducteur, le passager avant et le conducteur, ou les passagers avant et arrière et le conducteur. Operacióndel Operación del ecualizador L.P.S.
English Equalizer L.P.S. Operation Operation 1 2 1 Press the L.P.S. button repeatedly to select the L.P.S. mode you want to adjust. The L.P.S. indicator will blink for 5 seconds. L.P.S. 2 While the L.P.S. indicator is blinking, press the up/down (UP 8 , 9 DN) and left/right (c DN, UP f ) buttons, to fine tune the time correction for the selected position. DN 94 Adjusting L.P.
Fonctionnement du L.P.S. d'égaliseur Français Operación del Operación del L.P.S. ecualizador Español Réglage du L.P.S. Ajuste de L.P.S. Appuyez répétitivement sur la touche L.P.S. pour sélectionner le mode L.P.S. qu'on veut ajuster. L'indicateur L.P.S. clignote pendant 5 secondes. Presione repetidamente el botón L.P.S. para seleccionar el modo L.P.S. que desea ajustar. El indicador L.P.S. destella durante 5 segundos. Pendant que l'indicateur L.P.S.
Equalizer Surround Operation English DSP Surround Presets 1.@.#.$. 1 The MDA-W890 employs DSP (Digital Signal Processing) to duplicate mathematically various listening environments. Six typical surround settings are provided for a variety of musical source material as follows. NORMAL (Flat) SUR Press the SUR (SURROUND) button to select the Surround OFF (Flat) mode.
Fonctionnement d'ambiance d'égaliseur Français Operacióndel del Operación sonido envolvente ecualizador Español Préréglages d'ambiance DSP Sonido envolvente DSP preprogramado Le MDA-W890 utilise DSP (Traitement du signal numérique) pour dupliquer mathématiquement les divers environnements d'écoute. Six réglages d'ambiance typiques sont fournis pour les diverses sources musicales suivantes.
Surround Equalizer Operation English Adjusting the Surround Settings You can adjust the Surround settings for your preference. 2 1 2 1 SUR S SUR DN DN 98 UP UP Press the SUR button repeatedly to select the desired surround mode (except NORMAL). Within 5 second after the step 1 , press the 9 DN or UP 8 button to decrease or increase the reverberation level. Adjustments can be made within a range of +4 to –4 steps. Press the c DN or UP f button to adjust the initial reverberation time.
Fonctionnement d'ambiance d'égaliseur Français Operación del Operación del sonido envolvente ecualizador Español Ajustement des réglages d'ambiance Ajustes de sonido envolvente Les réglages d'ambiance peuvent être ajustés selon vos préférences. Usted podrá efectuar ajustes de sonido envolvente según su preferencia. Appuyez répétitivement sur la touche SUR pour sélectionner le mode d'ambiance désiré (excepté NORMAL).
Equalizer Operation English Equalizer Presets Six typical equalizer settings are preset at the factory for a variety of musical source material. 1.@.#.$.% 1 EQ 2 EQ 3 EQ 4 EQ 5 EQ 6 EQ Setting 1: FLAT Press the EQ (EQUALIZER) button to select the flat frequency response. Setting 2: MALE (VOCAL) Press the EQ button to select the MALE setting. Setting 3: FEMALE (VOCAL) Press the EQ button to select the FEMALE setting. Setting 4: POPS Press the EQ button to select the POPS setting.
Fonctionnement d'égaliseur Français Préréglages d'égaliseur Six réglages d'égaliseur typiques sont préréglés en usine pour diverses sources musicales. Operación del ecualizador Español Ajustes de ecualizador preprogramados Seis ajustes típicos de ecualización vienen preprogramados de fábrica para una variedad de fuentes musicales. Réglage 1: FLAT (réponse plate) Ajuste 1: FLAT Appuyez sur la touche EQ (EQUALIZER) pour sélectionner une réponse en fréquence plate.
Equalizer Operation English Adjusting the Equalizer Settings 3 1 2 2 102 1 EQ EQ Press the EQ (EQUALIZER) button repeatedly to select the Equalizer setting preset which you wish to adjust. The example shows FLAT mode. - - - - - - - - - - Within 5 seconds after the operation of 1 , DN 3 You can modify the Equalizer settings to create a response curve more appealing to your personal taste. press the EQ BAND DN (c DN) or UP (UP f ) button to select the frequency band to adjust.
Fonctionnement d'égaliseur Français Ajustement des réglages d'égaliseur Operación del ecualizador Español Ajuste de los ajustes de ecualizador Les réglages d'égaliseur peuvent être modifiés Usted podrá modificar los ajustes de afin de créer une courbe de réponse plus ecualización para crear una curva de frecuencia agréable pour votre goût personnel. más acorde con su gusto personal.
Equalizer Operation 2.# 1 1 English Memorizing the Equalizer Settings Press the EQ button to select the desired equalizer setting (factory preset or your own) you wish to store in memory. EQ 2 Within 5 seconds after operating step 1 , press and hold any one of the Preset buttons ( 1 – 6 ) for at least 2 seconds. The indicators blink for 5 seconds showing the unit is ready for storing. M 1 USER P.SET 2 3 CT 4 H 5 M 6 3 USER P.
Fonctionnement d'égaliseur Français Español Operación del ecualizador Mémorisation des réglages d'égaliseur Memorización de los ajustes de ecualizador Appuyez sur la touche EQ pour sélectionner le réglage d'égaliseur désiré (préréglage usine ou préréglage personnalisé) qu'on veut mettre en mémoire. Presione el botón de ecualizador (EQ) para seleccionar el ajuste de ecualizador deseado (preprogramado de fábrica o creado por usted) que desea almacenar en la memoria.
Equalizer Operation English Recalling the Memorized Equalizer/Surround Settings 2 1 1 Press the desired mode button, EQ, SUR or D.H.E. D.H.E. EQ 2 SUR USER P.SET 1 To recall your preset, pressing one of the preset switches ( 1 – 6 ) within 5 seconds after the operation in Section 1 . This provides sound characteristics of your own design. M 2 3 CT 4 H 5 M 6 1 1 DISP Switching the Display Modes Press the DISP (DISPLAY) button to select the desired Display pattern mode.
Fonctionnement d'égaliseur Français Operación del ecualizador Español Rappel des réglages mémorisés d'égaliseur/ ambiance Rellamada de los ajustes memorizados de ecualizador/sonido envolvente Appuyez sur la touche du mode désiré, EQ, SUR ou D.H.E. Presione el botón del modo deseado, EQ, SUR o D.H.E. Pour rappeler votre préréglage, appuyez sur un des commutateurs préréglés ( 1 – 6 ) dans les 5 secondes après l'opération de la section 1 . Les caractéristiques sonores désirées seront obtenues.
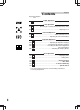
Equalizer Operation Pattern/ Courbe/ Patrón Display/Affichage/Visualizador Description 1 EQ Pattern • 63 • 160 • 400 • 1K • 2.5K • 6.3K • 16K • 2 Spectrum Analizer Pattern • 63 • 160 • 400 • 1K • 2.5K • 6.3K • 16K • 3 Peak Hold Pattern • 63 • 160 • 400 • 1K • 2.5K • 6.3K • 16K • 4 Peak Value Increasing Pattern • 63 • 160 • 400 • 1K • 2.5K • 6.3K • 16K • 5 "i" Character Pattern • 63 • 160 • 400 • 1K • 2.5K • 6.
Fonctionnement d'égaliseur Français Operación del ecualizador Español Descripción Description Courbe EQ Patrón EQ Courbe de spectre d'analyseur Patrón de analizador de espectro Courbe de maintien des crêtes Patrón de retención de crestas Courbe d'augmentation de la valeur crête Patrón de aumento de valor de la cresta Courbe de caractère "i" Patrón de carácter "i" Courbe de bloc Patrón de bloque Courbe miroir Patrón de espejo Courbe de spectre double superposé Patrón de espectro de doble
CD Operation Clock Operation English Displaying Time 1.@ 1 12:00 TITLE Press CLK (Clock) button. The mode changes each time you press the button. Select the clock displaying mode. CLK Notes: • The clock will be displayed by pressing the CLK button even if the power is turned off with the ignition ON. • When using this unit with the engine off, the battery may discharge over time.
Fonctionnement du lecteur CD de l'horloge Français Operación del reproductor de CD reloj Español Affichage de l'heure Visualización de la hora Appuyer sur la touche CLK (horloge) Le mode change à chaque pression sur la touche. Sélectionner le mode d’affichage de l’horloge. Pulse el botón CLK (reloj). El modo cambiará cada vez que usted pulse el botón. Seleccione el modo de indicación horaria.
CD Operation Clock Operation 2 3 4 1 1 2 3 4 TITLE 12:30 CLK CT 4 12:00 H 5 9:00 Setting Time Make sure you are in the Clock mode by pressing the Clock button (see page 110). Then, press and hold the CLK (Clock) button for at least 3 seconds. The time indication will begin to blink. To set the time to the nearest hour, press the CT button while the time indication is blinking. For example, if the time shown in the display is 9:35, the CT function will change it to 10:00.
Fonctionnement du l'horloge lecteur CD de Français Español Español Operación del reproductor de CD reloj Réglage de l'heure Ajuste de la hora Assurez-vous d'être en mode Clock (horloge) en appuyant sur la touche de l'horloge (se reporter à la page 111). Puis, appuyer sur la touche CLK (horloge) et la maintenir enfoncée pendant au moins 3 secondes. L'indication de l'heure commence à clignoter. Asegúrese de que está en modo de reloj presionando el botón de reloj (vea la página 111).
CD Operation Remote Control English Controls VOLUME 1 2 3 4 5 6 MUTE 7 PWR ENT 2 Power Switch Press the switch to turn the power on/off. CD-CHG BAND PROG 1 Mute Button Press the button to lower the volume by 20 dB instantly. Press the button again to cancel. SOURCE REMOTE CONTROL UNIT A.PROC 3 k Button Press the button to switch between the Play and Pause modes for the MD player or CD. 4 CD Changer Button Press the button to change to the CD changer operation.
Français Français Fonctionnement Télécommande du lecteur CD Español Español Operación del Control remoto reproductor de CD Commandes Controles 1 Touche de sourdine Appuyer sur la touche pour diminuer instantanément le volume de 20 dB. Appuyer à nouveau sur cette touche pour annuler. 1 Botón de sordina Presione el botón para bajar instantáneamente el volumen de 20 dB. Vuelva a presionar el botón para cancelar. 2 Interrupteur d'alimentation Appuyer sur l'interrupteur pour allumer/ éteindre l'appareil.
CD Operation Remote Control English 8 Button Radio mode: SEEK (DN) Button 3D/MD/CD Shuttle mode: Press the button to go back to the beginning of the current track. 9 Button Radio mode: SEEK (UP) Button 3D/MD/CD Shuttle mode: Press the button to advance to the beginning of the next track. VOLUME MUTE PWR 9 8 ENT CD-CHG BAND PROG SOURCE REMOTE CONTROL UNIT A.PROC Button Radio mode: Pressing the button will select, in descending order, stations programmed into the radio's presets as shown below.
Français Français Fonctionnement Télécommande du lecteur CD Operación del Control remoto reproductor de CD Español Español 8 Touche Mode radio: Touche de recherche (SEEK) en ordre descendant (DN) Mode 3D/MD/Changeur CD: Appuyer sur la touche pour reculer vers le début de la plage actuelle. 8 Botón Modo de radio: Botón de búsqueda descendente (SEEK – DN) Modo de 3D/MD/Cambiador de CD: Presione el botón para volver al inicio de la pista que se esté reproduciendo.
CD Operation Remote Control English English Battery Replacement Applicable battery: Use two "AAA" sized dry batteries or equivalent. Opening the battery cover Slide out the battery cover while firmly pressing outward. Replacing the battery Put the batteries in the case as illustrated. e d d e Closing the cover Push the cover as illustrated until a click is heard.
Français Français Fonctionnement Télécommande du lecteur CD Español Español Operación del Control remoto reproductor de CD Remplacement de la pile Reemplazo de la pila Pile appropriée: Utiliser deux piles sèches de dimension "AAA" ou équivalente. Pila apropiada: Use dos pilas secas de tamaño "AAA" o su equivalente. Ouverture du couvercle de la pile Faire glisser vers l'avant le couvercle de la pile tout en le poussant fermement vers l'extérieur.
Disc Care English English/Français/Español CORRECT CORRECTE CORRECTO INCORRECT INCORRECTE INCORRECTO Correct Handling Do not drop the disc while handling. Hold the disc so you will not leave fingerprints on the surface. Do not affix tape, paper, or gummed labels on the disc. Do not write on the disc. CORRECT CORRECTE CORRECTO Disc Cleaning Fingerprints, dust, or soil on the surface of the disc could cause the CD player to skip.
Entretien du disque Français Cuidado de los discos Español Manipulation correcte Manejo correcto Veiller à ne pas faire tomber le disque. Tenir le disque de manière à ne pas laisser d'empreintes sur la surface. Ne pas coller de ruban adhésif, papier ou étiquette sur le disque. Ne rien écrire sur le disque. No deje caer los discos mientras los maneja. Sujete los discos de forma que no queden huellas dactilares en su superficie. No pegue cintas, papeles, ni etiquetas engomadas en los discos.
Disc Care English English/Français/Español What is an MD The small, compact cartridge containing a 64mm diameter disc is very easy to handle. The signals on the disc are digital and are read without touching the disc, so the quality of the sound remains unchanged upon playback (unlike cassette). It uses a recording method called ATRAC (Adaptive TRansform Acoustic Coding). This is a compression technique used to reduce the music data to 1/5 of its original size.
Entretien du disque Français Cuidado de los discos Español Qu’est-ce qu’un MD ¿Qué es un MD? La petite cartouche compacte qui contient un disque de 64 mm de diamètre est très facile à manipuler. Les signaux sur le disque sont numériques et sont lus sans contacts avec le disque, de telle sorte que la qualité du son reste inchangée à la lecture (contrairement à la cassette).
In Case of Difficulty English English/Français/Español If you encounter a problem, please review the items in the following check list. This guide will help you isolate the problem if the unit is at fault. Otherwise, make sure the rest of your system is properly connected or consult your authorized Alpine dealer. Initial Turn-on After Installation 124 Symptom/Symptôme/Síntoma Cause and Solution No function or display./Fonctions inopérantes ou pas d'affichage.
En cas de problème Français En caso de dificultad Español En cas de problème, consulter la liste de vérifications suivantes. Ce guide devrait vous aider à résoudre tout problème provenant de l'appareil. Sinon, vérifier les connexions du reste du système ou consulter un revendeur Alpine autorisé. Cuando se presente algún problema, consulte los ítemes de la lista de comprobaciones siguiente. Esta lista le ayudará a resolver los problemas de su unidad.
In Case of Difficulty English English/Français/Español Radio Mode Symptom/Symptôme/Síntoma Cause and Solution Unable to receive stations./Impossible de recevoir les stations./Es imposible recibir emisoras. • No antenna or open connection in cable. – Make sure the antenna is properly connected; replace the antenna or cable if necessary. Unable to tune stations in the seek mode./ Impossible d'accorder les stations en mode de recherche automatique.
En cas de problème Français En caso de dificultad Español Réception radio Modo de la radio Cause et solution Causa y solución • Pas d'antenne ou connexion incorrecte des câbles. – Vérifier que l'antenne est bien raccordée; remplacer l'antenne ou le câble si nécessaire. • La antena no está conectada o el cable está desconectado. – Compruebe si la antena está adecuadamente conectada y, si es necesario reemplace la antena o el cable. • Les signaux dans la région sont faibles.
In Case of Difficulty English English/Français/Español CD Mode Symptom/Symptôme/Síntoma Cause and Solution CD not functioning./Le lecteur CD ne fonctionne • pas./El reproductor de discos compactos no funciona. Out of operating temperature range +50°C (+120°F) for CD. – Allow the car's interior (or trunk) temperature to cool. CD playback sound is wavering./Le son de lecture de CD est déformé./El sonido de reproducción de un disco compacto oscila. • Moisture condensation in the CD Module.
En cas de problème Français En caso de dificultad Español Mode CD Modo del reproductor de discos compactos Cause et solution Causa y solución • La température dépasse +50°C (+120°F). – Laissez la température de l'habitacle (ou du coffre) baisser. • Se encuentra a más de 50°C de temperatura. – Deje que se enfríe la temperatura en el interior (o en el portaequipajes) del vehículo. • Condensation d'humidité dans le module CD. – Attendez que l'humidité s'évapore (environ 1 heure).
In Case of Difficulty English English/Français/Español MD Mode Symptom/Symptôme/Síntoma Cause and Solution The MD could not be inserted./On ne peut pas insérer le MD./El MD no puede ser insertado. • • Sound skips due to vibration./Le son saute à cause de vibrations./Se producen interrupciones en el sonido debido a vibraciones. • Improper mounting. – Securely re-mount the unit. Sound skips without vibration./Le son saute en l'absence de vibration.
En cas de problème Français En caso de dificultad Mode de MD Modo de MD Cause et solution Causa y solución • Español Il y a déjà un MD dans l'unité. • – Ejecter le MD inséré et introduire le MD. Le MD a été inséré incorrectement. – Insérer le MD correctement. • Ya hay un MD insertado en la unidad. – Expulse el MD que está cargado en la unidad, e inserte el nuevo MD. El MD ha sido insertado incorrectamente. – Inserte el MD correctamente. • Montage incorrect de l'unité.
In Case of Difficulty English English/Français/Español Indication for 3D Head Unit Indication/Indication/Indicación Cause and Solution • Protective circuit is activated due to high temperature. – The indicator will disappear when the temperature returns to within operation range. • No disc is loaded. – Select a disc. • No magazine is loaded. – Insert a magazine. • Malfunction in the unit. – Press the eject button and remove the CD from the CD magazine.
En cas de problème Français En caso de dificultad Español Indication pour l'unité principale 3D Indicación para la unidad principal 3D Cause et solution Causa y solución • Le circuit de protection s'est déclenché car la température est trop élevée. – L'indication disparaît quand la température revient dans la plage de fonctionnement. • Se ha activado el circuito protector debido a la alta temperatura. – La indicación desaparecerá cuando la temperatura vuelva a la gama de operación.
In Case of Difficulty English English/Français/Español Indication for MD Head Unit Indication/Indication/Indicación NO DISC Cause and Solution • No MD is inserted. – Insert an MD. • Dirty or scratched MD. Bad recording condition. A non recorded MD. Not a music MD. – Press the O/C button and change the MD. The MD is inserted incorrectly. – Press the O/C button and insert the MD correctly. Dew condensation. – Wait a while. Mechanism error. 1. Press the O/C button and eject the MD.
En cas de problème Français En caso de dificultad Español Indication pour l'unité princi- Indicación para la unidad pale MD principal MD Cause et solution Causa y solución • Aucun MD n’a été introduit. – Introduire un MD. • No se ha insertado ningún MD. – Inserte un MD. • MD sale ou griffé. Mauvaises conditions d’enregistrement. Un MD non-enregistré. Pas un MD musical. – Appuyer sur la touche O/C et changer le MD. Le MD est introduit incorrectement.
In Case of Difficulty English English/Français/Español Indication for CD Shuttle Indication/Indication/Indicación Cause and Solution • Protective circuit is activated due to high temperature. – The indicator will disappear when the temperature returns to within operation range. • Malfunction in the CD Shuttle. – Consult your Alpine dealer. Press the magazine eject button and pull out the magazine. Check the indication. Insert the magazine again.
En cas de problème Français En caso de dificultad Español Indications sur le changeur CD Indicaciones para el cambiador de CD Cause et solution Causa y solución • Le circuit de protection s'est déclenché car la température est trop élevée. – L'indication disparaît quand la température revient dans la gamme de fonctionnement. • • Mauvais fonctionnement du changeur de CD. – Consultez votre revendeur Alpine. Appuyez sur la touche d'éjection de magasin et sortez-le. Vérifiez l'indication.
Specifications English English/Français/Español FM TUNER SECTION/SECTION TUNER FM/SECCION DEL SINTONIZADOR DE FM Tuning Range/Plage d'accord/Gama de sintonía ........................................................ 87.7 – 107.9 MHz Mono Usable Sensitivity/Sensibilité utilisable mono/ Sensibilidad útil en modo monoaural ................................................................ 9.3 dBf (0.8µV/75 ohms) 50 dB Quieting Sensitivity/Seuil de sensibilité à 50 dB Sensibilidad a 50 dB de silenciamiento .....
Spécifications Français Español Especificaciones ............................................. 87,7 – 107,9 MHz ................................................. 87,7 – 107,9 MHz ................................... 9,3 dBf (0,8µV/75 ohms) ..................................... 9,3 dBf (0,8µV/75 ohmios) ................................. 13,5 dBf (1,3µV/75 ohms) ................................... 13,5 dBf (1,3µV/75 ohmios) ............................................................... 80 dB ......
Specifications English English/Français/Español MD SECTION/SECTION MD/SECCION DEL REPRODUCTOR DE MD Signal-to-Noise Ratio/Rapport signal sur bruit/Relación señal-ruido ............................................... 90 dB Channel Separation/Séparation des canaux/Separación de canales .............................. 85 dB (at 1 kHz) Wow & Flutter (% WRMS)/Pleurage et scintillement (% (WRMS)/ Fluctuación y trémolo (% WRMS) .................................................................
Spécifications Français Español Especificaciones ............................................................... 90 dB ................................................ 85 dB (à 1 kHz) ................................................................... 90 dB .................................................... 85 dB (a 1 kHz) ................... Inférieur aux limites mensurables ............................. Inferior a los límites medibles .............................................................
Specifications English English/Français/Español CHASSIS SIZE/DIMENSIONS DU CHASSIS/DIMENSIONES DEL CHASIS Width/Largeur/Anchura ..................................................................................................... 178mm (7") Height/Hauteur/Altura ............................................................................................... 100mm (3-15/16") Depth/Profondeur/Fondo ..............................................................................................
Spécifications Español Français Especificaciones ....................................................... 178mm (7") ............................................................... 178mm ............................................. 100mm (3-15/16") ............................................................... 100mm ................................................. 156mm (6-1/8") ................................................................ 156mm ...............................................
R SERIAL NUMBER/NUMERO DE SERIE/NUMERO DE SERIE: INSTALLATION DATE/DATE D'INSTALLATION/FECHA DE INSTALACION: INSTALLATION TECHNICIAN/INSTALLATEUR/INSTALADOR: PLACE OF PURCHASE/LIEU D'ACHAT/LUGAR DE ADQUISICION: ALPINE ELECTRONICS, INC. Tokyo office: 1-1-8 Nishi Gotanda, Shinagawa-ku, Tokyo 141, Japan Tel.: (03) 3494-1101 ALPINE ELECTRONICS OF AMERICA, INC. 19145 Gramercy Place, Torrance, California 90501, U.S.A. Tel.: 1-800-ALPINE-1 (1-800-257-4631) ALPINE ELECTRONICS OF CANADA, INC.