
Owner`s manual

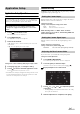
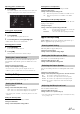
Table Of Contents
- Operating Instructions
- WARNING
- Features
- Getting Started
- Radio
- RDS
- Apple CarPlay (Optional)
- Auxiliary Device (Optional)
- Camera Operation (Optional)
- Setup
- Audio Setup
- Audio Setup Operation
- Adjusting Balance (Between Left and Right)
- Adjusting Fader (Between Front and Rear)
- Setting the Bass Level
- Setting the Treble Level
- Setting the Subwoofer
- Setting the Bass Engine SQ
- Setting the Volume for Each Application
- Setting the MX (Media Xpander)
- Equalizer Presets (EQ Presets)
- Setting Defeat
- Display Setup
- General Setup
- Application Setup
- Audio Setup
- Information
- Installation and Connections

26-EN
Application Setup Operation
1
Touch [] on the Home screen.
The Setup main screen is displayed.
2
Touch [Application].
The Application Setup screen appears.
3
Select the desired item.
If “ ” appears, there is another hierarchy level. Touch the
desired item.
If “ ” does not appear, proceed to step 4.
Setting items: Camera / Auxiliary (AUX) / Apple Carplay / Radio
4
Touch [] or [] etc., to change its setting.
5
Touch [] to return to the main application screen.
Touch [] to return to the previous screen.
• Immediately after changing the Application Setup (while the system
is writing data automatically) do not turn the ignition key to OFF.
Otherwise, the settings may not be changed.
Camera Setting
[Camera] is selected on the Application setup menu in step 3. Refer to
“Application Setup Operation” (page 26).
With an optional camera connected, its video is output to the monitor.
When the camera is connected, set this item.
Setting item: Position
Setting contents: Off (Initial setting) / Rear / Other
After selecting “Rear” or “Other” in the “Position”
setting, touch [ ] of “Position”, the following additional
items can be adjusted.
When the camera is connected, the video input signal type can be
selected.
Further setting item: Camera Signal
Setting contents: NTSC (Initial setting) / PAL
If you select “Rear,” you can adjust the camera guide position.
Setting item: Guide Adjustment
1
Touch [Guide Adjustment].
The camera guide adjustment screen is displayed.
2
Touch the guide you intend to adjust.
Guide line can also be selected by touching [] [].
Display example for rear camera mode
3
Touch [], [], [] or [] to adjust the position
of the guide.
• Touching [Clear] clears adjustments and returns to the setting
before guide line alteration.
4
After the adjustment is completed, touch [Set].
Application Setup
The Parking Brake must be engaged to access the Application
mode screen. Attempting to access this screen while driving will
display the warning-Unable to operate while driving.
The following steps 1 to 5 are common operations to each
“Setting item” of Application Setup. Refer to each section for
details.
Setting the Camera Input
Rear: Rear camera
Other: Side camera, Room camera, etc.
Setting the Camera Signal Input
NTSC/PAL: Choose the video input signal type manually.
Adjusting the Rear Camera Guide