
User manual
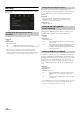

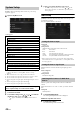
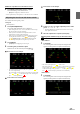
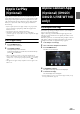
Table Of Contents
- Operating Instructions
- PRECAUTIONS
- WARNING
- Features
- Getting Started
- Location of Controls
- Turning Power On or Off
- Turning the System On
- Initial System Start-Up
- Adjusting the Volume
- Lowering Volume Quickly
- Touch Screen Operation
- Switching Sources
- Operating the Function Button on the Audio/Video Main Screen
- About Basic Operation for List Screen
- About the Shortcut Setup Screen
- About the Menu Screen
- About the Indicator Display
- Opening screen Customisation
- How to Input Characters and Numbers (Keypad)
- Favourite Function
- Applying Alpine TuneIt App
- Setup
- Setup Operation
- Wireless (Bluetooth) Setup
- General Setup
- Sounds Setup
- Setting the Balance/Fader/Rear Speaker/Subwoofer
- Setting the Media Xpander (MX HD)
- Equalizer Presets
- Adjusting the Parametric Equalizer Curve (Dual HD EQ)
- Adjusting the Crossover Settings (X-OVER)
- Adjusting the Time Correction (TCR)
- Setting Defeat
- Setting the Volume for Each Source
- Adjusting the Caller Level
- Adjusting the Microphone Level
- Adjusting the Ring Tone Level
- Volume Setting
- Auto Volume Setting
- Setting Audio Mute On/Off while Backing up
- Setting the Microphone Effect
- Default Sound Settings
- About the Crossover
- About Time Correction
- Visual Setup
- Screen Setup
- General Setup
- Car Setup
- Sounds Setup
- Sources Setup
- System Setup
- Android Auto (Optional)
- Apple CarPlay (Optional)
- Alpine Connect App (Optional) (X902D/X802D-U/INE-W710D only)
- Radio/RDS
- DAB/DAB+/DMB
- USB Flash drive (Optional)
- iPod/iPhone (Optional)
- HDMI Device (Optional)
- About HDMI selector (Optional)
- DVD Player Operation
- CD/MP3/WMA/AAC/WAV
- DVD
- Playing a Disc
- Playing Still Frames (Pausing)
- Stopping Playback
- Fast-forwarding/Fast-reversing
- Finding the Beginnings of Chapters/Tracks/Files
- Forward/Reverse frame-by-frame Playback
- Repeat Playback
- Searching by Title Number
- Searching Directly by Chapter Number
- Switching the Angle
- Switching the Audio Tracks
- Switching the Subtitles (Subtitle Language)
- Info Mode Function
- Switching Display Modes
- HDMI Operation
- Bluetooth Operation
- Auxiliary Device (Optional)
- Camera Operation (Optional)
- About Vehicle Interlock Function
- Information

47-EN
Set to “On” to display the Parking Assist screen if a vehicle detects an
obstacle.
Setting item:
Parking sensor interrupt
Setting contents:
Off / On (Initial setting)
• For details, see “About Vehicle Interlock Function” (page 86).
Rear Seat Entertainment Setup
[Rear Seat Entertainment] is selected on the System Setup Menu screen
in step 1. See “System Setup” (page 44).
When a Rear monitor equipped with HDMI input is connected to this
unit, change this setting to “On.” You can output images to the Rear
monitor. For details, see “Rear Seat Entertainment Function” (page 18).
Setting item:
Rear Seat Entertainment
Setting contents:
Off (Initial setting) / On
• When this setting is “On,” you can use this unit to switch the
Illumination of a Rear monitor with the Illumination function.
Setting the Rear Seat Entertainment System
Make sure the Rear Seat Entertainment is set to “On” ( ). See “Rear
Seat Entertainment Setup” (page 47).
Setting item:
Illumination Colour
Setting contents:
Off (Initial setting) / On
• For details on adjusting Illumination, see “Rear Seat Entertainment
Function” (page 18).
• When the Rear Seat Entertainment setting is set to “Off,” you cannot
select this item.
• Set the coordination colour controls on the Rear monitor to “Navi.”
When set to “Rear monitor,” you cannot operate them from this unit.
Make sure the Rear Seat Entertainment is set to “On” ( ). See “Rear
Seat Entertainment Setup” (page 47).
For remote control operation, the remote sensor of the external device
(Rear monitor, etc.) can be switched, as you prefer.
Setting item:
Remote Sensor
Setting contents:
Front (Initial setting) / Rear
• You can also control this setting from the Rear Seat Entertainment
System Setup screen. For details, see “Rear Seat Entertainment
Function” (page 18).
Unit Setup
[Unit] is selected on the System Setup Menu screen in step 1. See
“System Setup” (page 44).
Make this setting when you use an external audio processor.
When using an external audio processor, set to “On” ( ).
Setting item:
External AP
Setting contents:
Off (Initial setting) / On
• When this setting is “On,” the Volume level is fixed at 10. Also, Balance/
Fader/Subwoofer Level/Subwoofer Phase/Bass/Treble/MX HD/EQ
Presets/Dual HD EQ/X-OVER/Time Correction/Defeat/Phone
Speaker/Default Sound Settings are set to “Off” or “Flat” and cannot be
adjusted.
• Use the external AP to adjust volume.
Setting the Parking Sensor Interrupt On/Off Remote Sensor Setting
Front: The remote sensor of this unit is effective.
Rear: The remote sensor of Rear monitor is effective.
Setting the External AP