
User manual
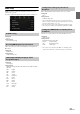
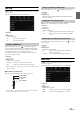
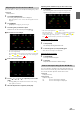
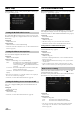


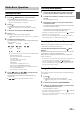
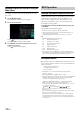
Table Of Contents
- Operating Instructions
- PRECAUTIONS
- WARNING
- Features
- Getting Started
- Location of Controls
- Turning Power On or Off
- Turning the System On
- Initial System Start-Up
- Adjusting the Volume
- Lowering Volume Quickly
- Touch Screen Operation
- Switching Sources
- Operating the Function Button on the Audio/Video Main Screen
- About Basic Operation for List Screen
- About the Shortcut Setup Screen
- About the Menu Screen
- About the Indicator Display
- Opening screen Customisation
- How to Input Characters and Numbers (Keypad)
- Favourite Function
- Applying Alpine TuneIt App
- Setup
- Setup Operation
- Wireless (Bluetooth) Setup
- General Setup
- Sounds Setup
- Setting the Balance/Fader/Rear Speaker/Subwoofer
- Setting the Media Xpander (MX HD)
- Equalizer Presets
- Adjusting the Parametric Equalizer Curve (Dual HD EQ)
- Adjusting the Crossover Settings (X-OVER)
- Adjusting the Time Correction (TCR)
- Setting Defeat
- Setting the Volume for Each Source
- Adjusting the Caller Level
- Adjusting the Microphone Level
- Adjusting the Ring Tone Level
- Volume Setting
- Auto Volume Setting
- Setting Audio Mute On/Off while Backing up
- Default Sound Settings
- About the Crossover
- About Time Correction
- Visual Setup
- Screen Setup
- General Setup
- Car Setup
- Sounds Setup
- Audio Setup
- System Setup
- Radio/RDS
- DAB/DAB+/DMB
- USB Flash drive (Optional)
- iPod/iPhone (Optional)
- HDMI Device (Optional)
- DVD Player Operation
- CD/MP3/WMA/AAC/WAV
- DVD
- Playing a Disc
- Playing Still Frames (Pausing)
- Stopping Playback
- Fast-forwarding/Fast-reversing
- Finding the Beginnings of Chapters/Tracks/Files
- Forward/Reverse frame-by-frame Playback
- Repeat Playback
- Searching by Title Number
- Searching Directly by Chapter Number
- Switching the Angle
- Switching the Audio Tracks
- Switching the Subtitles (Subtitle Language)
- Info Mode Function
- Switching Display Modes
- HDMI Operation
- Bluetooth Operation
- Auxiliary Device (Optional)
- Camera Operation (Optional)
- About Vehicle Interlock Function
- Information

44-EN
[System] is selected on the Setup main screen in step 3. See “Setup
Operation” (page 27).
System Setup Menu screen
<Setting items>
*1 When Camera Select is set to “Off,” you cannot select this item.
*2 You can select this item only when Camera Select is “Front” or “Rear.”
*3 You can select this item only when Camera Select is “Rear.”
*4 Set this setting after closing the Alpine TuneIt App.
1 Select the desired item.
2 To switch the setting, touch [], [], [], [], or mark the
checkboxes “Off” ( ) or “On” ( ).
• If “ ” appears, there is a further hierarchy. Touch the desired
item.
3 To uc h [] to return to the main source screen.
• To return to the previous List screen, touch [] or [] in the
previous page. For details, see “About Basic Operation for List
Screen” (page 17).
Camera Setup
[Camera] is selected on the System Setup Menu screen in step 1. See
“System Setup” (page 44).
You can set up items related to the Camera.
Setting item:
Camera Select
Setting contents:
Off (Initial setting) / Front / Rear / Other
When the camera is connected, the video input signal type can be
chosen.
Further setting item:
Camera Signal
Setting contents:
NTSC (Initial setting) / PAL
The video pattern can be changed when connected to HCE-C252RD/
HCE-C257FD.
When Camera Select is set to “Off,” you cannot select this item.
Setting item:
Guide Adjustment
1 To uc h [Guide Adjustment].
The camera guide adjustment screen is displayed.
2 To uc h [Back], [Panorama], [Corner], or [Top].
The view will change to the selected view.
• [Back] will not appear for the Front camera.
• For an explanation of video patterns, see the camera Owner’s Manual.
System Setup
Camera
Camera Select
Camera Signal*
1
Guide Adjustment*
2
Interrupt (Power OFF)*
3
CAN-I/F
Default Vehicle Screen
Climate screen interrupt time
Parking sensor interrupt
Rear Seat Entertainment
Rear Seat Entertainment
Remote Sensor
Unit
External AP
Additional AUX BOX
Application
Alpine TuneIt App*
4
The following steps 1 to 3 are common to each “Setting
item” of System Setup. See each section for details.
Setting the Camera Input
Front: Front camera
Rear: Rear camera
Other: Side camera, Room camera, etc.
Setting the Camera Signal Input
Switching Video Patterns for Rear Camera &
Front Camera