
User manual
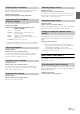


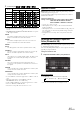


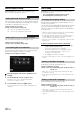
Table Of Contents
- Operating Instructions
- PRECAUTIONS
- WARNING
- Features
- Getting Started
- Accessory List
- Location of Controls
- Turning Power On or Off
- Turning the System On
- Initial System Start-Up
- Inserting/Ejecting a Disc
- Adjusting the Screen Viewing Angle
- Detaching and Attaching the Screen (INE-W987D Only)
- Adjusting the Volume
- Lowering Volume Quickly
- Common Operations
- Using My Favourites
- User Registration
- Setting My Favourites
- Easy Sound Setup mode/BASS ENGINE SQ mode
- Settings When Switching Users
- How to Input Characters and Numbers (Keypad)
- Top banner and Bottom banner Fade Out Setting
- Switching Sources
- Rear Entertainment Function
- Switching the Dual Screen Display
- Touch operation
- Selecting an Item in a List
- About the Indicator Display
- Parking Assist Interrupt Function
- Access to Climate Mode
- Applying TuneIt
- Radio
- RDS
- DAB/DAB+/DMB
- CD/MP3/WMA/AAC
- DVD
- Playing a Disc
- Stopping Playback (PRE STOP)
- Stopping Playback
- Fast-forwarding/Fast-reversing
- Finding the Beginnings of Chapters/ Tracks/Files
- Playing Still Frames (Pausing)
- Forward frame-by-frame Playback
- Slow Motion Playback
- Selecting Folders
- Repeat Playback
- Searching by Title Number
- Searching Directly by Chapter Number
- Searching for a Desired Video File
- Switching the Angle
- Switching the Audio Tracks
- Switching the Subtitles (Subtitle Language)
- About DivX®
- Setup
- Setup Operation
- General Setup
- General Setup Operation
- Language Setting
- Remote Sensor Setting
- Opening/Closing Screen Automatically
- Setting the Remove Screen Angle
- Security Code Setting
- Setting Top banner and Bottom banner Display
- Screen/LED Customize
- Visual Setting
- About X800D-U/INE-W987D
- Installation Setup
- Setting the Parking Assist Interrupt On/Off
- Setting the Climate Interrupt On/Off
- Setting the External Audio Processor On/Off
- Setting the Digital Output
- Sound Setup
- Sound Setup Operation
- Setting the Balance/Fader/Subwoofer
- Setting the MX (Media Xpander)
- Equalizer Presets
- Adjusting the Parametric Equalizer Curve (Parametric EQ)
- Adjusting the Time Correction (Time Correction)
- Adjusting the Crossover Settings (X-OVER)
- Setting Defeat
- Volume Setting
- Setting the Volume for Each Source
- About Time Correction
- About the Crossover
- Source Setup
- BLUETOOTH Setup
- BLUETOOTH Setup Operation
- BLUETOOTH Setting
- Displaying BLUETOOTH Information
- Registering the BLUETOOTH Device
- Automatic Connection setting
- Setting the Passcode
- Changing the Character Code of the Phone Book
- Selecting the Output Speaker
- Adjusting the Caller Volume
- Adjusting the Microphone Level
- Adjusting the Ring Tone Volume
- Deleting All the Histories
- Camera Setup
- BLUETOOTH Operation
- Auxiliary Device (Optional)
- Camera Operation (Optional)
- USB Memory (Optional)
- iPod/iPhone (Optional)
- HDMI Device (Optional)
- MirrorLink™ Operation (Optional)
- Information
- Installation and Connections

57-EN
Adjusting the Crossover Settings
(X-OVER)
[X-OVER] is selected on the Sound setup menu in step 3. Refer to
“Sound Setup Operation” (page 53).
Before performing the following procedures, refer to “About the
Crossover” (page 59).
Setting item: X-OVER
1
Touch [Channel] to select the channel.
Each time you touch, the channel switches.
• The channel being adjusted is displayed in red.
2
Adjust the crossover to your preference.
Selecting the Cut-Off Frequency
Touch [] or [] of “Freq.”, and then select the cut-off
frequency.
Setting contents: 20 / 25 / 31.5 / 40 / 50 / 63 / 80 (Initial setting) /
100 / 125 / 160 / 200 Hz
Adjusting the Slope
Touch [] or [] of “Slope”, and then adjust the HPF or LPF
slope.
Setting contents: 0 (Initial setting) / 6 / 12 / 18 / 24 dB/oct.
Adjusting the Level
Touch [] or [] of “Level”, and then adjust the HPF or LPF
level.
Setting contents: -12 to 0 dB (Initial setting: 0)
3
Repeat steps 1 to 2 to make adjustment to the other
channels.
4
To store the adjusted setting value, touch and hold
[Preset1], [Preset2], or [Preset3] for at least 2
seconds.
• Touch [Flat] to initialise all values.
• If the Rear Speaker setting is “Off”, the Rear Speaker setting cannot
be edited (refer to page 54).
• If the Subwoofer setting is “Off”, the Subwoofer setting cannot be
edited (refer to page 54).
• While adjusting the X-OVER you should consider the frequency
response of the connected speakers.
Calling the X-OVER adjusted value
Calling the pre-set X-OVER adjusted value.
Touch [Preset1], [Preset2], or [Preset3] on the
X-OVER screen.
The setting stored in the Preset will be recalled.
Setting Defeat
[Defeat] is selected on the Sound setup menu in step 3. Refer to “Sound
Setup Operation” (page 53).
If Defeat is “On”, MX, Equalizer Presets, Car Specific Sound Setup and
Parametric EQ functions are turned OFF. This disables any settings
made for these functions.
Setting item: Defeat
Setting contents: Off (Initial setting) / On
Volume Setting
[Volume] is selected on the Sound setup menu in step 3. Refer to
“Sound Setup Operation” (page 53).
You can change the volume of the sound heard when a button is
touched.
Setting item: Key Sound Feedback
Setting contents: 0 to 7 (Initial setting: 4)
Setting the Volume for Each Source
[Source Volume Setup] is selected on the Sound setup menu in step 3.
Refer to “Sound Setup Operation” (page 53).
The volume level for each application can be adjusted.
Setting item: Radio / DAB / DVD / CD / Compressed Media /
iPod Music / iPod Video / HDMI / AUX / AUX3 /
BLUETOOTH Audio
Setting contents: -14 to +14 (Initial setting: 0)
• Settable source differ depending on the connected device and
settings.
About Time Correction
The distance between the listener and the speakers in a car vary widely
due to the complex speaker placement. This difference in the distances
from the speakers to the listener creates a shift in the sounds image and
frequency characteristics. This is caused by the time delay between the
sound reaching the listener’s right versus the left ear.
To correct this, this unit is able to delay the audio signal to the speakers
closest to the listener. This effectively creates a perception of increased
distance for those speakers. The listener can be placed at an equal
distance between the left and right speakers for optimum staging.
The adjustment will be made for each speaker in 3.4 cm steps.
Front HPF Rear HPF Subw. LPF