
User manual


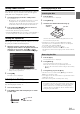

Table Of Contents
- Operating Instructions
- PRECAUTIONS
- WARNING
- Features
- Getting Started
- Accessory List
- Location of Controls
- Turning Power On or Off
- Turning the System On
- Initial System Start-Up
- Inserting/Ejecting a Disc
- Adjusting the Screen Viewing Angle
- Detaching and Attaching the Screen (INE-W987D Only)
- Adjusting the Volume
- Lowering Volume Quickly
- Common Operations
- Using My Favourites
- User Registration
- Setting My Favourites
- Easy Sound Setup mode/BASS ENGINE SQ mode
- Settings When Switching Users
- How to Input Characters and Numbers (Keypad)
- Top banner and Bottom banner Fade Out Setting
- Switching Sources
- Rear Entertainment Function
- Switching the Dual Screen Display
- Touch operation
- Selecting an Item in a List
- About the Indicator Display
- Parking Assist Interrupt Function
- Access to Climate Mode
- Applying TuneIt
- Radio
- RDS
- DAB/DAB+/DMB
- CD/MP3/WMA/AAC
- DVD
- Playing a Disc
- Stopping Playback (PRE STOP)
- Stopping Playback
- Fast-forwarding/Fast-reversing
- Finding the Beginnings of Chapters/ Tracks/Files
- Playing Still Frames (Pausing)
- Forward frame-by-frame Playback
- Slow Motion Playback
- Selecting Folders
- Repeat Playback
- Searching by Title Number
- Searching Directly by Chapter Number
- Searching for a Desired Video File
- Switching the Angle
- Switching the Audio Tracks
- Switching the Subtitles (Subtitle Language)
- About DivX®
- Setup
- Setup Operation
- General Setup
- General Setup Operation
- Language Setting
- Remote Sensor Setting
- Opening/Closing Screen Automatically
- Setting the Remove Screen Angle
- Security Code Setting
- Setting Top banner and Bottom banner Display
- Screen/LED Customize
- Visual Setting
- About X800D-U/INE-W987D
- Installation Setup
- Setting the Parking Assist Interrupt On/Off
- Setting the Climate Interrupt On/Off
- Setting the External Audio Processor On/Off
- Setting the Digital Output
- Sound Setup
- Sound Setup Operation
- Setting the Balance/Fader/Subwoofer
- Setting the MX (Media Xpander)
- Equalizer Presets
- Adjusting the Parametric Equalizer Curve (Parametric EQ)
- Adjusting the Time Correction (Time Correction)
- Adjusting the Crossover Settings (X-OVER)
- Setting Defeat
- Volume Setting
- Setting the Volume for Each Source
- About Time Correction
- About the Crossover
- Source Setup
- BLUETOOTH Setup
- BLUETOOTH Setup Operation
- BLUETOOTH Setting
- Displaying BLUETOOTH Information
- Registering the BLUETOOTH Device
- Automatic Connection setting
- Setting the Passcode
- Changing the Character Code of the Phone Book
- Selecting the Output Speaker
- Adjusting the Caller Volume
- Adjusting the Microphone Level
- Adjusting the Ring Tone Volume
- Deleting All the Histories
- Camera Setup
- BLUETOOTH Operation
- Auxiliary Device (Optional)
- Camera Operation (Optional)
- USB Memory (Optional)
- iPod/iPhone (Optional)
- HDMI Device (Optional)
- MirrorLink™ Operation (Optional)
- Information
- Installation and Connections

20-EN
Adjusting the Screen Viewing Angle
Adjust the screen’s angle for better visibility.
1
Press c (Eject).
The Open/Tilt screen is displayed.
2
Touch [Up] or [Down] of “Tilt” to adjust the
desired screen angle.
The screen angle can be adjusted in 5 stages.
3
Touch [] to return to the normal mode.
• The screen colour will vary when viewed at certain angles. Adjust the
screen angle for the best viewing position.
• If the voltage of the vehicle’s battery power is low, the screen may
blink when the screen angle is changed. This is normal and not a
malfunction.
Detaching and Attaching the Screen
(INE-W987D Only)
It may be difficult to remove the screen panel in some angle, so please
select a proper angle to detach the screen panel easily base on your
vehicle type and the installation location of the main unit. Refer to
“Setting the Remove Screen Angle” on page 48. And please according
to the following operation to remove the screen panel.
1
Press c (Eject).
The Open/Tilt screen is displayed.
2
Touch [ Remove Screen].
A confirmation message is displayed.
3
Touch [OK] to confirm.
Touch [Cancel] will return to normal mode.
The screen turns to the Remove Screen Angle which is set
in “Setting the Remove Screen Angle” (page 48). Then, a
count down for 30 seconds is displayed.
• If you do not want to remove the screen panel, press
c (Eject)
button to return to normal mode.
• If the Screen is not detached within 30 seconds, the unit will
return to normal mode.
4
Press the Release Lever on the bottom of the screen
panel (figure1) within the 30 seconds count down.
The screen panel is unlocked (figure2).
• After the Release Lever is pressed, the front panel will close in
15 seconds, whether the screen panel is detached or not.
5
Grasp the screen panel firmly, and force the bottom
of the screen panel outward to make it depart from
the main unit.
• When the screen panel is detached, please keep your hand away from
the unit, because the front panel will close automatically in 15
seconds after the Release Lever is pressed.
• The screen panel may become hot in normal usage (especially the
connector terminals on the back of the screen panel). This is not a
malfunction.
• To protect the screen panel, place it in the supplied carrying bag.
• When detaching the screen panel, do not apply excessive force as it
may result in malfunction.
• If Auto Open/Close is set to On, the screen will turn to the Remove
Screen Angle automatically when ignition is set to OFF. Refer to
“Opening/Closing Screen Automatically” on page 48.
Detaching
figure2
figure1
figure3