
Navigation Software Manual


47
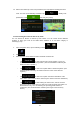
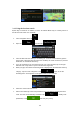
• If you are on the Map screen, tap and then tap .
• If you are in the Navigation menu, tap and then tap .
2. The Address Book is displayed.
3. Tap the entry that you want to set as your destination. If necessary, browse down to
see more of the list or tap and enter a few letters from the name
of the entry.
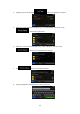
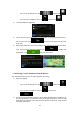
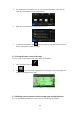
4. After a short summary of the route parameters, the map appears showing the entire
route. The route is automatically calculated. Tap to modify route
parameters, or tap and start your journey.
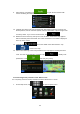
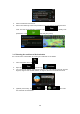
3.1.6 Selecting a recent destination from the History
The destinations that you have set earlier appear in the History.
1. Access the History:
• If you are on the Map screen, tap and then tap .
• If you are in the Navigation menu, tap and then tap
.
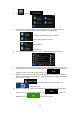
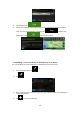
2. The list of recent destinations appears. Smart History promotes three destinations to
the first page based on your previous routes (most likely destinations). The rest of the
destinations are ordered by time they were last selected. If necessary, scroll the list to
see earlier destinations.