
User manual
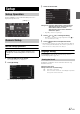
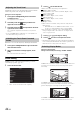
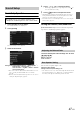
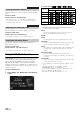

Table Of Contents
- Operating Instructions
- PRECAUTIONS
- WARNING
- Features
- Getting Started
- Common Operations
- Radio
- RDS
- CD/MP3/WMA/AAC
- DVD
- Playing a Disc
- Stopping Playback (PRE STOP)
- Stopping Playback
- Fast-forwarding/Fast-reversing
- Finding the Beginnings of Chapters/ Tracks/Files
- Playing Still Frames (Pausing)
- Forward frame-by-frame Playback
- Slow Motion Playback
- Selecting Folders
- Repeat Playback
- Searching by Title Number
- Searching Directly by Chapter Number
- Searching for a Desired Video File
- Switching the Angle
- Switching the Audio Tracks
- Switching the Subtitles (Subtitle Language)
- About DivX®
- Setup
- Setup Operation
- General Setup
- General Setup Operation
- Language Setting
- Remote Sensor Setting
- Opening/Closing Screen Automatically
- Setting the Remove Screen Angle
- Security Code Setting
- Setting Top banner and Bottom banner Display
- Screen/LED Customize
- Visual Setting
- About INE-W977BT
- Installation Setup
- Setting the External Audio Processor On/Off
- Setting the Digital Output
- Sound Setup
- Sound Setup Operation
- Setting the Balance/Fader/Subwoofer
- Setting the MX (Media Xpander)
- Equalizer Presets (Bass Max EQ)
- Adjusting the Parametric Equalizer Curve (Parametric EQ)
- Adjusting the Time Correction (Time Correction)
- Adjusting the Crossover Settings (X-OVER)
- Setting Defeat
- Volume Setting
- Setting the Volume for Each Source
- About Time Correction
- About the Crossover
- Source Setup
- BLUETOOTH Setup
- BLUETOOTH Setup Operation
- BLUETOOTH Setting
- Displaying BLUETOOTH Information
- Registering the BLUETOOTH Device
- Automatic Connection setting
- Setting the Passcode
- Changing the Character Code of the Phone Book
- Setting Received Calls Automatically
- Setting the time for automatic reception of a call
- Selecting the Output Speaker
- Adjusting the Caller Volume
- Adjusting the Microphone Level
- Adjusting the Ring Tone Volume
- Deleting All the Histories
- Camera Setup
- BLUETOOTH Operation
- Auxiliary Device (Optional)
- Camera Operation (Optional)
- USB Memory (Optional)
- iPod/iPhone (Optional)
- Information
- Installation and Connections

42-EN
The character code to be used for tag text information displayed on the
screen can be selected from 7 character codes.
Setting item: Format Sel.
Setting contents: EU1 / EU2 (Initial setting) / RUS / CHI / THA /
ARA
The Setup menu, feedback information, etc. for this unit can be changed
to appear in the selected language.
Setting item: Language Sel.
Setting contents: English / German / French / Spanish /
Portuguese / Italian / Dutch / Finnish /
Norwegian / Swedish / Russian / Thai / Arabic /
Chinese / Other languages (Czech / Danish /
Greek / Hungarian / Polish / Slovak / Turkish)
• Touch [OK] to confirm the language and display the screen in the
specified language.
Remote Sensor Setting
[Remote Sensor] is selected on the General setup menu in step 3. Refer
to “General Setup Operation” (page 41).
For remote control operation, the remote sensor of the external device
(monitor, etc.) can be switched, as you prefer.
Setting item: Remote Sensor
Setting contents: Front (Initial setting) / Rear
• If the RSE (page 58) is “Off”, the setting is not displayed.
Opening/Closing Screen Automatically
[Auto Open/Close] is selected on the General setup menu in step 3.
Refer to “General Setup Operation” (page 41).
In the Auto Open/Close mode, you can detach the screen easily when
ACC is OFF.
Setting item: Auto Open/Close
Setting contents: Off (Initial setting) / On
* Refer to “Setting the Remove Screen Angle” (page 42).
Setting the Remove Screen Angle
[Remove Screen Angle] is selected on the General setup menu in step
3. Refer to “General Setup Operation” (page 41).
Depending on the installation location of this unit in the car, You can
select a proper angle (Angle1-Angle5) to remove the screen easily.
When Remove Screen mode is activated, the screen will turn to the
selected angle automatically. Refer to “Detaching and Attaching the
Screen” on page 20.
Setting item: Remove Screen Angle
Setting contents: Angle1 / Angle2 / Angle3 (Initial setting) /
Angle4 / Angle5
• Touch [ ] or [ ] to select Angle1 to Angle5, the screen will turn
to the corresponding angle as the setting. When exit the setting of
Remove Screen angle, the screen will return to the previous view
angle.
Security Code Setting
[Security Code] is selected on the General setup menu in step 3. Refer
to “General Setup Operation” (page 41).
You can set the system to be unusable without entering a password.
When you turn this setting to “On” and set a password, password input
is required when the system is connected to a battery and turned on for
the first time.
Setting item: Security Code
Setting contents: Off (Initial setting) / On
Format settings
EU1: ISO 8859-1
EU2: ISO 8859-15
RUS: ISO 8859-5
CHI: GB18030
THA: CP874
ARA: CP1256
Setting the Menu Language
Front: The remote sensor of this unit is effective.
Rear: The remote sensor of the external monitor
connected to AUX OUTPUT of this unit
becomes effective. The remote control
operates the source connected to the AUX
OUTPUT terminals.
Off: Turns off the Auto Open/Close mode.
On: Turns on the Auto Open/Close mode.The
Screen will turn to the Remove Screen Angle*
automatically when you set ignition from ACC to
OFF.
Setting Security code