
User manual
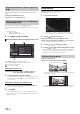
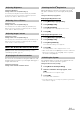

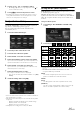
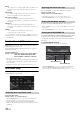
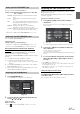
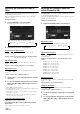

Table Of Contents
- Operating Instructions
- PRECAUTIONS
- WARNING
- Getting Started
- Accessory List
- Location of Controls
- Turning Power On or Off
- Turning the System On
- Initial System Start-Up
- Inserting/Ejecting a Disc
- Adjusting the Volume
- Lowering Volume Quickly
- Top banner and Bottom banner Fade Out Setting
- Switching Sources
- About Sound Menu button
- Touch Operation
- Selecting an Item in a List
- About the Indicator Display
- Displaying Audio/Visual Information on the Navigation screen
- Radio/RBDS
- CD/MP3/WMA/AAC
- DVD
- Playing a Disc
- Stopping Playback (PRE STOP)
- Stopping Playback
- Fast-forwarding/Fast-reversing
- Finding the Beginnings of Chapters/Tracks/Files
- Playing Still Frames (Pausing)
- Slow Motion Playback
- Selecting Folders
- Repeat Playback
- Searching by Title Number
- Searching Directly by Chapter Number
- Searching for a Desired Video File
- Switching the Angle
- Switching the Audio Tracks
- Switching the Subtitles (Subtitle Language)
- About DivX®
- Setup
- Setup Operation
- General Setup
- Sound Setup
- Sound Setup Operation
- Car Specific Sound Setup
- Setting the MX (Media Xpander)
- Equalizer Presets (EQ Presets)
- Quick Sound Setup
- Adjusting the Time Correction (TCR)
- Adjusting the Crossover Settings (X-Over)
- Adjusting the Parametric Equalizer Curve (Parametric EQ)
- Other Setting
- Setting Defeat
- About Time Correction
- About the Crossover
- Source Setup
- BLUETOOTH Setup
- Camera Setup
- BLUETOOTH Operation
- Auxiliary Device (Optional)
- Applying TuneIt
- Camera Operation (Optional)
- USB Memory (Optional)
- iPod/iPhone (Optional)
- Pandora® internet radio (optional) (INE-W960/INE-NAV-60 only)
- SiriusXM Satellite Radio (Optional) (INE-W960/INE-NAV-60 only)
- Receiving Channels with the SiriusXM Tuner
- Tuning Channels by Category
- Changing the Display
- Checking the SiriusXM Radio ID Number
- Storing Channel Presets
- Tuning Channels Using Presets
- Search Function
- Selecting the Channel Directly
- Storing the Desired Song/Artist
- Receiving and Tuning to an Alert
- Replay Function
- Parental Control Function
- Using Jump Memory and Jump Recall Function
- Information
- Installation and Connections
- LIMITED WARRANTY

33-EN
Setting item: Brightness
Setting content: -15 to +15 (Initial setting: 0)
You can adjust the brightness between MIN (-15) and MAX
(+15). When it reaches the minimum or maximum point, the
display shows “MIN” or “MAX” respectively.
Setting item: Color
Setting content: -15 to +15 (Initial setting: 0)
You can adjust the color between MIN (-15) and MAX (+15).
When it reaches the minimum or maximum point, the display
shows “MIN” or “MAX” respectively.
Setting item: Contrast
Setting content: -15 to +15 (Initial setting: 0)
You can adjust the contrast between LOW (-15) and HIGH (+15).
When it reaches the minimum or maximum point, the display
shows “LOW” or “HIGH” respectively.
About INE-W960/INE-NAV-60/INE-W960S
[About] is selected on the General setup menu in step 3. Refer to
“General Setup Operation” (page 30).
You can view the version information of this product. Make note of this
information and refer to it whenever you contact Alpine Tech Support or
an Alpine-authorized dealer.
Setting item: Version Info
Setting content: Serial No. / Firmware Version
This unit will display the registration code required to play a DivX
®
VOD (Video On Demand), or you can also display the deregistration
code.
Setting item: Warranty/Copyright Info.
Displaying the Registration Code
1
Touch [Warranty/Copyright Info.].
2
Touch [DivX(R) VOD].
3
Touch [Registration].
The registration code is displayed on the screen.
4
Touch [OK].
Displaying the Deregistration Code
1
Touch [Warranty/Copyright Info.].
2
Touch [DivX(R) VOD].
3
Touch [Deregistration].
The confirmation dialog screen appears.
4
Touch [OK].
The deregistration code is displayed on the screen.
• When you have finished, touch [Cancel]. If you want to continue and
display a new registration code, touch [OK], check the registration
code, and then touch [OK] again.
You can initialize all data, to restore the factory settings. Remove the
CD/DVD disc, etc. from the system before operation
Setting item: Restore Factory Setting
1
Touch [Restore Factory Setting].
2
After the confirmation message appears, touch
[OK].
The confirmation screen appears again.
3
Touch [OK].
The system starts initialization.
• Do not turn on/off the power or change the ignition key position until
system restart is completed.
Adjusting Brightness
Adjusting Color of Picture
Adjusting Image Contrast
Displaying the Product Information
Checking the DivX
®
Registration
Initializing the System