
User manual
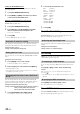

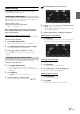

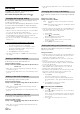
Table Of Contents
- Operating Instructions
- WARNING
- Features
- Getting Started
- Accessory List
- Location of Controls
- Touch operation
- Turning Power On or Off
- Turning the System On
- Initial System Start-Up
- Inserting/Ejecting a Disc
- Adjusting the Monitor Viewing Angle
- Adjusting the Volume
- Using the Home Screen
- Using the Favorites Menu
- Switching between Simple Mode & Info Mode
- Selecting an Item in a List
- About the Indicator Display
- Radio
- RDS
- CD/MP3/WMA/AAC
- DVD
- Playing a Disc
- Stopping Playback (PRE STOP)
- Stopping Playback
- Fast-forwarding/Fast-reversing
- Finding the Beginnings of Chapters/ Tracks/Files
- Playing Still Frames (Pausing)
- Forward frame-by-frame Playback
- Slow Motion Playback
- Selecting Programme/Playlist
- Selecting Folders
- Repeat Playback
- Searching by Title/Programme Number
- Searching Directly by Chapter Number
- Searching by Programme
- Searching by Playlist
- Searching for a Desired Video File
- Switching the Angle
- Switching the Audio Tracks
- Switching the Subtitles (Subtitle Language)
- About DivX®
- Setup
- Audio Setup
- Audio Setup Operation
- Setting the Balance/Fader/Subwoofer
- Setting the Volume for Each Application
- Setting the MX (Media Xpander)
- Equalizer Presets (Bass Max EQ)
- Download Sound Setting
- Setting Defeat
- Adjusting the Time Correction (Time Correction)
- Adjusting the Crossover Settings (X- OVER)
- Adjusting the Parametric Equalizer Curve (Parametric EQ)
- About Time Correction
- About the Crossover
- Display Setup
- General Setup
- Application Setup
- Audio Setup
- BLUETOOTH Operation
- Navigation System (Optional)
- Auxiliary Device (Optional)
- Camera Operation (Optional)
- USB Memory (Optional)
- iPod/iPhone (Optional)
- Nokia(Optional)
- Information
- Installation and Connections

49-EN
Connection with external input devices is available through the iPod
VIDEO connector. An optional adapter cable is required (standard RCA
to 3.5ø mini-phono plug or 3.5ø to 3.5ø mini phono plug).
You can also play back video connecting with an optional AV cable (4-
pole mini AV plug to 3-RCA).
Setting item: AUX3 In Sel.
Setting contents: iPod Video (Initial setting) / AUX3
Usable 4-pole mini AV plug
The unit accepts the following 4-pole mini AV plug pin-out:
• Please check pin-out carefully before use of this product. Depending
on the cable, there may be no picture and/or sound.
Switching the Visual Input Signal System (AUX3 In Sel.)
After setting to “AUX3” in “Setting the AUX3 In Sel.,” this setting can
be carried out. The video input type can be changed.
Setting item: Signal
Setting contents: Auto (Initial setting) / NTSC / PAL
RSE Setting
[RSE] is selected on the Application setup menu in step 3. Refer to
“Application Setup Operation” (page 46).
Video and audio can be output to the rear monitor.
Setting item: RSE
Setting contents: Off (Initial setting) / On
Phone Setting
Touch [Phone] on the Application setup menu in step 3. Refer to
“Application Setup Operation” (page 46).
When a call is received, you can set whether to answer it automatically
or not.
Setting item: Auto Answer
Setting contents: Off (Initial setting) / On
Setting the time for automatic reception of a call
When “Auto Answer” is set to “On,” you can set how many seconds to
let elapse before letting the Auto Answer pick up the call.
Setting item: Time
Setting contents: 5sec / 10sec (Initial setting) / 15sec / 20sec
1
Touch [Auto Answer.].
The Auto Answer setting screen is displayed.
2
Touch [] or [].
You can select which speaker in the car will output the audio from the
phone.
Setting item: Phone Speaker
Setting contents: All(Initial setting) / Front L / Front R / Front LR
• The setting cannot be adjusted during a phone call. Adjust the setting
before placing a call.
You can adjust the volume of the incoming call.
Setting item: Receiver Volume
Setting contents: 1 to 11 (Initial setting: 5)
You can adjust the transmit volume, during the call.
Setting item: Transmitter Volume
Setting contents: 1 to 11 (Initial setting: 5)
You can adjust the receive volume, during the call.
Setting item: Calling Volume
Setting contents: 1 to 11 (Initial setting: 5)
Setting the AUX3
iPod Video: Set when connected to an iPod or iPhone.
AUX3: Set when connected to an external input device.
Auto: The video input signal type (NTSC or PAL) will
be automatically selected.
NTSC/PAL: Choose the video input signal type manually.
Setting the Rear Seat Entertainment
System
Audio L (White)
Audio R (Red)
Ground
Video (Yellow)
Setting Received Calls Automatically
On: When a call is received, it will be answered automatically
Off: When a call is received, it will not be answered
automatically
Selecting the Output Speaker
All: The sound is output from all speakers in car.
Front L: The sound is only output from the front left speaker.
Front R: The sound is only output from the front right
speaker.
Front LR: The sound is output from the front left and front
right speakers.
Adjusting the Receive Volume
Adjusting the Transmit Volume
Adjusting the Calling Volume